Quilt Label Tutorial
Oct 27, 2013 - 6:29pm

1

1
A couple of days ago I posted a photo on instagram showing how I make quilt labels. I was asked to do a tutorial on my method so here it is! I either write the label by hand or print them on inkjet printable fabric. The brand of printable fabric that I like to use is Matilda's Own available through Victorian Textiles.
If you can't get a hold of inkjet printable fabric you can try this other option.
Jump on your computer and a come up with your label, then print it out. Then use a a light box (if you don'y have one you can use a window or a light under a glass top table) and trace onto fabric using a permanent pen. There are a number of fabrics pens out there on the market, I like to use a really fine one because most pens can bleed a little.. It's also needs to be washable so check the label on the pen.
Fabric choice for the label could be a simple as a homespun or calico, matching the colours in the quilt obviously.
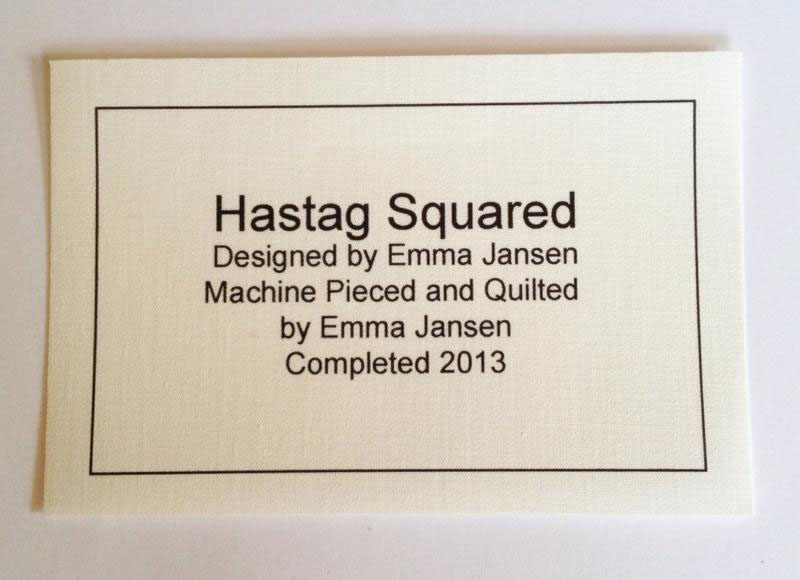
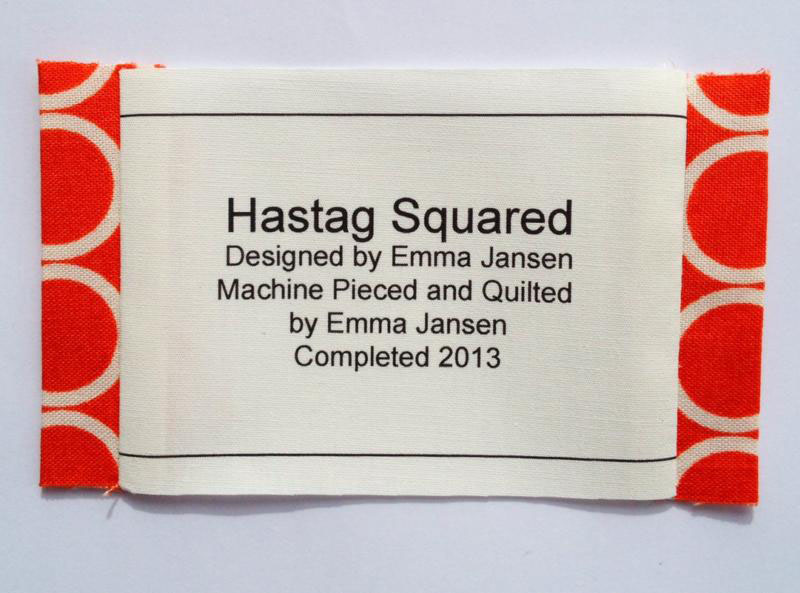
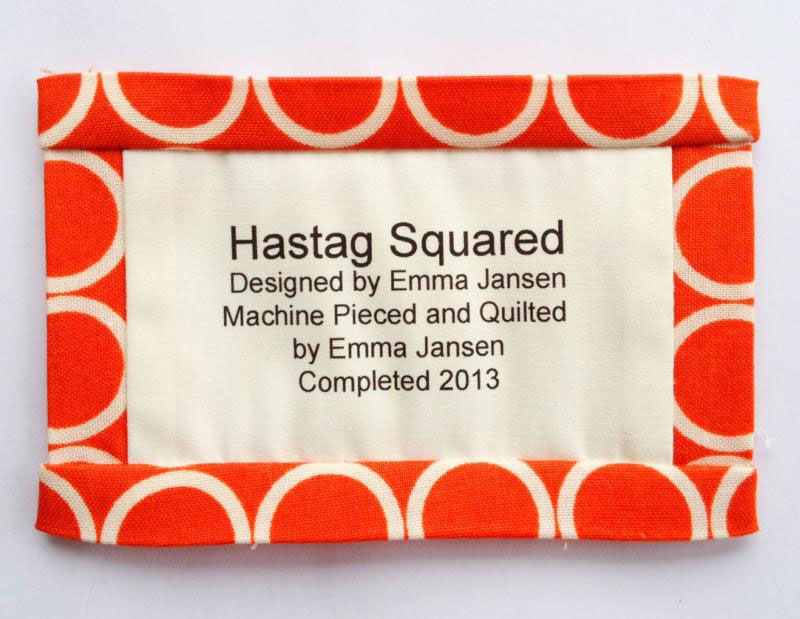
This label was a left ove from my quilt labeling marathon. As you can see there is a spelling mistake so please just ignore that :) The size of this label is 3.5" x 2". So the next step is to cut the fabric for the edging. On this size label I cut my strips 1.5" wide. If you label is bigger you can use a bigger border, but for this size 1.5" looks good.
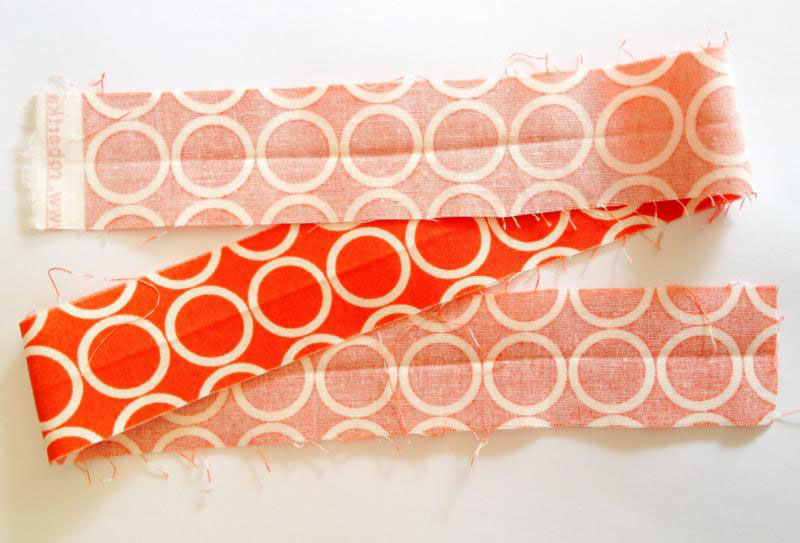
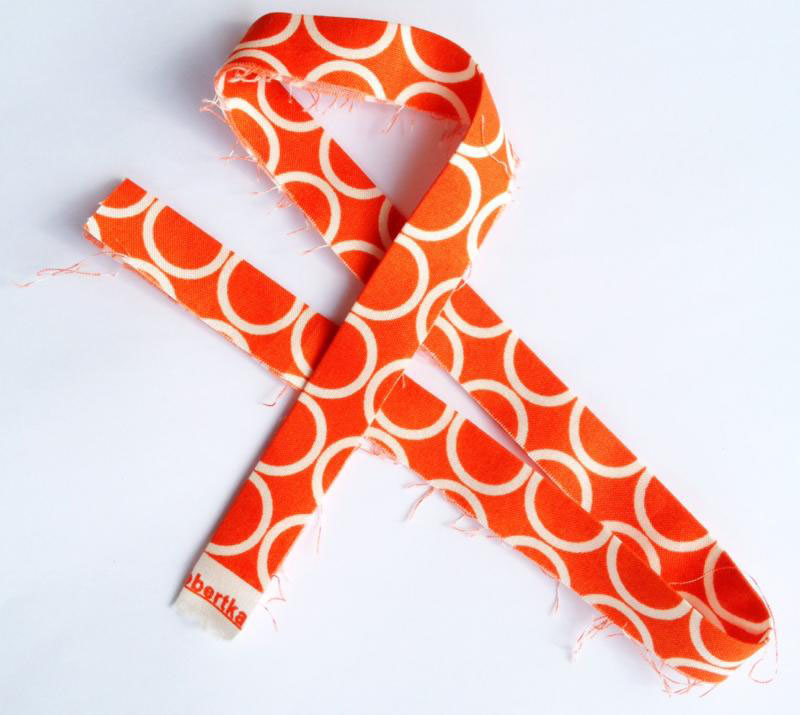
Then fold the fabric in half length wise and iron.
Then sew two strips to either side of the label.
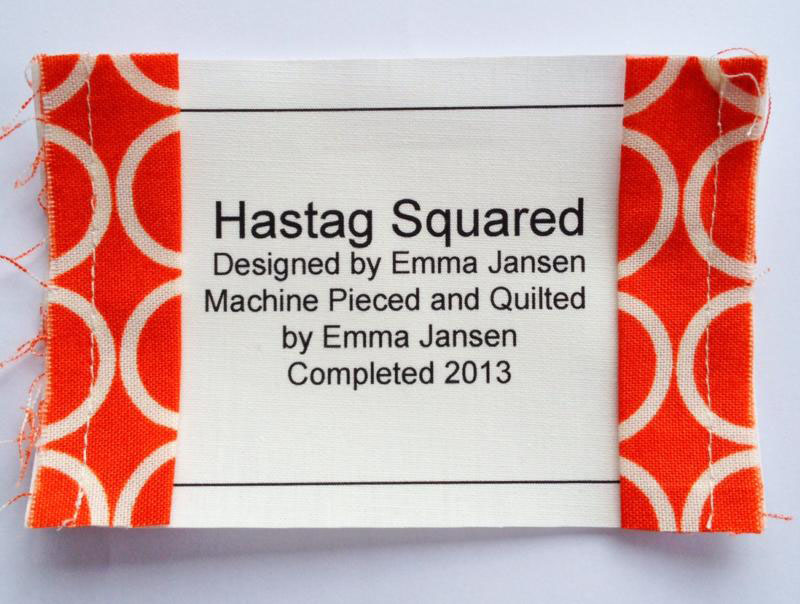
Iron towards the label.
Then you need to sew the two top borders. The way we do this is by cutting the length of edging about an inch longer than the label. Pin in place.
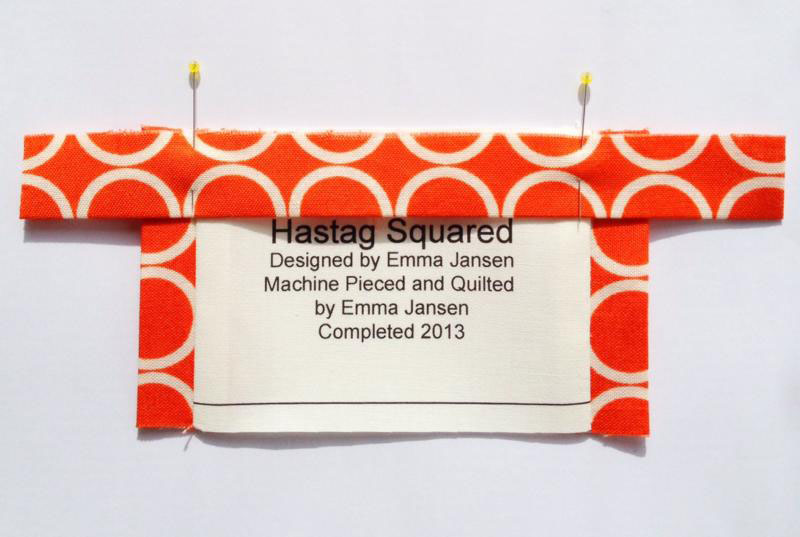
The turn the ends under to the backside of the label and pin in place.
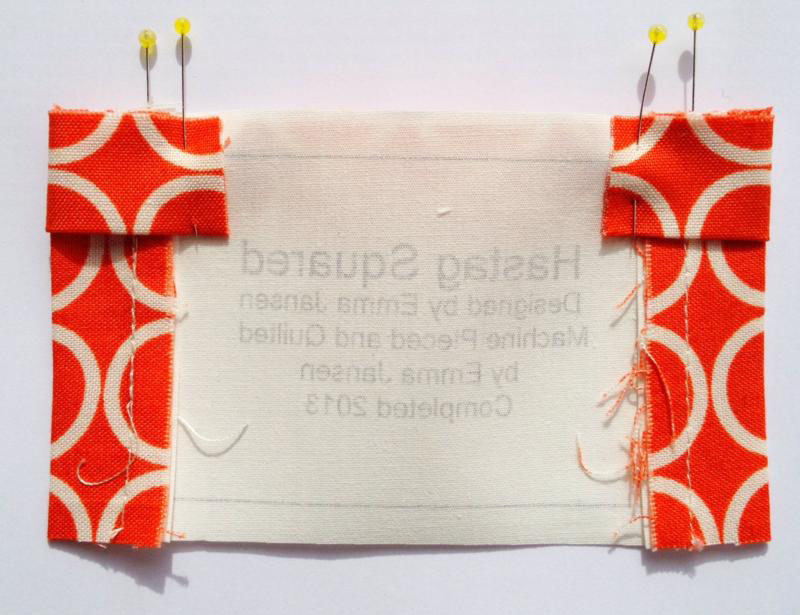
Sew in place. The little trick is you can now flip the border over giving a turned edge ready to slip stitch on to the back of the quilt.

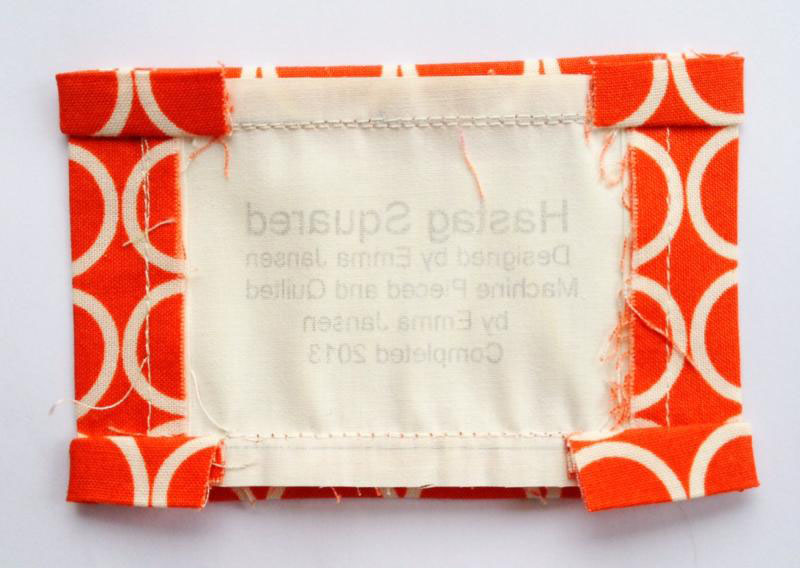
Iron in place and repeat on the bottom edge. Here is a photo of the back of the label, when sewing it on the back of the quilt just catch the outside border and tuck the ends in.
Your label is now complete, ready to sew onto your quilt!
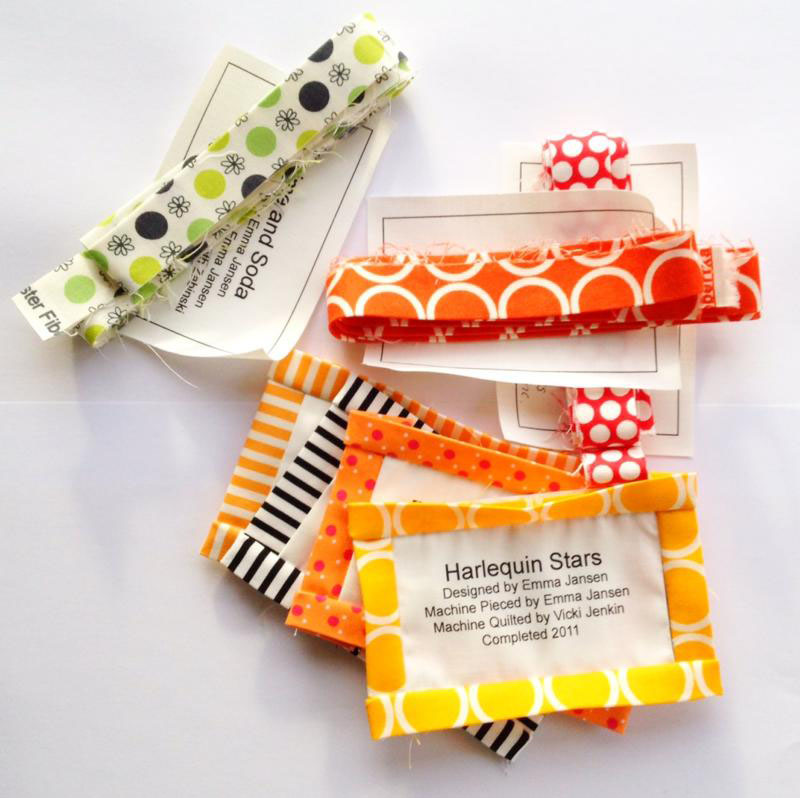
I often use the leftover binding from quilts to do these labels, but you can just use any left over fabric from the quilt.
Oct 27, 2013 - 11:35pm
Gwen: Genius!, thank you!! How does the printable fabric work?
May 27, 2016 - 11:33pm
DIANNE J CHRISTIAN: INCREDIBLE. LOVE IT.
Dec 21, 2018 - 9:17am
Jude: Brilliant you just solved my little issue with the top row after I had figured out the rest on my own I’m at a lust as to why I screwed up the top row. Doh!! Yes tuck it over and alls well !! Merry Christmas enjoy your time with your new little man.
Aug 11, 2023 - 8:08am
Beth B: I do something similar for my labels. I find a font I like and play with the size. Then I select the bold option and print the label on regular paper. If the label is a light fabric, I am able to trace the lettering without the use of a light box. I also make the label a triangle and attach two sides with the binding. So I only need to slip stitch one edge.
Mar 7, 2023 - 11:52am
Fabienne: Love the idea of using a light box. From La Baie, Québec Canada


