Week 7 - Bronte's Stars Quilt Sew Along
Mar 31, 2021 - 2:03pm

1

0
Welcome to Week 7, otherwise known as the bonus week!
This week I will share my tips on straight line quilting and also announce the big winner.
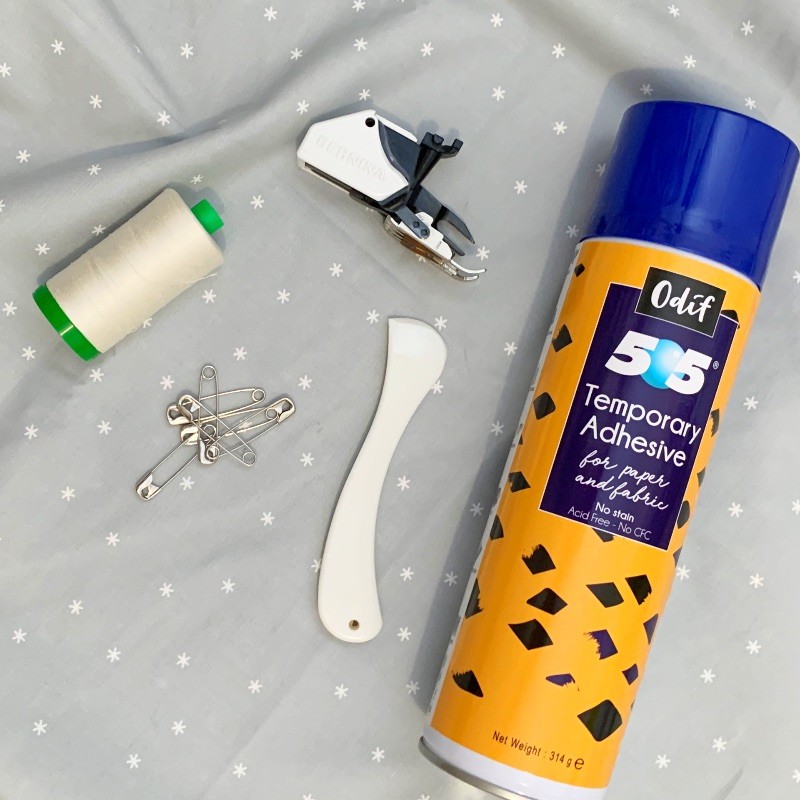
TOOLS OF THE TRADE
As this is the last newsletter, I thought I might talk a little about quilting. I love to use straight lines in all my quilts and I have discovered a few things that might help you too!
Firstly, what you'll need:
Walking Foot for your machine – you may have to purchase this separately as most machines don't come with one, unless you’re a lucky duck and have bought a quilting edition - sometimes they include these as part of the package.
A walking food basically does the same thing as the feed dogs on your machine, except from above. It helps to feed the three layers of your quilt through evenly so that the fabric doesn’t bunch up.
40wt Thread - now this is just what I like to quilt with, so if you prefer something else, go for it! I like it because it's a little stronger and it also makes the quilting a bit more of a feature. I like to use Aurifil Thread, 100% cotton.
Basting Spray and/or Safety Pins for basting - I like to use both. I don't have a large sewing table to work on so all the help I can get, I take!
The safety pins are stainless steel, size 2. There are some fancy curved pins on the market which are great too. The basting spray is called 505 Temporary Adhesive. I like this brand as it has hardly any smell and stays stuck!
Hera Marker – A Hera marker is an awesome piece of plastic that allows you to mark your quilt without using a pencil/washout marker. The Hera marker places a fold in the fabric when your quilt top is basted that stays for a good amount of time. I love it because there is no need to wash out line markings afterwards. Just use your quilting ruler to get lovely straight lines.
BASTING
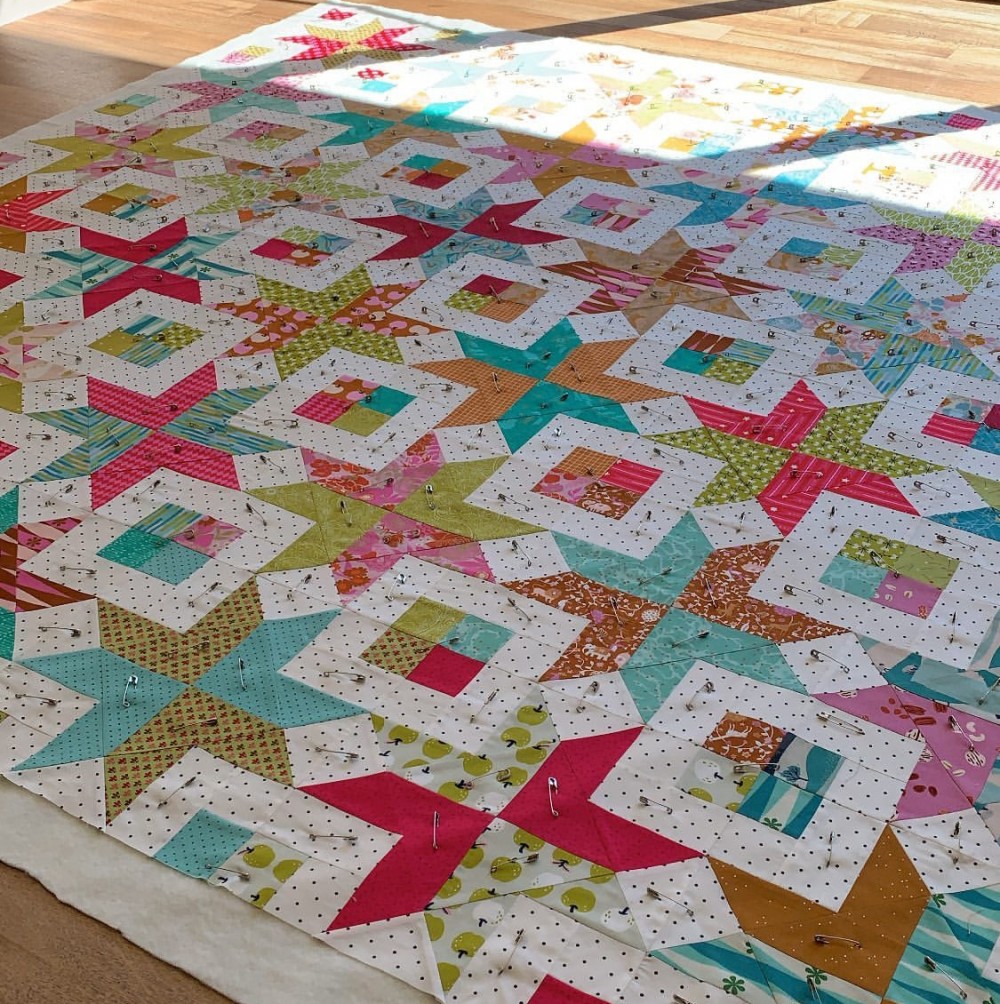
The first thing you’ll need to do is baste your quilt. Once you have pieced your backing, lay it down with the right side to the floor. Some people baste on their kitchen table, some on the wall and others on their dining room or lounge room floor. It’s totally up to you!
I lay my quilt backing on my lounge room floor and tape down the edges to keep the backing taut. Then I layer the batting on top and baste it to the backing using the basting spray. Next, I layer the quilt top, right side up and baste it to the batting and backing.
Finally, I plonk myself down in the middle of the quilt and start pinning from the centre out, every 3 inches of so!
QUILTING
After you’ve basted your quilt, you need to do is increase the stitch length on your machine. I usually sew using a 2.5” length and then up it to 2.8” when quilting.
After you’ve basted your quilt, you need to do is increase the stitch length on your machine. I usually sew using a 2.5” length and then up it to 2.8” when quilting.
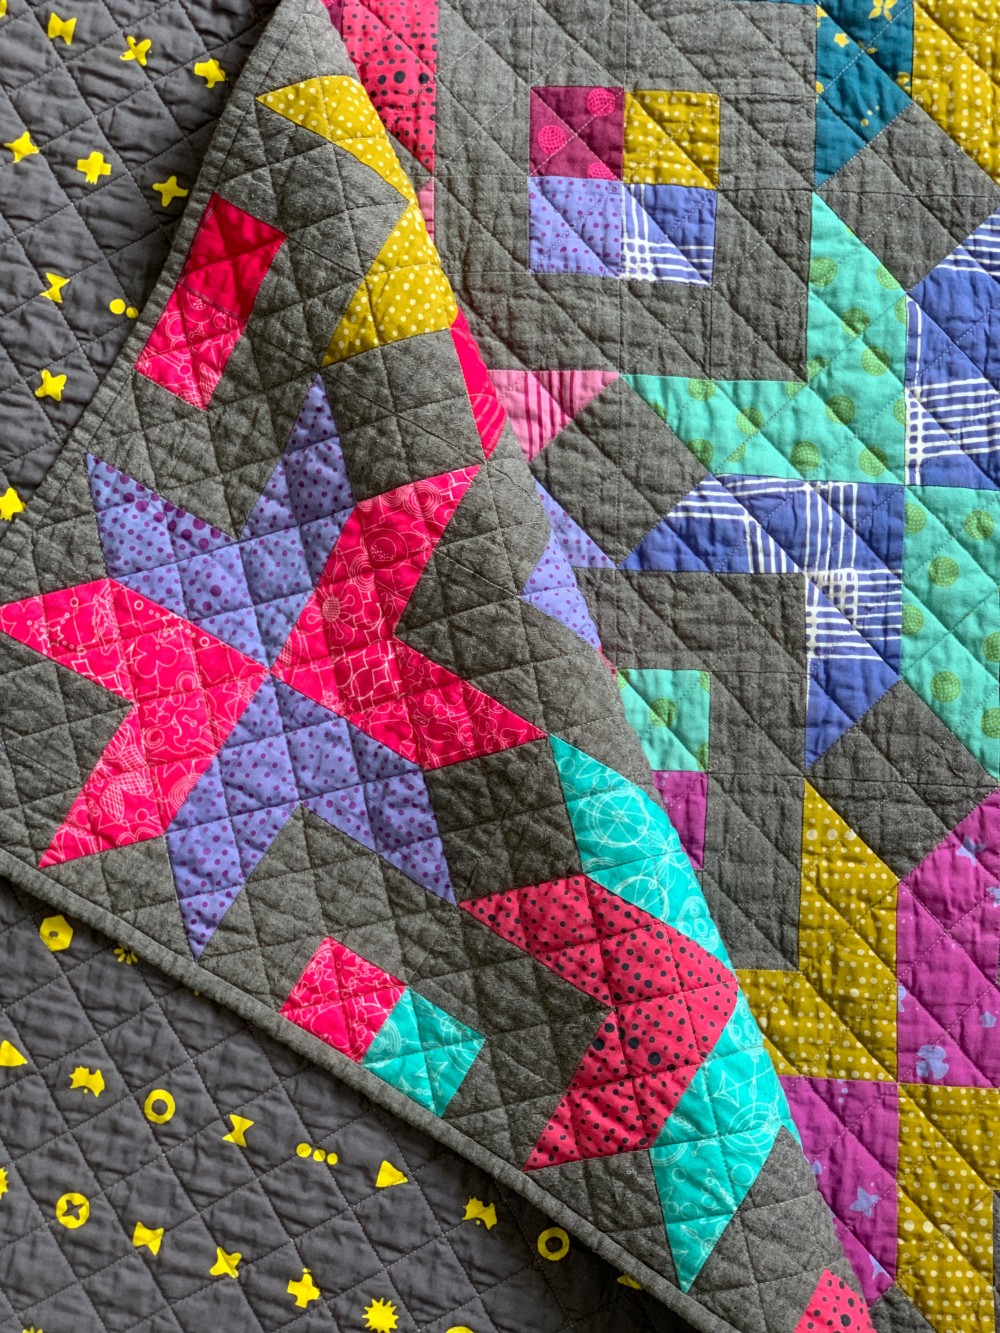
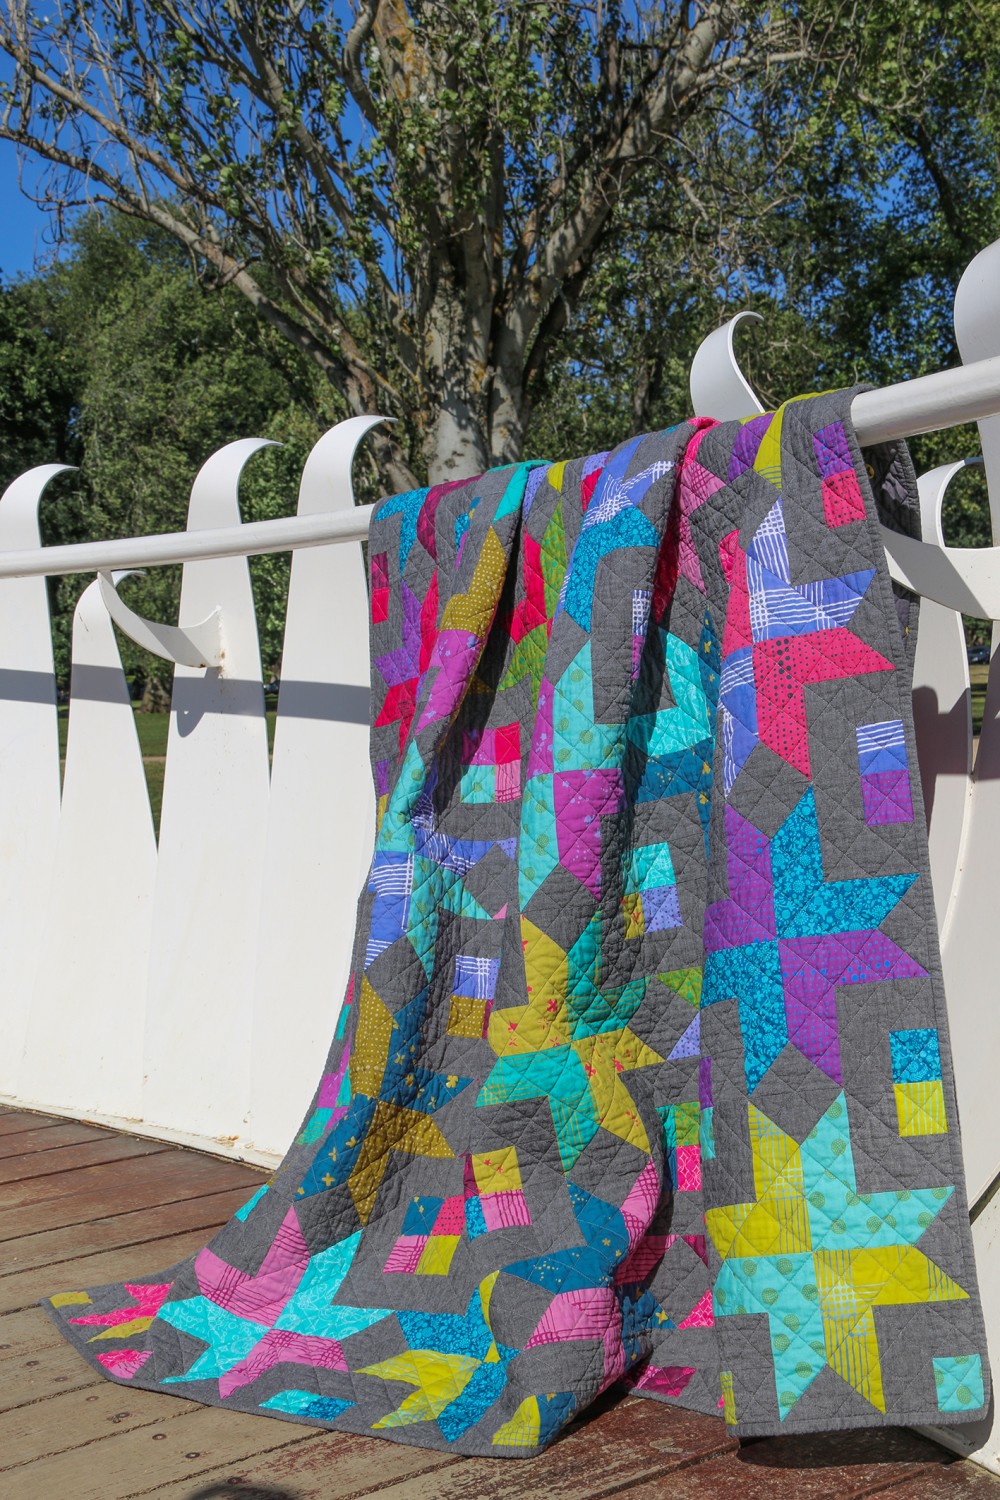
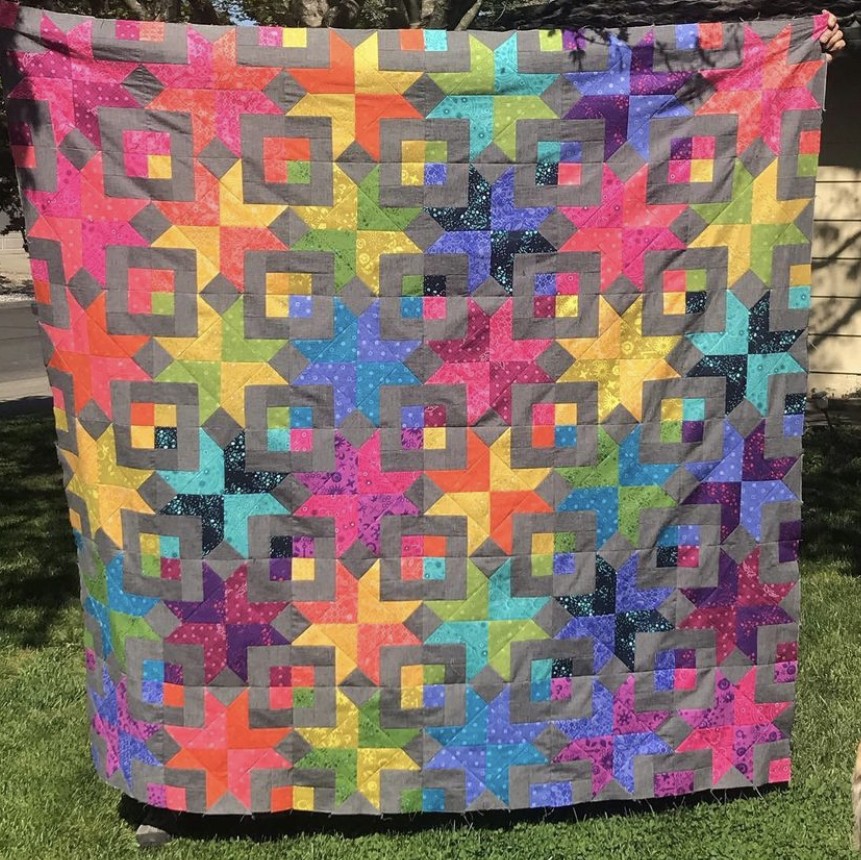
The Bronte's Stars quilt above has been quilted with diagonal cross hatching and I'll talk about that later on.
Another style that I love is straight lines all in one direction, so I thought that I would show that technique first.
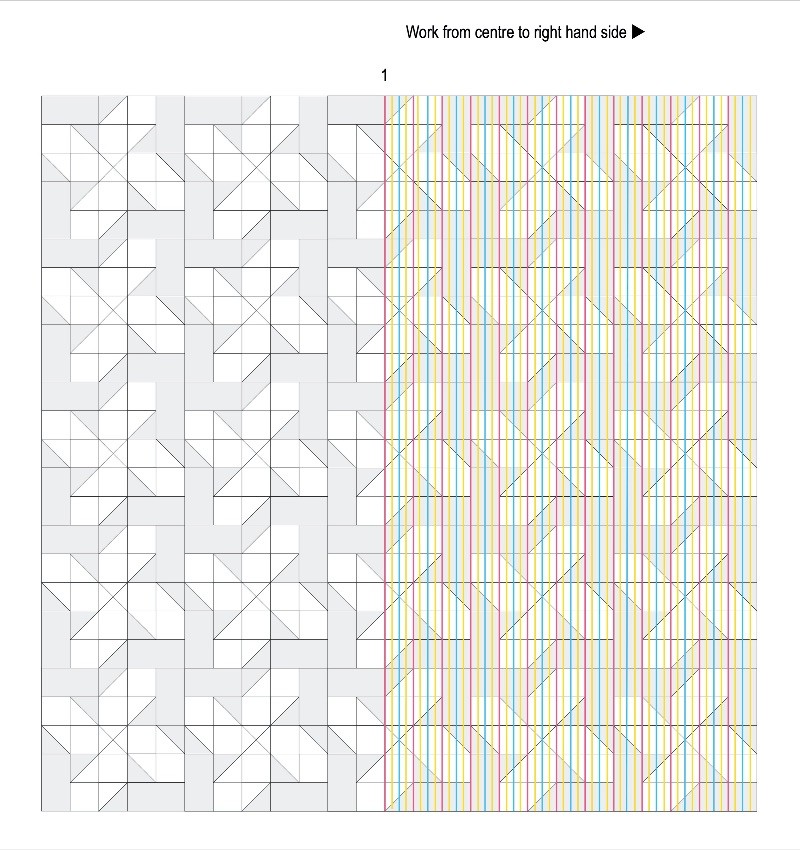
Please excuse the Whirligig quilt in the diagram below, I am re-using some of my work from my previous sew along which gives me more time to design and sew!
The best way to explain how I do this is with a diagram.
My approach for this quilt was to begin in the middle of the quilt. I quilted the first red line (marked with 1 on the diagram) and then continued sewing the rest of the red lines to the right hand side of the quilt.
Then I went back and quilted all of the blue lines in between the red lines. Once all the blue lines were done I went back and did the yellow lines.
The idea is that the red lines anchor the quilt. Then you go back and fill in the gaps. If you tried to do the heavy quarter inch quilting from the first row, your quilt would end up distorted and no-one wants that!
Just remember, after you’ve completed all the red lines, you need to flip the quilt around, so you’re quilting from the other side and working from the middle to the right, before you go back and do the blue and yellow lines.
Another style that I love is straight lines all in one direction, so I thought that I would show that technique first.
Please excuse the Whirligig quilt in the diagram below, I am re-using some of my work from my previous sew along which gives me more time to design and sew!
The best way to explain how I do this is with a diagram.
My approach for this quilt was to begin in the middle of the quilt. I quilted the first red line (marked with 1 on the diagram) and then continued sewing the rest of the red lines to the right hand side of the quilt.
Then I went back and quilted all of the blue lines in between the red lines. Once all the blue lines were done I went back and did the yellow lines.
The idea is that the red lines anchor the quilt. Then you go back and fill in the gaps. If you tried to do the heavy quarter inch quilting from the first row, your quilt would end up distorted and no-one wants that!
Just remember, after you’ve completed all the red lines, you need to flip the quilt around, so you’re quilting from the other side and working from the middle to the right, before you go back and do the blue and yellow lines.
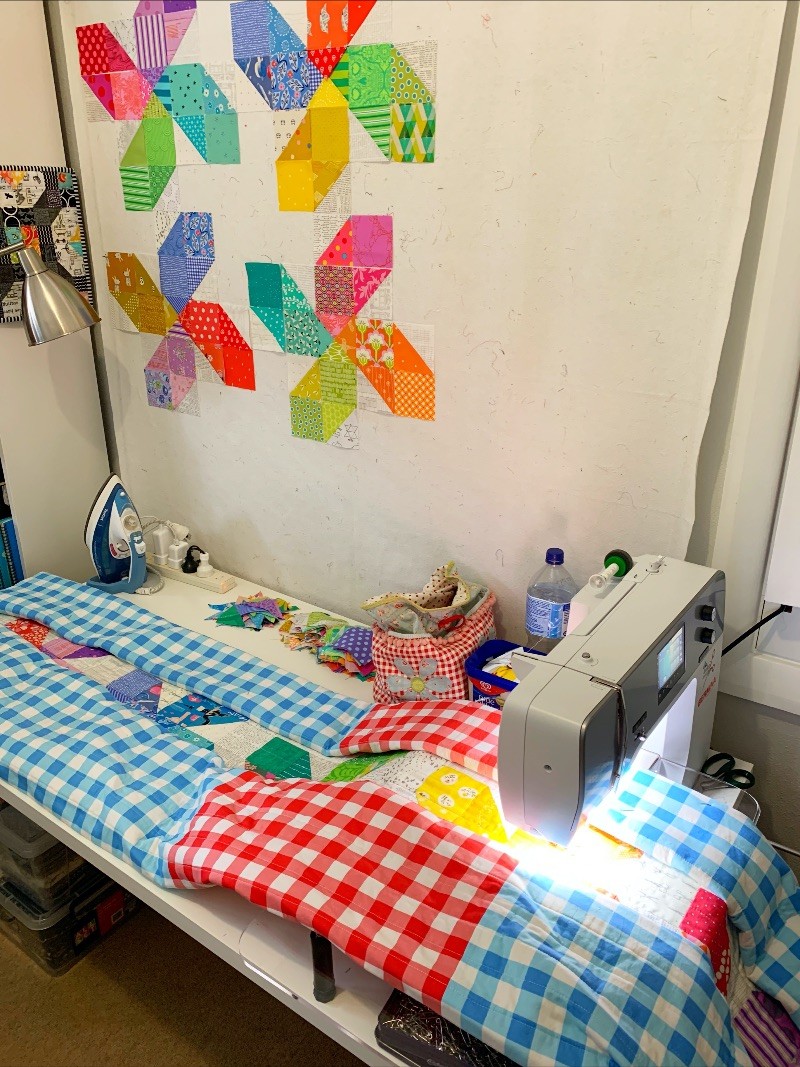
To get the quilt into position to feed through the sewing machine you need to roll it up. It makes it must easier to handle and to fit through the throat of your sewing machine. See the pictures below.
Please note the space at the end of the table, this allows the quilt to hang off the end as it passes through rather than getting bunched up.
Please note the space at the end of the table, this allows the quilt to hang off the end as it passes through rather than getting bunched up.
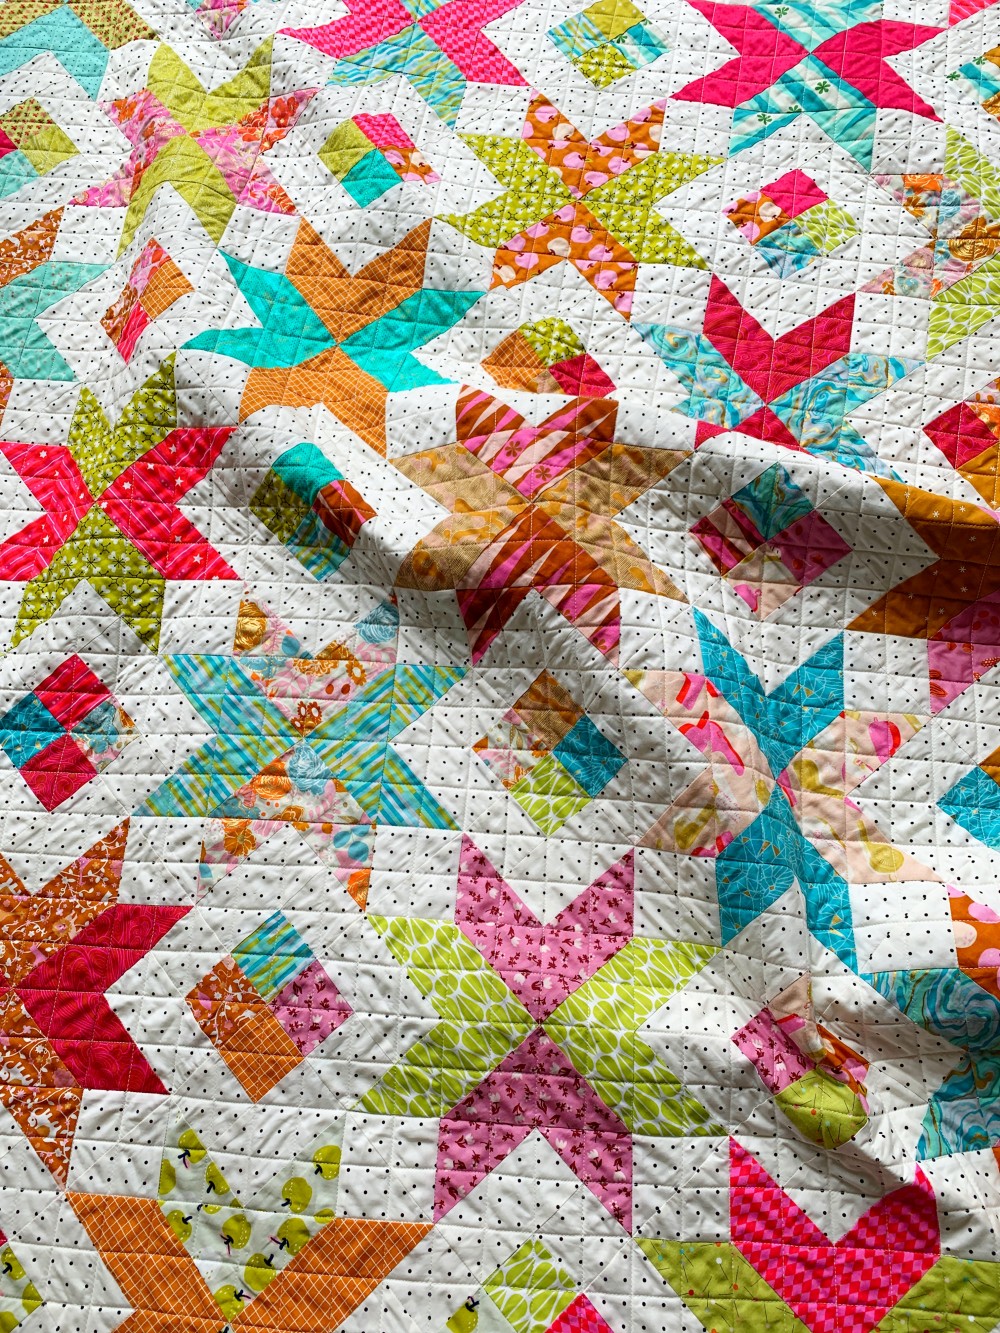
The other style of straight line quilting I like to do is cross hatching. This is done in the same way as the previous quilt except the lines are done on the diagonal. Start with your anchor lines of quilting and then go back and slowly fill in the gaps.
Please note that my lines are not perfect, they never are. I wobble and move around with the best of them, but the wonderful thing about this style of quilting is it doesn't matter. Once it’s all done you notice the effect - not how straight the lines are.
Please note that my lines are not perfect, they never are. I wobble and move around with the best of them, but the wonderful thing about this style of quilting is it doesn't matter. Once it’s all done you notice the effect - not how straight the lines are.

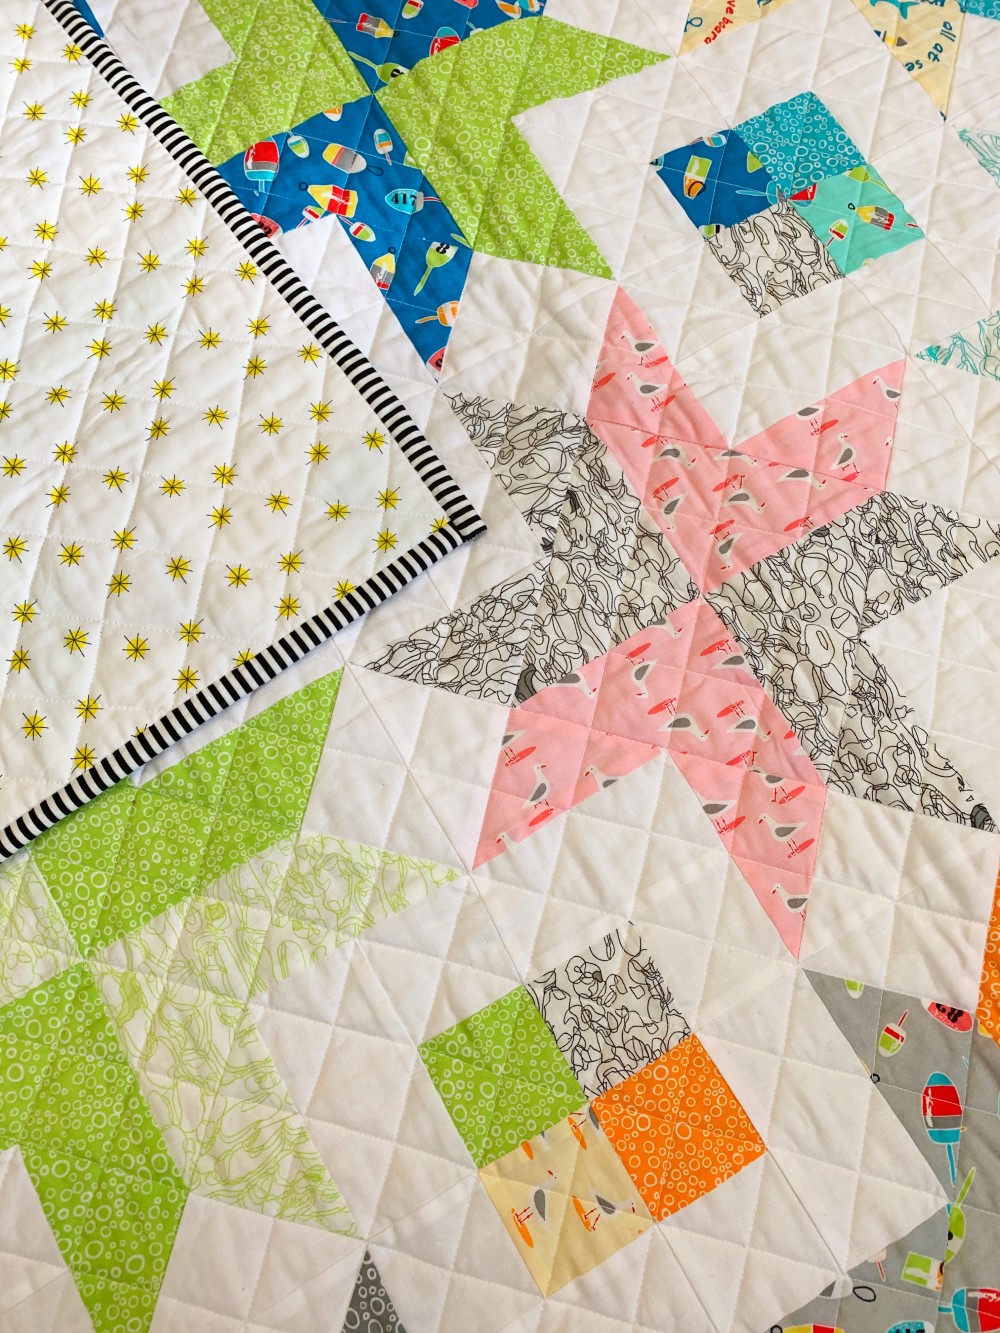
If you’re not comfortable quilting using just the force, that's where the fabulous Hera Marker comes in handy. This white piece of plastic creates a fold or indentation on the fabric that lasts for ages.
Using your quilting ruler to keep the lines straight, run the Hera Marker along the fabric pushing down firmly. You’ll see that it leaves an indentation on your quilt which you can use as your guide for when you’re quilting. I used it in the quilt below.
Just note, I did all the anchor lines first so I could then remove the pins. It makes it much easier to place a ruler on the quilt once the pins are gone. I also mark up with the Hera Marker on the floor. It's a bit hard on the back but unless you have a large table (I don't) the floor is the best option.
GRAND PRIZE WINNER
Drum roll please............ and the winner is @msbookleaf
Congratulations, your quilt is absolutely stunning!
Drum roll please............ and the winner is @msbookleaf
Congratulations, your quilt is absolutely stunning!
So that's it, well done if you got your Bronte's Stars quilt top finished!
If not, I hope you still enjoyed the ride and of course you can still access all the weekly newsletters on my blog.
I’ve had an wonderful time sharing my quilt with you all and a few tips and tricks along the way. I hope they have helped with this quilt and maybe you have learnt a thing or two for your next quilt. I really enjoy being a sew along host and I definitely see more of them in my future. Also, how good is the little community we have created! I hope you keep sharing your EJJ creations on Instagram and in the Facebook group.
I would like to say a big thank you to you all. Obviously this would not have been possible without you purchasing the pattern and sharing your photos on Instagram. I am so grateful for all the support, without you I would have to go and get a real job and not have my boy home with me full time. I'm a very lucky lady!
Until next Sew Along,
Happy Patching,
Emma x