Round Trip Sew Along
Week 5 - Round Trip Quilt Sew Along
May 29, 2024 - 9:41pm
Round Trip Sew Along
Welcome to Week 5 of the Round Trip Quilt Sew Along.It's time to get these quilt tops pieced!
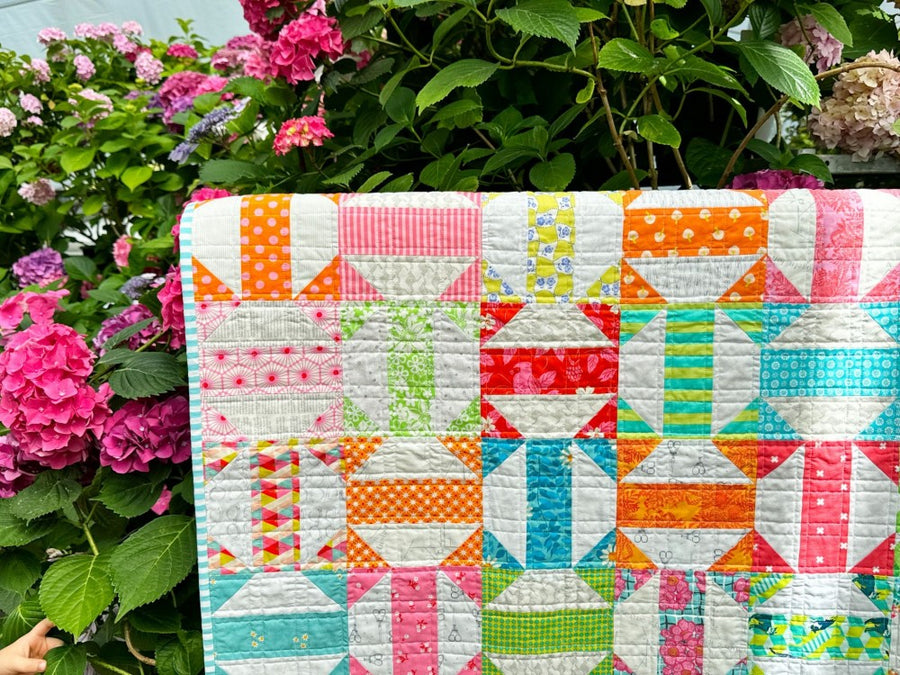
SHARE ON INSTAGRAMDon’t forget to post a pic of your Round Trip blocks to IG and be sure to the use the #roundtripSAL and #roundtripquilt hashtags to make it easier for me and others to find your photos.QUILTINGI have quilted my Round Trip quilts in a couple of different ways. The first quilt I made was done by stitching ¼" either side of the seams and continuing these lines through the blocks. I think this looks really modern and suits the style of the quilt.
For my vintage inspired yellow and white version I have taken the plunge and decided to hand quilt using perle 8 thread. First up I basted the quilt as usual and then machine quilted in the ditch to secure the blocks. A Hera marker was used to mark the ¼" lines for the hand quilting.The needle that I prefer to use is a Jeana Kimball embroidery/redwork size 9 and to be honest I use the needles for everything. Binding, sock mending, anything!
My Liberty Round Trip quilt was quilted the same way as the original. I used Aurifil 40wt in one of my favourite colours Dove, 2600. This is a great colour especially when your have a grey background colour as it dosen't show up too much on the lighter fabrics.
With my third super scrappy version I decided to try a quilting method I hadn't used for a very long time. Wavy lines using a walking foot. These are done pretty loosely and to be honest I really enjoyed not having to be so accurate. Straight lines can be intense so this is so much more relaxing!Jeni Baker has a great YouTube video about this technique if you're interested.How To Quilt Wavy Lines With a Walking Foot
I haven't decided how I am going to quilt my sew along quilt but I think I'm leaning towards horizontal straight lines. Stay tuned because no doubt I'll change my mind. Below I have added some basic information on quilting that I previously included in my sew alongs.
TOOLS OF THE TRADEAs this is the last newsletter, I thought I might talk a little about quilting. I love to use straight lines in all my quilts and I have discovered a few things that might help you too!Firstly, what you'll need:Walking Foot for your machine - you may have to purchase this separately as most machines don't come with one, unless you’re a lucky duck and have bought a quilting edition - sometimes they include these as part of the package. A walking food basically does the same thing as the feed dogs on your machine, except from above. It helps to feed the three layers of your quilt through evenly so that the fabric doesn’t bunch up.40wt Thread - now this is just what I like to quilt with, so if you prefer something else, go for it! I like it because it's a little stronger and it also makes the quilting a bit more of a feature. I like to use Aurifil Thread, 100% cotton.Basting Spray and/or Safety Pins for basting - I like to use both. I don't have a large sewing table to work on so all the help I can get, I take! The safety pins are stainless steel, size 2. There are some fancy curved pins on the market which are great too. The basting spray is called 505 Temporary Adhesive. I like this brand as it has hardly any smell and stays stuck!Hera Marker - A Hera marker is an awesome piece of plastic that allows you to mark your quilt without using a pencil/washout marker. The Hera marker places a fold in the fabric when your quilt top is basted that stays for a good amount of time. I love it because there is no need to wash out line markings afterwards. Just use your quilting ruler to get lovely straight lines.
BASTINGThe first thing you’ll need to do is baste your quilt. Once you have pieced your backing, lay it down with the right side to the floor. Some people baste on their kitchen table, some on the wall and others on their dining room or lounge room floor. It’s totally up to you!I lay my quilt backing on my lounge room floor and tape down the edges to keep the backing taut. Then I layer the batting on top and baste it to the backing using the basting spray. Next, I layer the quilt top, right side up and baste it to the batting and backing. Finally, I plonk myself down in the middle of the quilt and start pinning from the centre out, every 3 inches of so!Imagine this photo below with evenly spaced safety pins instead of a 5 year old child although he is very good at keeping them flat and together.
QUILTINGAfter you’ve basted your quilt, you need to do is increase the stitch length on your machine. I usually sew using a 2.2 length and then up it to 2.8 when quilting. My machine is a Bernina, so check yours as every machine is different.
One of my favourite ways to quilt is with either vertical or horizontal lines using a walking foot. As I haven't done this technique with any of my previous Round Trip versions I thought I will still share this information using my Balderdash Quilt.
The Balderdash quilt above has been quilted with ¾" spaced lines.The best way to explain how I do this is with a diagram.My approach for this quilt was to begin in the middle of the quilt. I quilted the first red line (marked with 1 on the diagram) and then continued sewing the rest of the red lines to the right hand side of the quilt. Then I went back and quilted all of the yellow lines in between the red lines. Once all the yellow lines were done I went back and did the blue lines.
Then I went back again and did the green lines. The idea is that the red lines anchor the quilt. Then you go back and fill in the gaps. If you tried to do the ¾" quilting from the first row, your quilt would end up distorted and no-one wants that!Just remember, after you’ve completed all the red lines, you need to flip the quilt around, so you’re quilting from the other side and working from the middle to the right, before you go back and do the yellow, blue and green lines.
To get the quilt into position to feed through the sewing machine you need to roll it up. It makes it must easier to handle and to fit through the throat of your sewing machine. See the pictures below.Please note the space at the end of the table, this allows the quilt to hang off the end as it passes through rather than getting bunched up.
If you want to tackle the ¼" lines like I did in my first quilt This is done in the same way as the previous quilt. Start with your anchor lines of quilting and then go back and slowly fill in the gaps.Please note that my lines are not perfect, they never are. I wobble and move around with the best of them, but the wonderful thing about this style of quilting is it doesn't matter. Once it’s all done you notice the effect - not how straight the lines are.
If you’re not comfortable quilting using just the force, that's where the fabulous Hera Marker comes in handy. This white piece of plastic creates a fold or indentation on the fabric that lasts for ages. Using your quilting ruler to keep the lines straight, run the Hera Marker along the fabric pushing down firmly. You’ll see that it leaves an indentation on your quilt which you can use as your guide for when you’re quilting. I used it in the quilt below. Just note, I did all the anchor lines first so I could then remove the pins. It makes it much easier to place a ruler on the quilt once the pins are gone. I also mark up with the Hera Marker on the floor. It's a bit hard on the back but unless you have a large table (I don't) the floor is the best option.
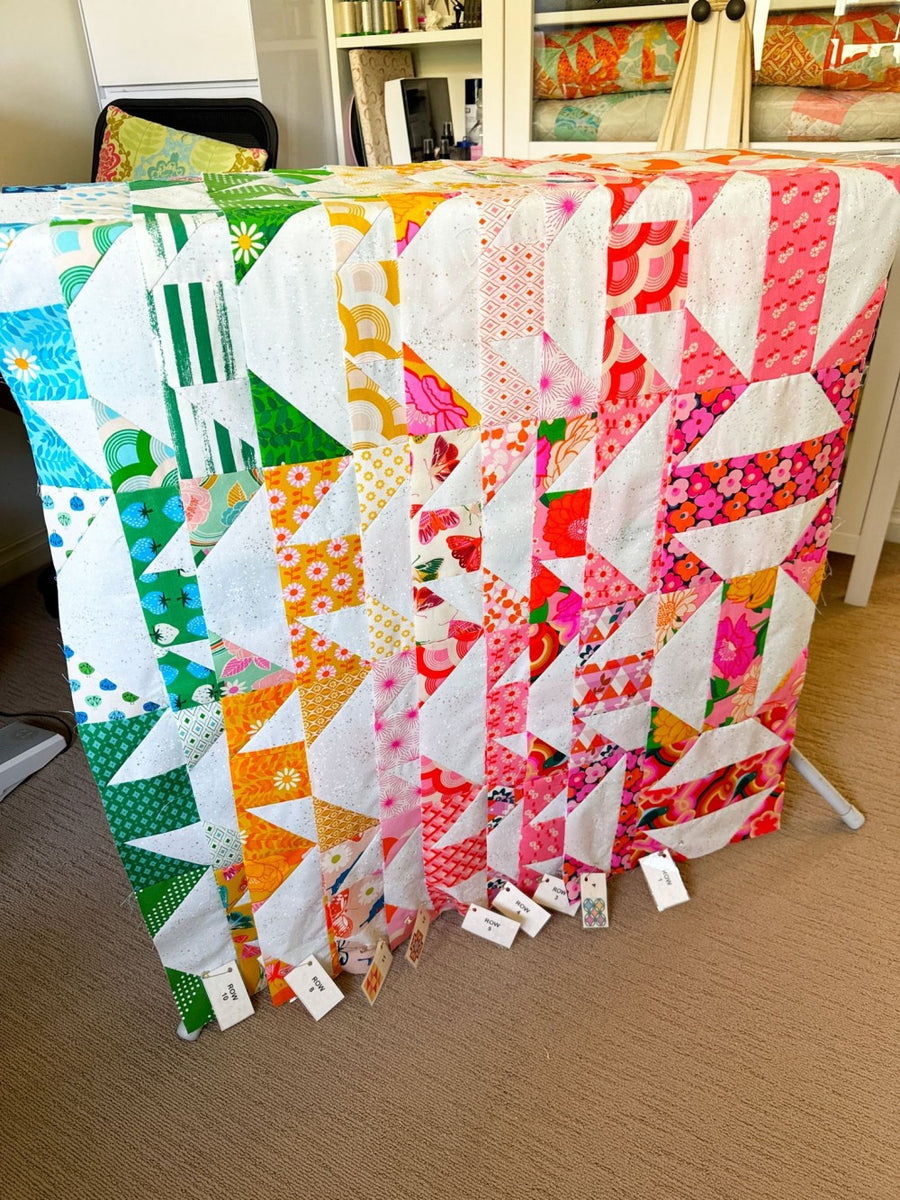
My plan was to share with you all a finished quilt top this week but the stars did not align so please imagine these rows sewn together.Power outages at school and extra shifts at my other job just didn't leave much time for sewing. I will have a good go at it this weekend and hopefully knock it over and maybe even get it quilted.
So that's it for the Round Trip sew along.
I’ve had an amazing time sharing my quilt with you all and a few tips and tricks along the way. I also love this little community we have created and I hope you keep sharing your EJJ creations on Instagram and in the Facebook group.
Thank you so much for joining me and I hope you have enjoyed this quilting adventure.
Emma x
Week 4 - Round Trip Quilt Sew Along
May 29, 2024 - 9:24pm
Round Trip Sew Along
Welcome to Week 4 of the Round Trip Quilt Sew Along.This week we are making the last of our blocks, planning our layout and getting ready to sew our quilt tops together, If you have just joined the SAL, welcome! Be sure to grab the pattern, read up on all the details and choose your fabrics soon so you can catch up and join in the fun!
SHARE ON INSTAGRAMDon’t forget to post a pic of your Round Trip blocks to IG and be sure to the use the #roundtripSAL and #roundtripquilt hashtags to make it easier for me and others to find your photos.
PIECING TIPSSo many of you have jumped ahead and completed your quilt tops which is awesome. I wanted to take the time this week to share my block piecing tips with you all before next week. I have a little trick to help get those pesky points matching as best as possible.Start by grabbing two of your blocks.When piecing try to keep the block with the seam intersection visable uppermost.See photo below.Check the seams align by folding back and having a look.Once aligned, fold back and pin in place.Sew together making sure you go through the middle of the intersection.
Ta da, lovely matching points.
Now grab your next block.As you can see when you place this block in position to sew (see photo below), the seam intersection is not showing.
So flip, and sew from the other side. An easy trick that definitely helps with matching your points.
This trick dosen't work when it's time to sew the rows together but hopefully by then you will have a good feel for it.After much indecision I finally settled on my sew along quilt layout. I had planned a random layout but felt the fabrics suited a colour wash better.It is also Buffy approved.
Check the random layout below.Which do you prefer?
We are nearly finished the sew along, just one newsletter to go. Have you been having fun? Have you made one or two quilts? It's an extremely addictive pattern so I wouldn't be suprised if you even make three!Next week we will be putting our quilt tops together and I will also be sharing my machine quilting tips with you all.
Emma x
Week 3 - Round Trip Quilt Sew Along
May 29, 2024 - 9:14pm
Round Trip Sew Along
Welcome to Week 3 of the Round Trip Quilt Sew Along.This week we are continuing to make blocks, or as some of you have already finished a quilt top (smarty pants) you might like to start another one.If you have just joined the SAL, welcome! Be sure to grab the pattern, read up on all the details and choose your fabrics soon so you can catch up and join in the fun!
SHARE ON INSTAGRAMDon’t forget to post a pic of your Round Trip blocks to IG and be sure to the use the #roundtripSAL and #roundtripquilt hashtags to make it easier for me and others to find your photos.There might be a prize for the final week, not from a shop or sponsor, just from me. So keep posting those photos to be in running to win!!
Have a look at these beauties that have been popping up on instagram and the facebook group.Photos:
1. Wendy2. Linda
3. Kimberly
4. Helen
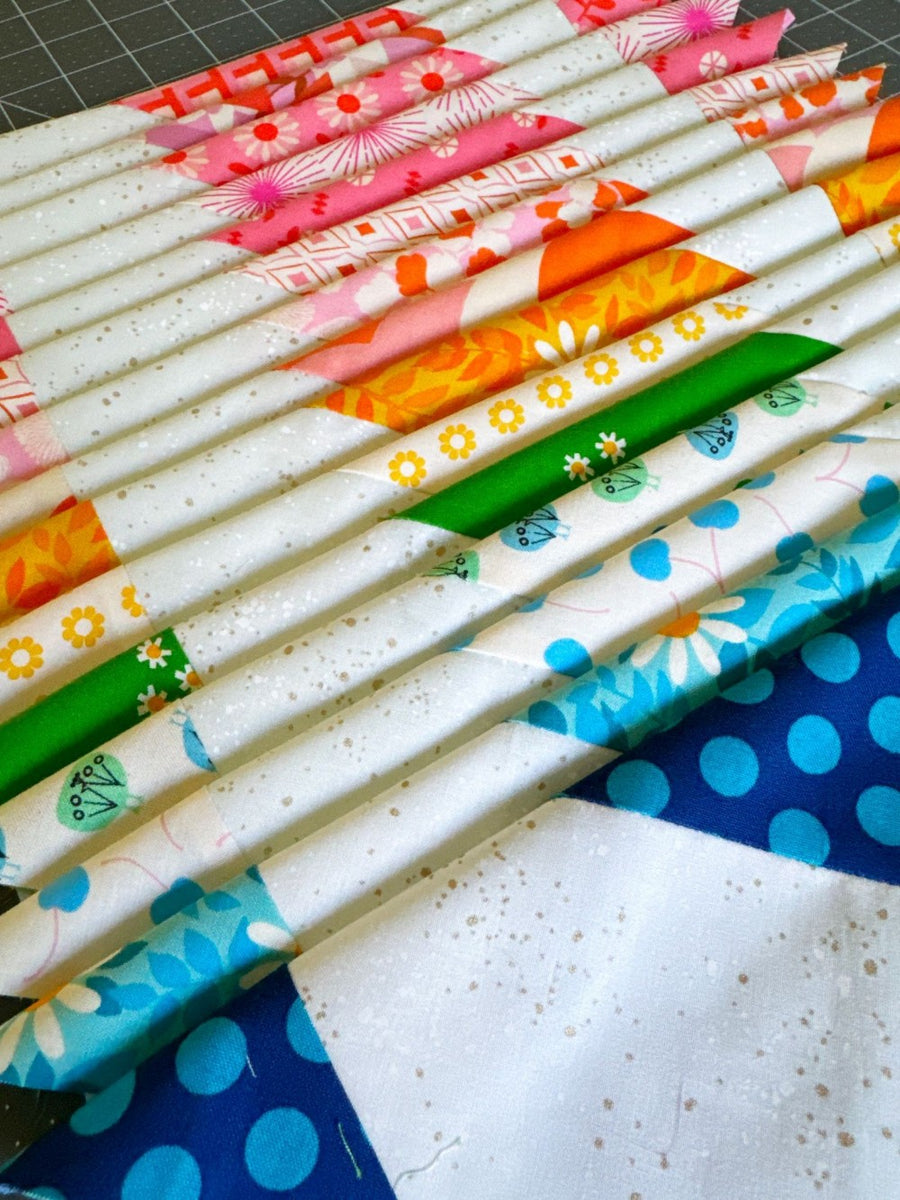
PIECING There's a fun little video on instagram showing the method I use for sewing on the corner flip blocks. It's sped up, so it might be a bit hard to understand if you haven't tried this method before.Sewing Video on InstagramAfter you have marked and placed the corner squares in the correct positions, start sewing along one of the drawn lines. When you get to the end, don't cut the thread, just pull it so there's enough length in the thread to get to the next square.The photo below was taken on a black background so you can see the threads looping from a stitched line to the next stitched line.
Then when it comes time to trim the triangles, you can also trim the looped thread, making a nice neat block ready to sew into a quilt top. How easy is that!
Well it's back to sewing for me. I'm about halfway through my 100 blocks and although Henry has started school this week, my other job has been filing my spare hours. I will hopefully get a good run at it over the weekend.
Have you joined the Facebook Group?
Pop on over and join the chatter along side some fabulously supportive sewing peeps.
Next week we will be making the last of our blocks and getting ready to sew our quilt tops together. See you on the gram!
Emma x
Week 2 - Round Trip Quilt Sew Along
May 29, 2024 - 8:52pm
Round Trip Sew Along
Welcome to Week 2 of the Round Trip Quilt Sew Along.This week is all about starting to piece your blocks.If you have just joined the SAL, welcome! Be sure to grab the pattern, read up on all the details and choose your fabrics soon so you can catch up and join in the fun!
SHARE ON INSTAGRAMDon’t forget to post a pic of your cut fabrics to IG and be sure to the use the #roundtripSAL and #roundtripquilt hashtags to make it easier for others to find your photos.Some of you have already starting piecing and I love it. It's so nice to sew a quilt that comes so together quickly, that you just want to keep on making.
PIECING This week, and the next couple of weeks we are piecing our blocks.I shared all my tips last week, so click on the Week 1 button above if you would like to check it out.Did you see the video of me cutting on instagram and Facebook? I like to cut a number of fabrics at a time, up to 6 layers if the blade is nice and sharp. The quilt I am making is made up of recently bought fat quarters, 30cm cuts and fabric from my stash. The fabric is sorted into like piles to do the cutting, fat quarters with fat quarters, 30cms cuts with 30cms cuts. With the scraps, because the sizes and not uniform I tend to cut these individually.Cutting Video on Instagram
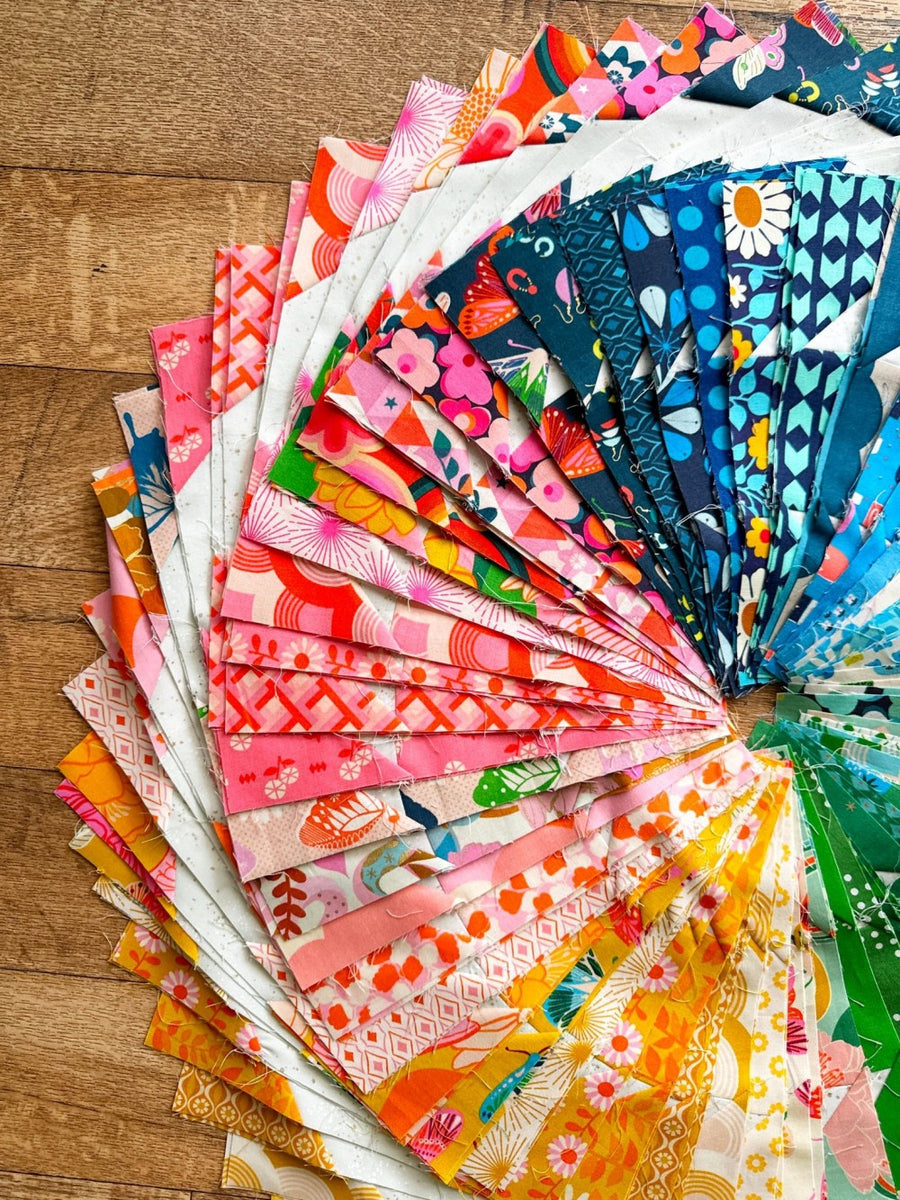
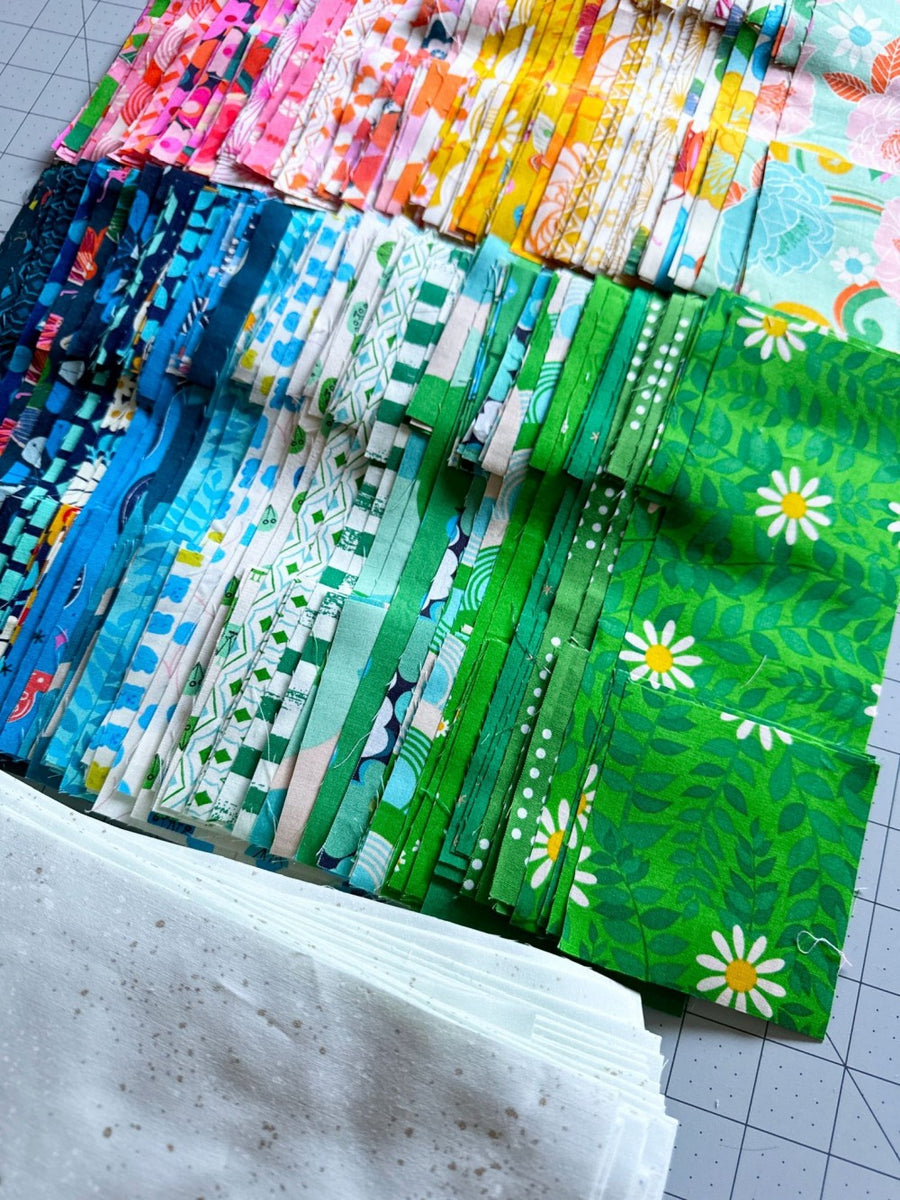
My quilt for the sew along has changed back to my original plan. The photo above was a test run and it just didn't work for me. It felt like the quilt was going to be too busy and chaotic and wasn't going to showcase the gorgeous fabrics.The orginal plan was to use a Speckled fabric from Ruby Star Society as the background so it was back to cutting for me.
I have decided to make a big quilt, so I am making 100 - 9'' blocks. The quilt will be 10 x 10, with a finished size of 90'' square. This will be perfect on my bed, and I'm excited. It's been a number of years since I made a quilt just for me.
Each fabric will be used twice and have a colourwash layout. That might still change once all the blocks are complete. This is becoming the ever evolving quilt so you never know.20 blocks down, 80 to go!
How is your quilt coming along?Are you sticking to your original plan or have you changed like me?To be honest, I usually have a vision for my quilt and stick to it, but I'm really enjoying letting the fabric lead me with this one.
Are you having fun? Have you joined the Facebook Group?
There are some great quilts popping up and it's so wonderful to see how excited you all are about this pattern.
Next week we will be making more blocks but I have a feeling some of you might end up making 2 or even 3 Round Trip quilts. So let's dive into our fabrics and sew our stashes!
Emma x
Week 1 - Round Trip Quilt Sew Along
May 29, 2024 - 8:31pm
Round Trip Sew Along
Round Trip Quilt Sew Along
Week 1
Welcome to Week 1 of the Round Trip Quilt Sew Along.
This week is all about cutting the fabric and planning your quilt layout.
If you have just joined the SAL, welcome! Be sure to grab the pattern, read up on all the details and choose your fabrics soon so you can catch up and join in the fun!Grab the Pattern Here.
SHARE ON INSTAGRAMDon’t forget to post a pic of your cut fabrics to IG and be sure to the use the #roundtripSAL and #roundtripquilt hashtags to make it easier for others to find your photos.Don't worry if you’re ahead, or you see other people sewing blocks already, this is supposed to be fun. If you feel like sewing, go for it. This sew along is all about enjoyment so there are no rules, stick to the schedule or move ahead, do what's right for you. I'll give you a tip, this quilt pattern is addictive. You'll end up making more, especially with the different block sizes and versions!There have been some fabulous fabric combos popping up on Instagram and in the Facebook group and I'm excited to watch these quilts come to life. Check out some inspiring fabric pulls below.
CUTTING TIPS This quilt is made up of rectangles and squares, so give your fabrics a good press and swap out your rotary blade for a new one. You deserve it!
To speed up cutting I like to cut 4 layers at a time. I know this can be a bit daunting but I promise if you have a nice sharp blade it's easy. Just remember to concentrate because if you make a mistake, you will make it 4 times!!
If you are making a quilt using the fabric requirements from the pattern, just follow the cutting out instructions for the size quilt you are planning to make.
If you are making the 6" block and would like to use Jelly Rolls, Layer Cakes or Fat Eighths scroll down for some extra cutting instructions.
PRE-CUTS
Jelly Rolls, Layer Cakes and Fat Eighths are great for the 6" block.Please refer to the cutting out instructions for more information.
Please note:
FULL BLOCK = This means that you get one whole full block from the fabric you are cutting. Both Fabric 1 and Fabric 2.These can then be split and paired with another fabric to make a block.This is a great way to cut out a scrappy quilt and what I used for my sew along version.
eg: 48 Fabrics = 48 Blocks
MAIN FABRIC SETS: Fabric just for Fabric 1.
BACKGROUND FABRIC SETS: Fabric just for Fabric 2 (Background)
BLOCK PREPARATION:
Once you have cut all your fabrics, the next stage is to pair them. If you are using the same background fabric, this is easy. If you are using lots of different background fabrics, it's best to lay them out. It ensures no double ups or repeats.If the scrappy vibe was your plan, then this is the perfect time to make sure the pairs are all different. Try laying them out on a table to pair them up, it makes it much easier to see. If your table isn't big enough, the floor can work too.I am undecided with my layout and am planning a big play over the weekend. It's between a random mix up of all the colours or a colour wash of sorts. Stay tuned, it will be interesting to see where this quilt ends up.
The corners of the Round Trip blocks are made with flips as mentioned in the pattern on Pages 18 - 20.To do these, you need to mark the centre of the squares with a diagonal line on the back of the fabric.
However, to be honest, with the 6" block I didn't mark. I felt the distance was perfectly fine to eyeball. It's up to you, so do what feels most comfortable.Marking definitely happened with the 9" block, and with the 2 colour quilt it was easy because there was no directional fabric. It's a great job to get done in front of the tv.When sewing with a directional fabric I found it much easier to work one block at a time. Follow the steps below to see what works best for me.
I am going to jump ahead and give you some tips on piecing. This is not a complicated quilt and I'm sure some of you will be itching to get going so I wanted to share this with you all now.PIECING:Step 1: Sew the rectangles together.This is a great step to chain piece. These were sewn together in batches and it sped up the process no end!
Step 2: The next step is to work out the direction of the fabrics. I am a visual person so for me, it works best to lay the squares in the correct position and then flip them with my fingers. This confirms they are going to end up in the right direction. Yay!
The striped fabrics were actually pieced differently in the scrappy version. The stripes were placed horizontally in the centre rectangle of the block and the corner squares were placed vertically.
Step 3: Mark the back of the fabrics with a water soluble pencil or pen diagonally through the middle. I like to use a sandpaper board, it stops the fabric moving and guarantees a straight line.
Step 4: Stitch on one of the pencil lines, then spin the block and sew the next line without cutting the thread. Continue around the block until all are complete. It's chain piecing in a circle. You spin me round round, baby right round.
Step 5: Using a ruler and rotary cutter, trim the corners ¼" away from the seam line. Try trimming the joined threads at this stage too. They can get caught up when you iron so it's good to cut them off.
Step 6: Press all the flips to the outside of the block. And done!
Next week we will be making blocks and more blocks.
If you have any questions, you can always email me!
Once again thank so much for joining me on this sew along. I hope you're
enjoying the process and meeting some other sewers from around the world.Keep checking the hashtag #roundtripsal, it's a great place to discover other Trippers and it also might inspire and motivate you.
Emma x
Round Trip Quilt Sew Along
May 29, 2024 - 7:55pm
Round Trip Sew Along
Round Trip Quilt Sew AlongWelcome and thank you for joining the Round Trip Quilt Sew Along. Let's have some fun!In previous sew alongs, Week 1 has always been for fabric selection. This year we are doing things a little differently and instead, all the tips for picking your fabrics will be done in this welcome email. This should give you a little more time to gather your fabrics and go shopping if needed.
GETTING STARTED:
Make sure you’ve purchased your Round Trip Pattern.
The Round Trip SAL will be taking place on Instagram, so be sure your account is set to public so we can all see your posts using the #roundtripsal and #roundtripquilt hashtags.
If you are more of a Facebooker, there is a private Emma Jean Jansen Sew Along Group which has recently grown to over a 1500 people. The group is lovely and we're a very encouraging bunch of crafty folk.
Post a photo of your fabric selection - Once you have chosen your fabric, post a photo and introduce yourself to all the other “Tripers”, this is a great way to meet others participating in the sew along.
Pre-Cuts - If you would like to use one or two of those Jelly Rolls you have been hording, (I know you all have them) well here's your chance. These will be great for the 6" block. In terms of requirements you are on your own, but it would be quick to work out how many pieces you get from each strip to make the blocks.
PLANNING YOUR QUILT:
Your first step is to decide what size version you are making. The Round Trip Quilt comes in 4 sizes, Baby, Small Throw, Large Throw and Bed. There are then two different block sizes and two layout options.
The 6" block is better for fabric scraps and smaller prints. Just keep in mind that to get a bigger quilt you do need to make more blocks.
The 9" block is great for fat quarters and larger prints, but to be honest you could use either and still be happy.
Join the Emma Jean Jansen Sew Along Facebook Group here.
CHOOSING YOUR FABRICS:
This is the fun part, so either raid your stash or go shopping. The first version which is the cover girl, was made with a combination of older prints with some newer ones added into the mix. There are a number of prints from Matilda, a fabric range I designed in 2016. You can still get your hands on some from Patchwork With Gail B here.There are also some quilting weight prints from Liberty's London Parks range that was released in 2023. Also included are 4 prints from Tula Pink's Besties range and a couple of her older ones too. Of course I used some Ruby Star society, with prints from Flowerland, Backyard and Jolly Darlings.
The background fabrics (which I did not get a photo of either as a fabric pull or cut, what was I thinking!) is a total mix. This was a grab anything that was low volume or grey from my fabric stash and as you can see in the photo below there are both white and cream backgrounds included.
When I designed this quilt I knew it had to be made with just two colours and who doesn't love yellow and white. These two colours give of such a vintage vibe and I am so here for that. The two colours are both Kona solids in Snow and Sunflower and I used Version D, 9" alternating layout.
You might have seen that I am hand quilting this one with Perle 8 thread. First the quilt was secured by machine quilting in the ditch which also acts as a permanent basting method. Then the quilting lines are made using a Hera Marker and then stitch and repeat. You can check out a video that I made here.
The next two images are digital mockups of a red and white quilt. I wanted to show how different the quilt looks using the two different layouts. First is the alternating and the second is the original. Crazy huh!
Who dosen't love Liberty fabrics? I don't have many Liberty fabrics in my stash but I did have enough to make this Baby sized, 6" original version. This has been made as a gift and I'm itching to get it finished. The background fabric is an Essex yarn dyed woven in charcoal, I think. This piece had been kicking round for a number of years so I'm not quite sure, but I had enough so it got used!
The third version that I am still in the middle of making although I did complete all the blocks the other night is a riot of colour. I went deep into my fabric tubs and found all the stripes that I had. Some of these are old, like my shop days old, so bascially vintage. The florals are a mix of Tula Pink, Anna Maria Horner, Heather Bailey, 2 Ruby Star Society prints and even two of mine. I cut one whole block from each fabric and then paired them up with another. I didn't repeat the pairing so the end result is super scrappy. This is the 9" block.
DIGITAL MOCKUP INSPIRATIONWith these mockups I haven't sepcified what size block I have used. It is really tricky to get the scale right in these when you don't have the fabric on hand. You will have to decide what size block suits the fabric you have selected best. First up is Anna Maria Horner's Brave fabric collection. You could definitely have fun fussy cutting some of the prints in this range.
Now how super cute is this mock up using Sugar Cone by Kimberly Kight for Ruby Star Society? I have a fat quarter bundle of this range and I am so tempted to make this. 5 Round Trip quilts isn't too much, is it? Just asking for a friend.
Starry by Ruby Star Society is pretty darn fabulous. I have always wanted to make a quilt using the same print in different colour ways and this range would be perfect. You could also make it with a random layout too.
Sunbeam by Rashida Coleman-Hale for Ruby Star Society would be another great range for some fussy cutting possibiltles. I am a big fan of this range and it's not my usual colours but sometimes you just need a little subtlety in your life.
I love Jennifer Paganelli's fabrics. The colour saturation is magnificent.This is her current range Lovely Day and I decided to show how the fabrics would look in 3 different versions.1st up, original version.
Then alternating.
Final version, not using a background fabric, just the prints all mixed up.
I know it's the same quilt and I know colour placement can change the look but I am still amazed that these three images are the same quilt pattern.Which is your favourite?
Next up, some graphic stripes and solid versions. You could have endless fun playing with colour placement so make sure you print out the colouring sheet included in the pattern and have a go.
Last one is Besties by Tula Pink in the original layout. Look at those bunnies!
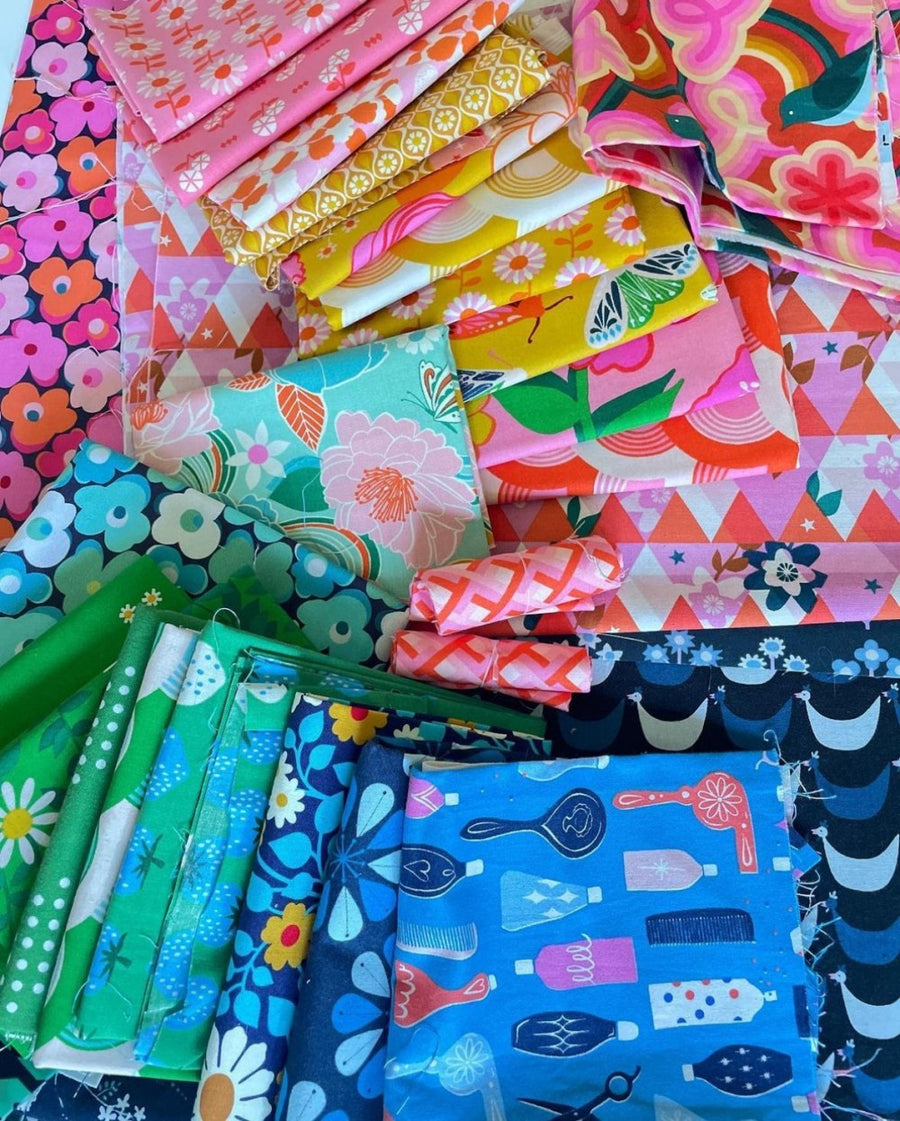
Finally I am sharing my fabric pull for the sew along. This is mainly made up of Ruby Star Society fabrics and a couple of old school Cotton and Steel prints. The plan was to use a Speckled fabric for the background but now I'm not so sure. It might be more fun just to mix and match the blocks. I'll need to make a decision toot sweet as I have to start writing all the newsletters.
The next newsletter will be arriving in your inboxes on the 19th of January. This will be all about planning and cutting, and will signal the offical start of the sew along.Thanks so much for joining me on this patchwork adventure. I can't wait to share lots of tips and sewing hacks with you all. Let's have some fun!Emma x