Week 1 - Wake Me Up Quilt Sew Along
Dec 13, 2021 - 7:31pm

1

0
Wake Me Up Quilt Sew-Along
Week 1
Welcome to Week 1 of my first sew-along featuring my latest quilt pattern, Wake Me Up. I am super excited to be sewing-along with all of you. In fact, I am about to make my 4th version of this quilt, that's how much I love it!
I’m planning on making a scrappy queen size version using fabric from my stash!
GETTING STARTED
GETTING STARTED
- Make sure you’ve purchased your Wake Me Up pattern!
- The Wake Me Up SAL will be taking place on Instagram, so be sure your account is set to public so we can all see your posts using the #wakemeupsal and #wakemeupquilt hashtags.
- There are lots of people participating in this sew along, so let’s start off with introductions! We’d love to see a picture of you in your native quilting habitat and hear a bit about you. Lots of people are working from home at the moment, so the community during this sew along may really help those people who are otherwise isolated.
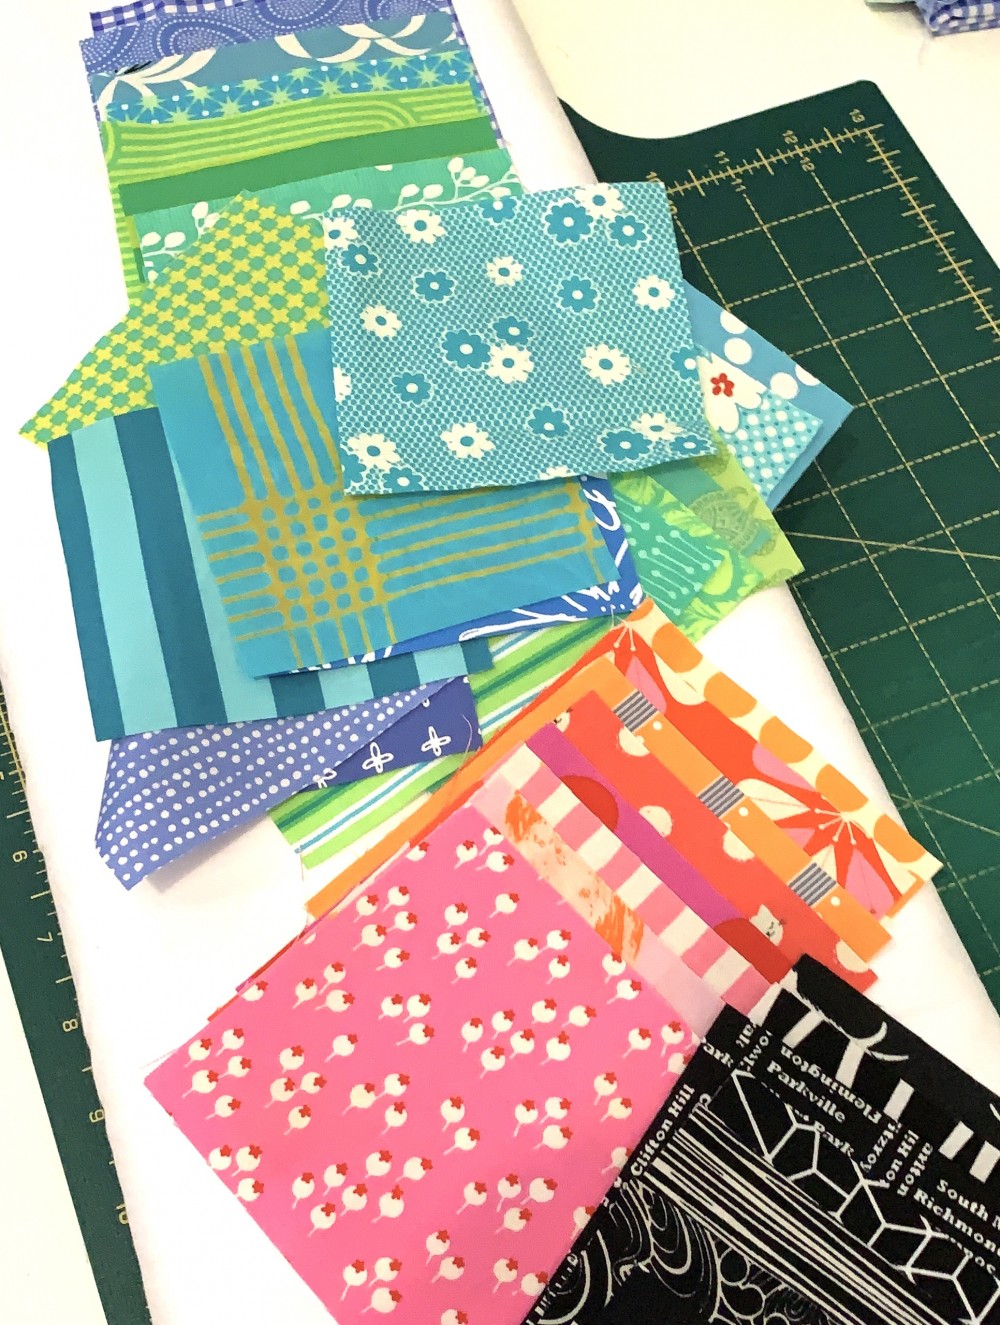
- Post a photo of your fabric pull (if you have one yet!) – in this newsletter we’ll talk a bit about colour and placement. If you’ve already decided on your fabric, posting a picture may help to inspire others.
- Now’s the time to buy up on fabric if it’s not in your stash – support for small businesses has never been more important and most fabric shops are selling online!
PLANNING YOUR QUILT:
Your first step is to decide what size quilt you are making. The Wake Me Up Quilt comes in 2 sizes, a throw size and a queen size.
The throw finishes at 56” x 56” and the queen size finishes at 84” x 84”. Lots of us are home at the moment and have a bit more time on our hands, but if you’re a bit time poor (can anyone say homeschooling?) then the throw size is perfect for a quick finish.
The next step is to decide on colours!
CHOOSING YOUR COLOURS:
Yay! Any excuse to buy some more fabric, right?
This week we are concentrating on choosing fabrics and cutting all the squares needed for this quilt.
The quilt is made up of 4 colour groups.
You may choose to make your quilt from solids or prints or a combination of both. You may also decide to go raid your scrap basket and go completely scrappy or choose 4 main fabrics in each colour. The beauty of this quilt is that you don’t have to go out and buy more fabric (or better still, stay in and order online) – you can raid your stash and make a gorgeous quilt!
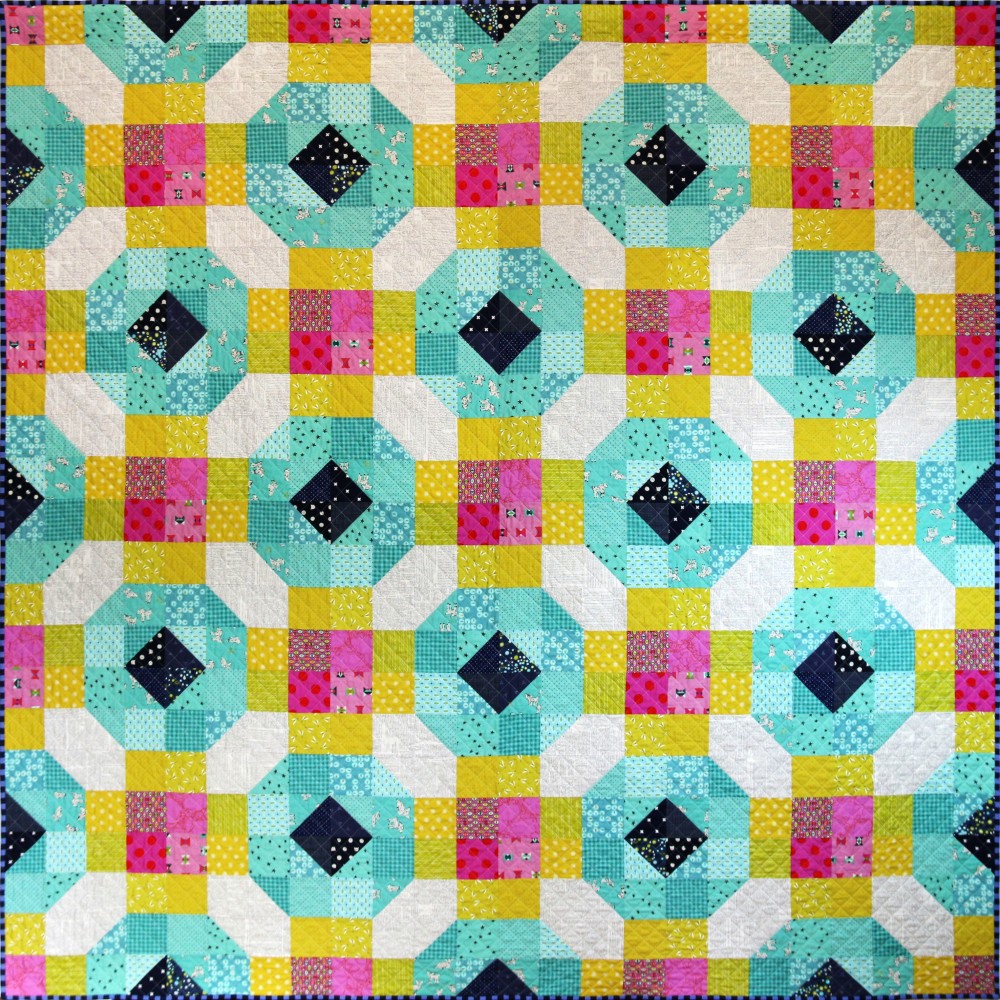
For my original quilt, I used aqua, navy, pink and yellow with a very subtle text print for the background.
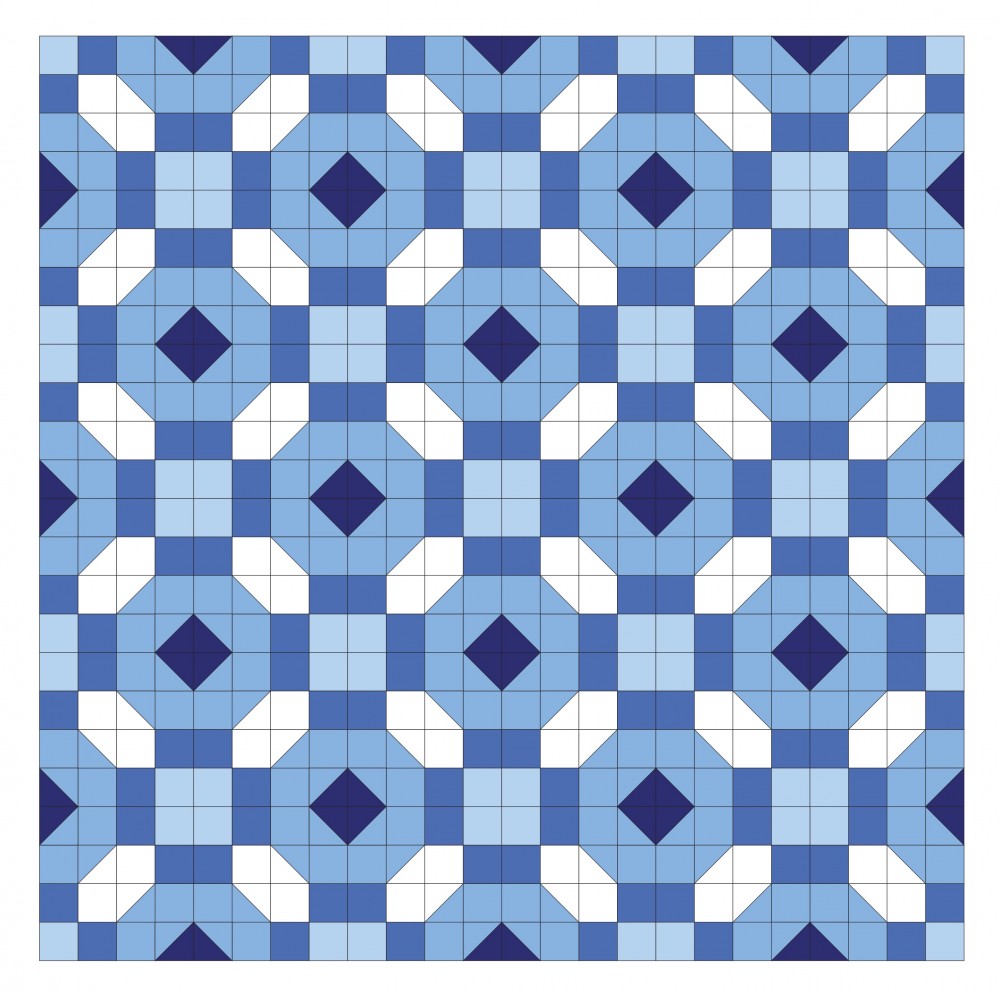
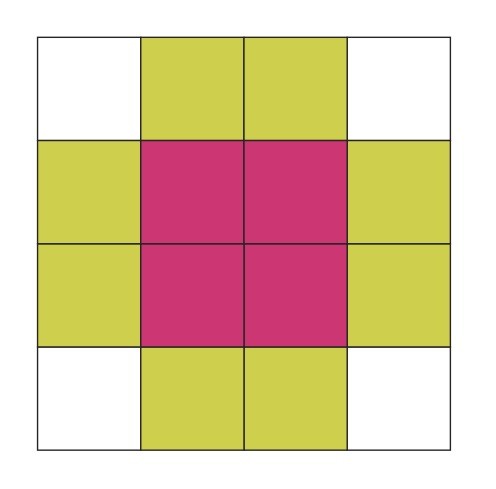
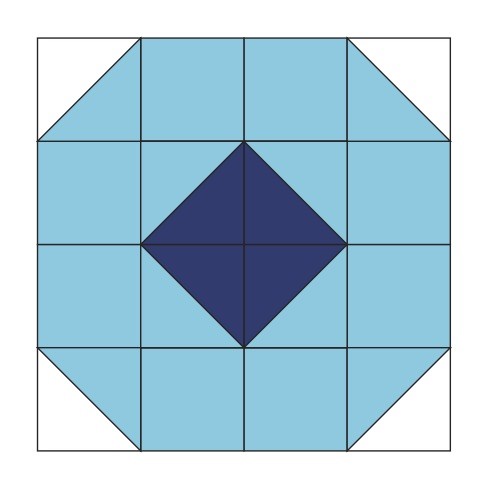
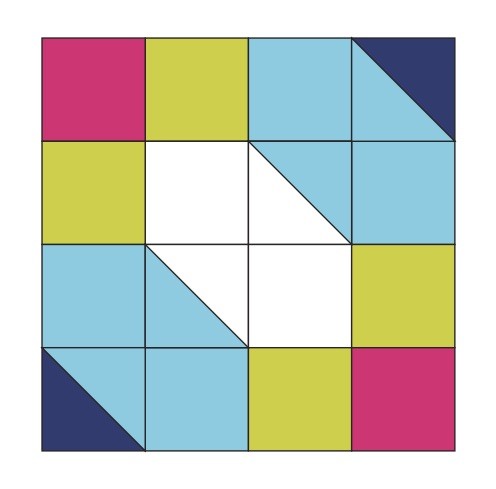
The key when choosing your colours groups is to choose colours that contrast well so the secondary patterns in the quilt are easy to see. The quilt has been designed to highlight 2 shapes – described as a circle block and a square block in the pattern – so the easiest way to find success with your quilts is to make sure there is contrast in these shapes.
A great way to work out if the colours you’re thinking of using work well in this quilt, is to use the colouring page from the pattern and have a play around with the colour placement.
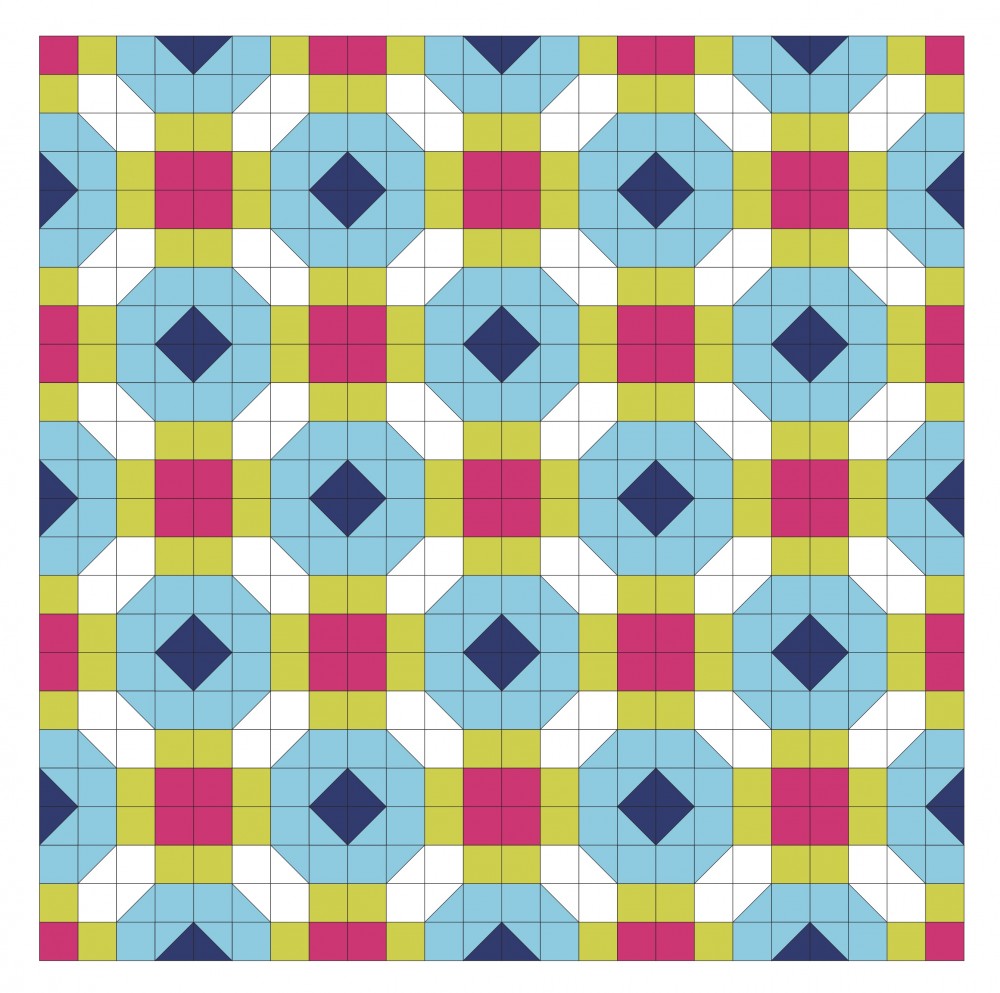
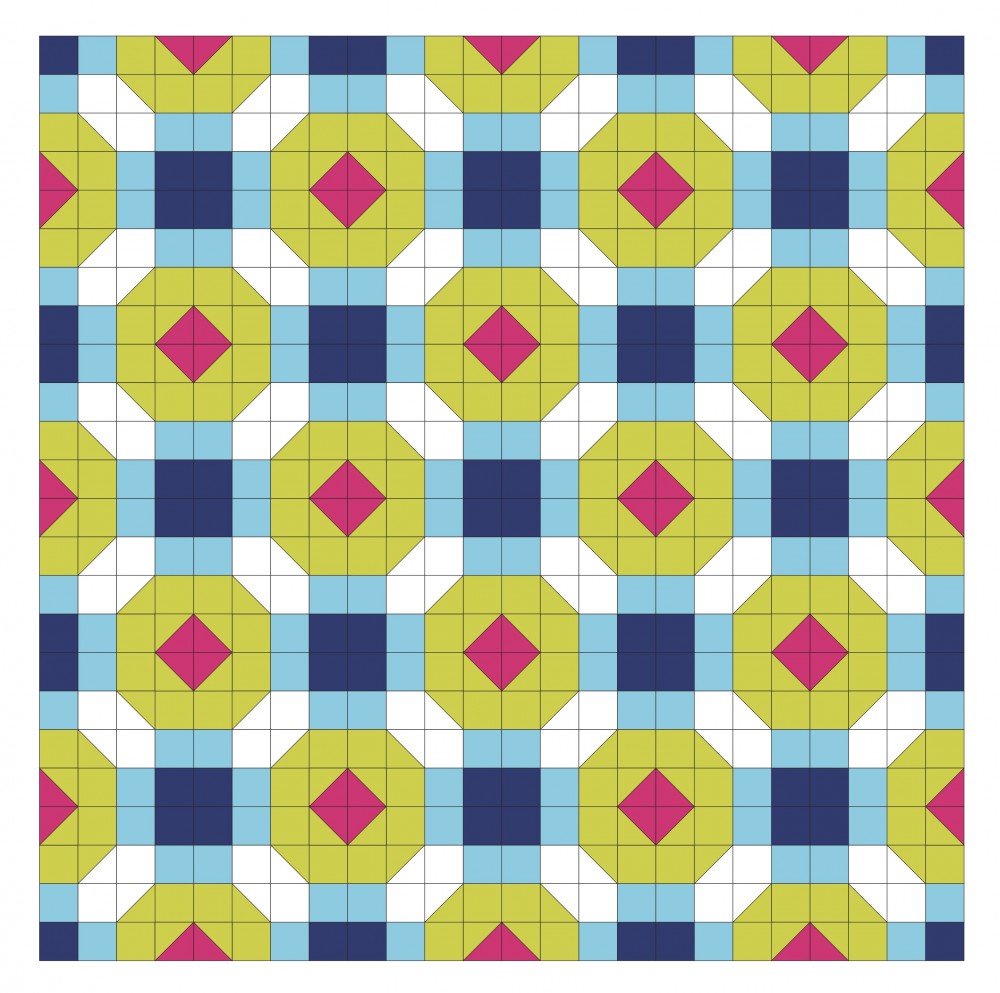
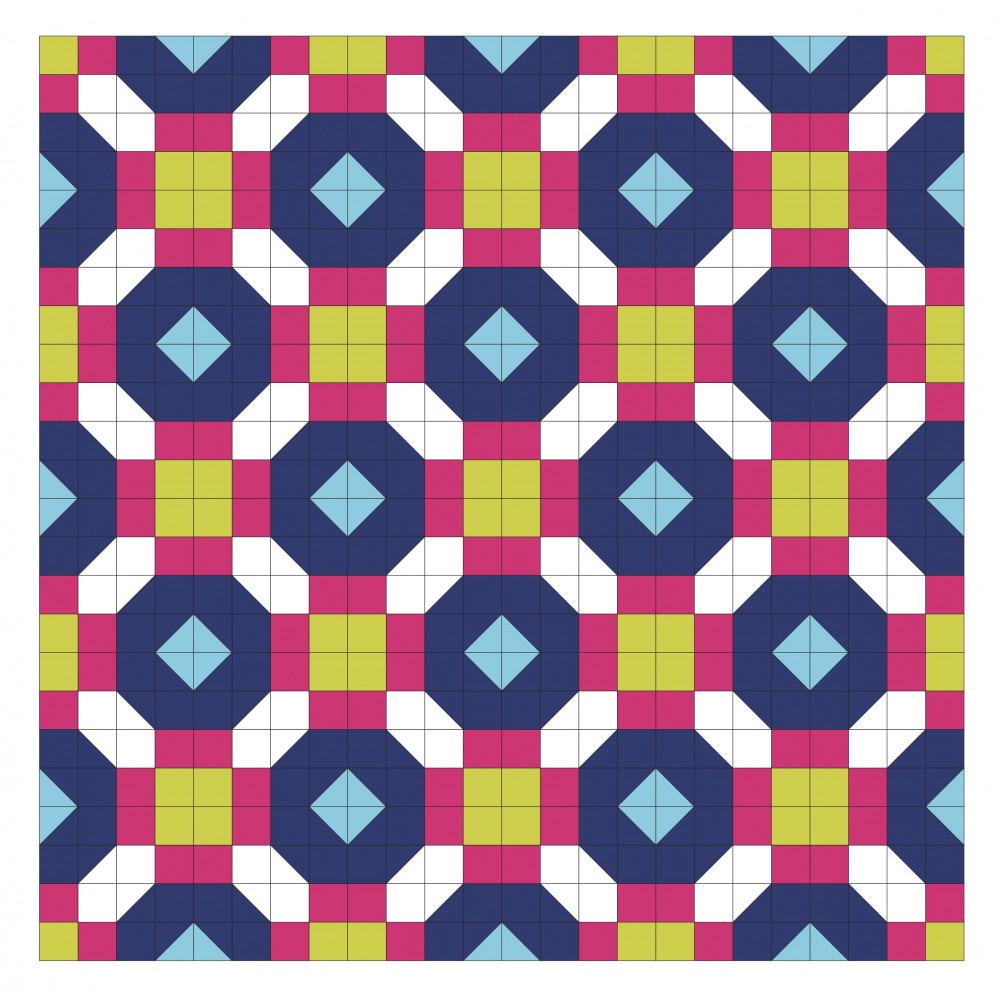
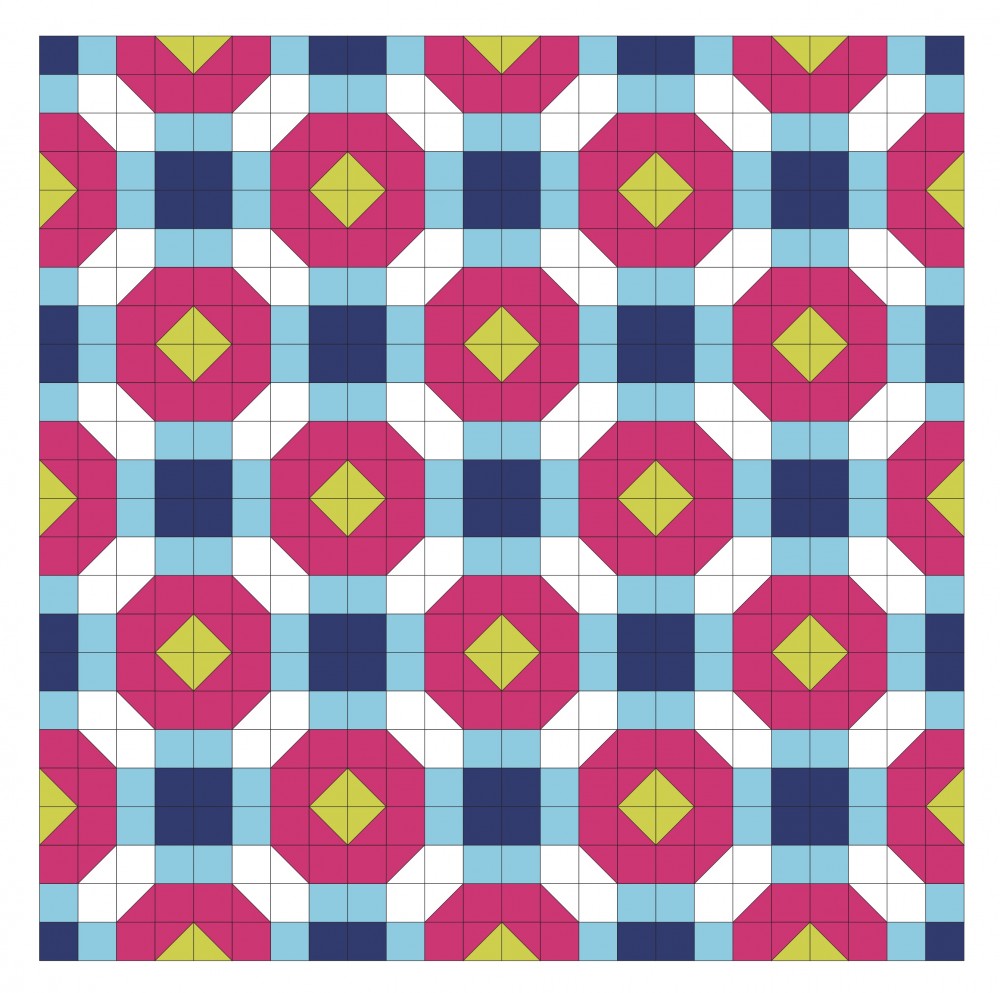
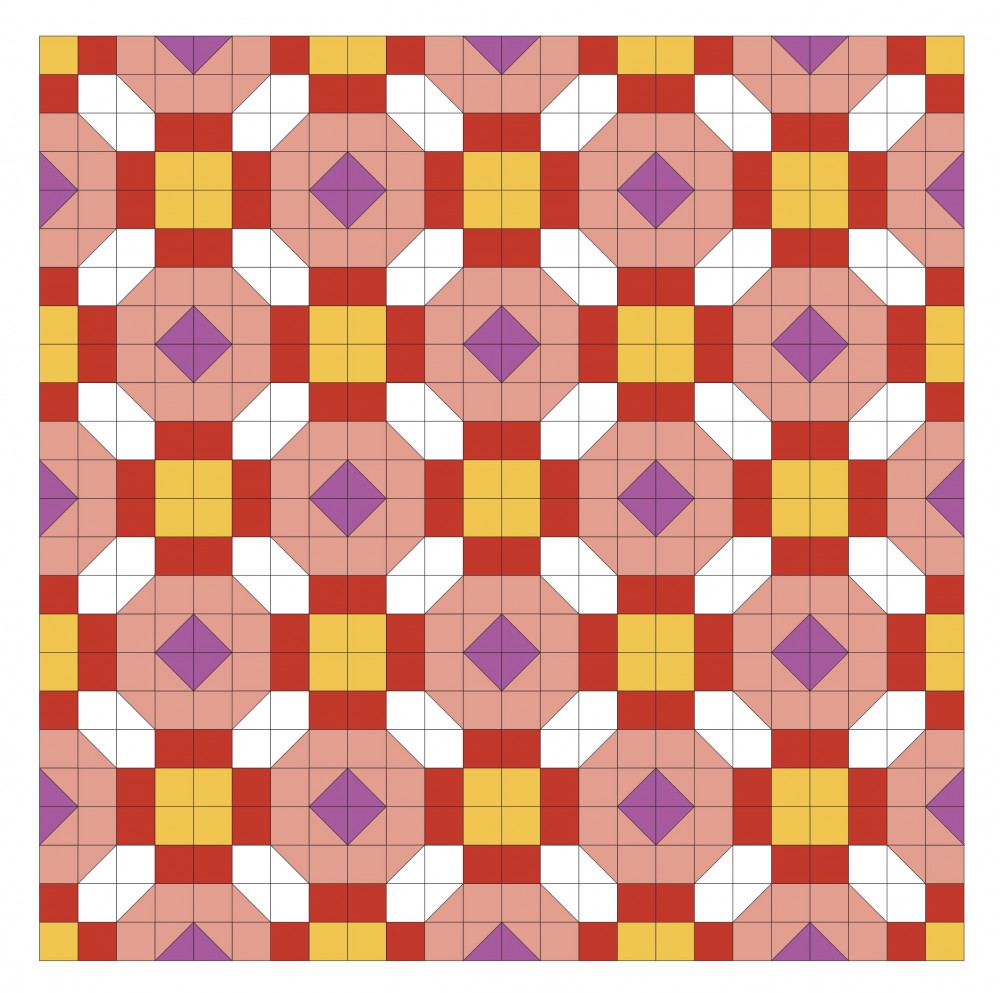
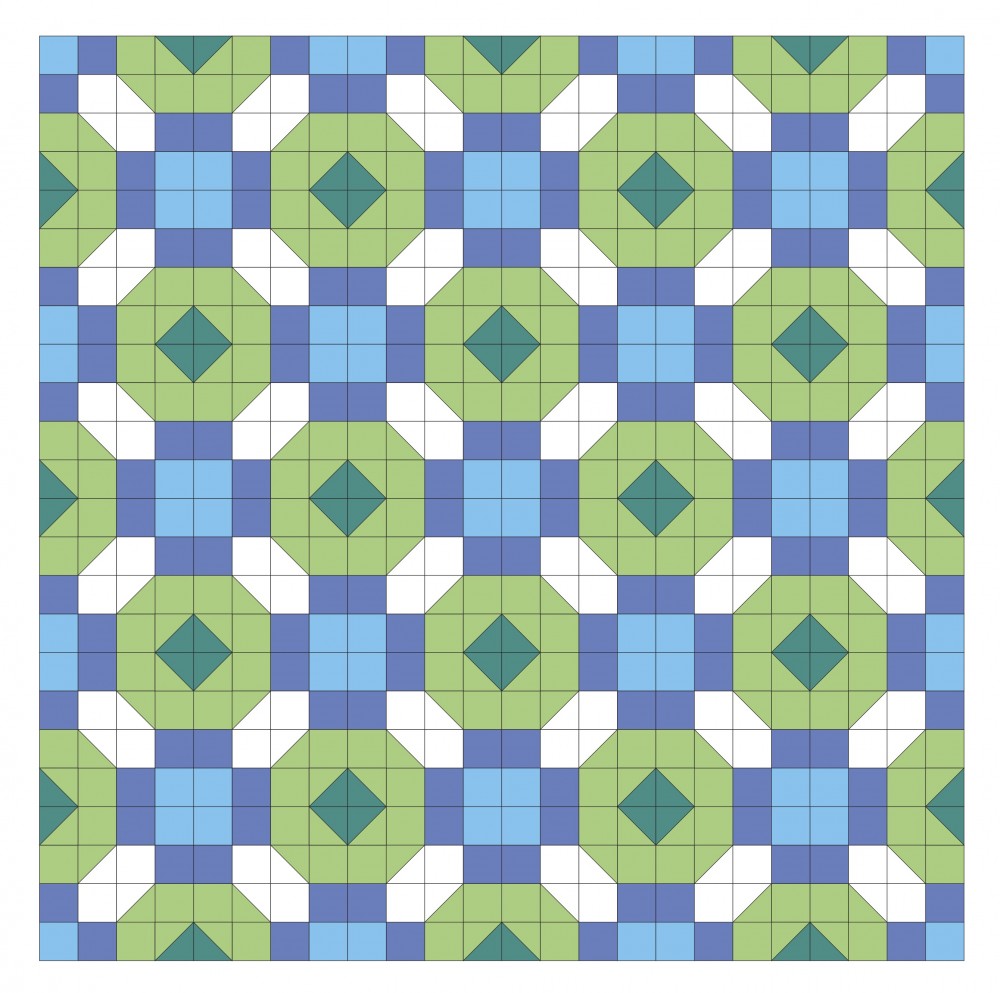
This quilt can look so different just by changing the placement of your colours. Take a look at the four images below. The first image is the same as my original quilt. The next 3 are the same colours in different positions. How different does the quilt look in the other pictures!
A great way to work out if the colours you’re thinking of using work well in this quilt, is to use the colouring page from the pattern and have a play around with the colour placement.
This quilt can look so different just by changing the placement of your colours. Take a look at the four images below. The first image is the same as my original quilt. The next 3 are the same colours in different positions. How different does the quilt look in the other pictures!
WAKE ME UP INSPO
There are so many lovely colour combinations to choose from. I’ve come up with a few combinations to help inspire those who are still struggling. Word of warning though, if you’re like me you’ll want to make all the versions!
There are so many lovely colour combinations to choose from. I’ve come up with a few combinations to help inspire those who are still struggling. Word of warning though, if you’re like me you’ll want to make all the versions!
WARM QUILT
COOL QUILT
TONAL QUILT
Sidenote – if you’re finding you’re a bit overwhelmed with all the options, you can also buy a kit from the ones curated by The Quilt Shop or Millrose Quilting and Gallery.
MY QUILT
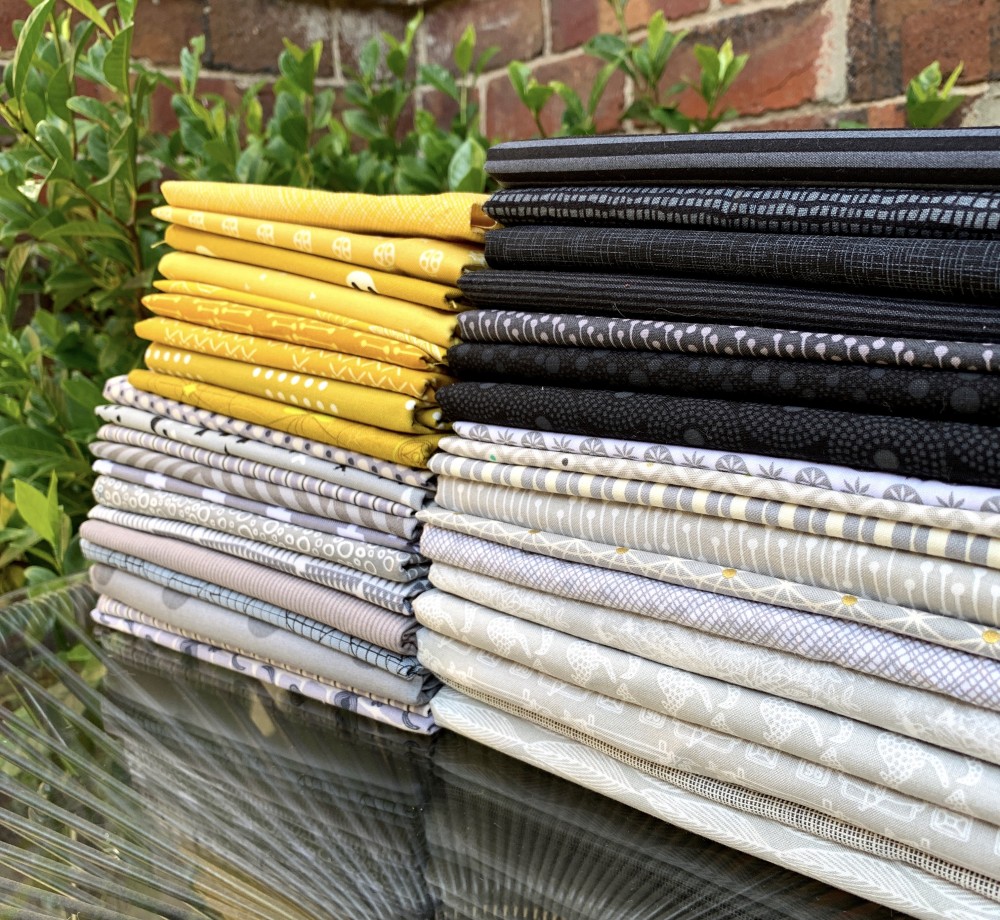
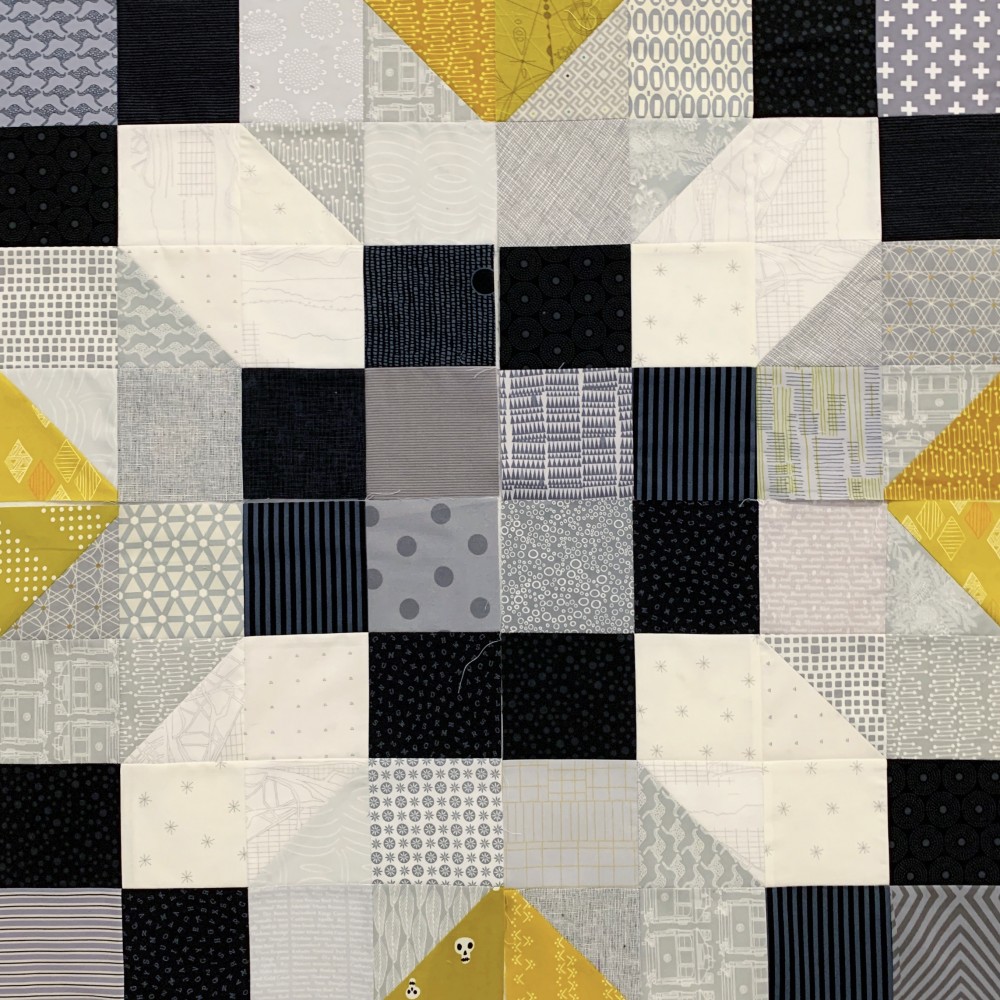
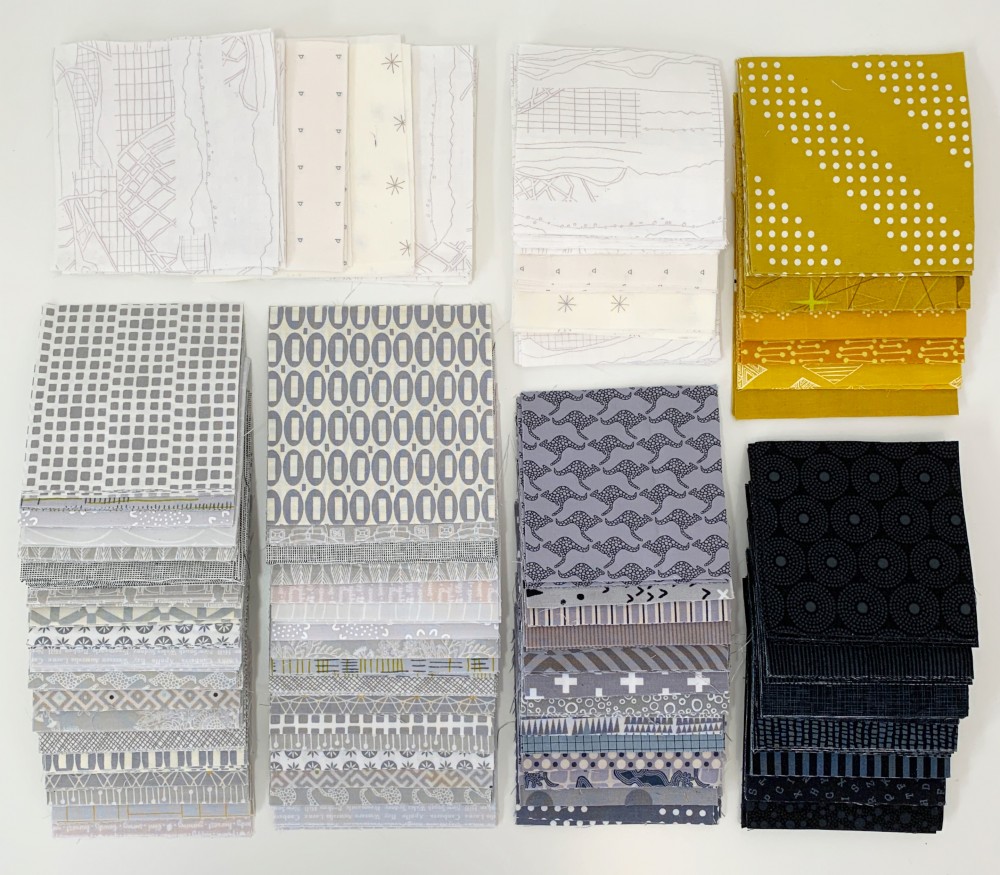
The quilt I’m making for the sew along is for my parent's bedroom in their new, very modern house. I'm using a subtle palette of greys, blacks and yellows. The plan is to make a queen size, but I might even decide to go BIG! By making 64 blocks (8 x 8) my quilt will end up at 107" square. My folks have a king size bed so the queen size won’t be big enough.
I’m excited about these colours though!
MY QUILT
The quilt I’m making for the sew along is for my parent's bedroom in their new, very modern house. I'm using a subtle palette of greys, blacks and yellows. The plan is to make a queen size, but I might even decide to go BIG! By making 64 blocks (8 x 8) my quilt will end up at 107" square. My folks have a king size bed so the queen size won’t be big enough.
I’m excited about these colours though!
CUTTING
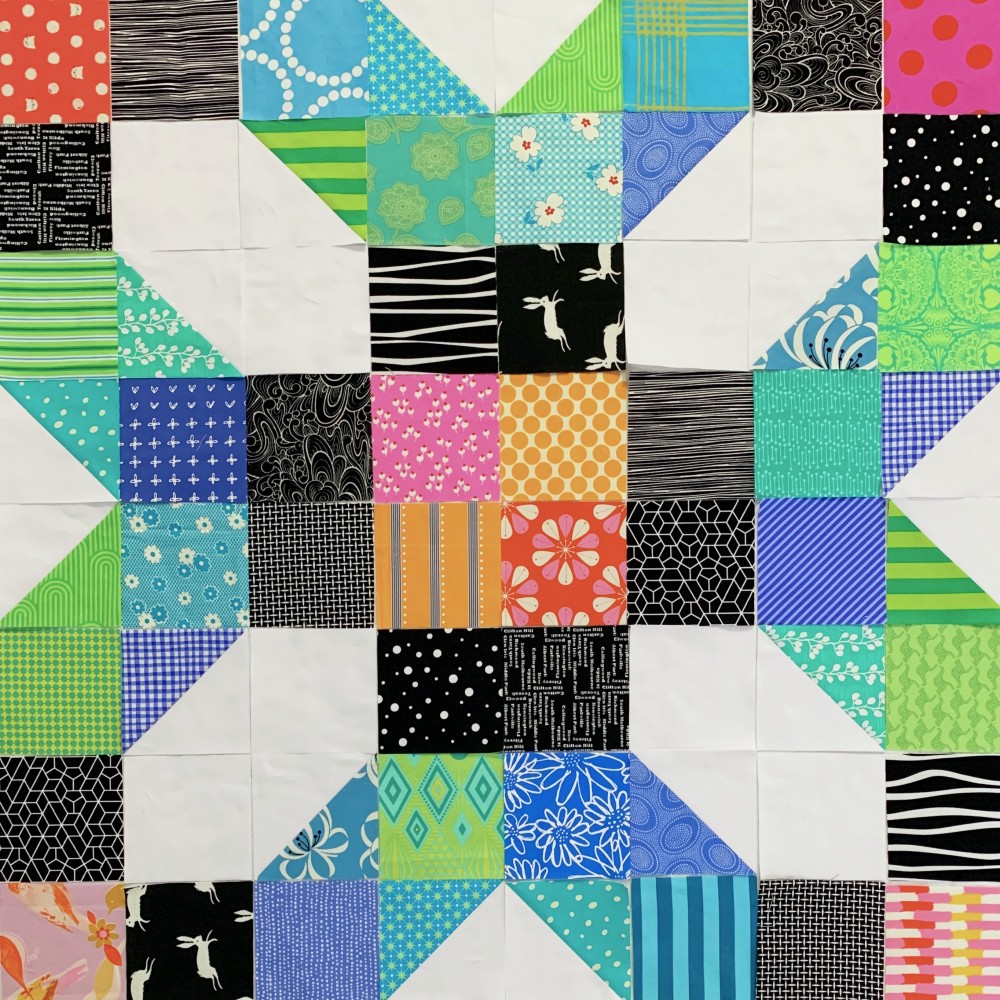
Have you ever noticed that there are two kinds of quilters? There a quilters who enjoy making blocks and then there are quilters who want the recipe for the fastest way to put a quilt together – the chain piecers.
Well in this pattern, I have catered for both.
If you love to make one block at a time and then pieced the blocks together down the track, then I’ve got you covered. You’ll be making the circle blocks and square blocks!
If, on the other hand, you want to chain piece the quilt and get this thing done fast, then look no further! There’s a construction method to satisfy you too.
CUTTING TIPS
If your plan is to follow the first method of construction or you’re working from a limited number of fat quarters in each colour group, all the cutting instructions for the throw and queen size quilts are set out on page 1 and 2 of your pattern. You’re basically cutting out heaps of squares!
If your plan is to follow the first method of construction or you’re working from a limited number of fat quarters in each colour group, all the cutting instructions for the throw and queen size quilts are set out on page 1 and 2 of your pattern. You’re basically cutting out heaps of squares!
On the other hand, if you’re planning on making a scrappy quilt using lots of different fabrics, then your first step is to make note of how many squares you need for each colour group.
That part is simple – I’ve added the total number of squares needed beside each colour on page 1 and 2 of your pattern.
That part is simple – I’ve added the total number of squares needed beside each colour on page 1 and 2 of your pattern.
Next, gather all your fabric pieces and scraps together and count them. Then divide the number of squares you need for each colour by the number of fabrics you have and you’ll know how many squares you need to cut from each!
Example:
In the queen size instructions, you will need a total of 72 of the “pink fabric” squares.
Let’s say you have 9 different pink fabrics that you’d like to use.
If you teleport yourself back to grade 4 maths (or ask your home schooled kids!) then a simple calculation will reveal that you’ll need to cut 8 squares from each of your 9 pink fabrics!
Follow this simple rule for each of the remaining colours.
*PLEASE NOTE*
The pattern calls for you to cut larger squares from the “aqua”, “navy” and “background” fabrics to make Half Square Triangles (HSTs).
Lots of quilters like to cut their HSTs bigger and then trim them down to size. Just remember when you’re trimming that your unfinished HSTs need to be 4” square.
If you have any questions, you can always email me!
Thanks so much for coming on this ride with me. The world is a strange place at the moment and I hope this Sew-Along brings you some joy from your home and a sense of community as we all physically distance ourselves. Stay safe and let’s have some fun!
Emma x