Harlequin Stars - Piecing Tutorial
Aug 18, 2014 - 5:11pm

1

1
I have written this tutorial to help with the piecing together of this block.
There are 16 points all meeting in the centre and with seam allowances it can get tricky.
This tutorial will have a few tips and tricks I use to get all the points matching in the centre.
Grab the Harelquin Stars Pattern here.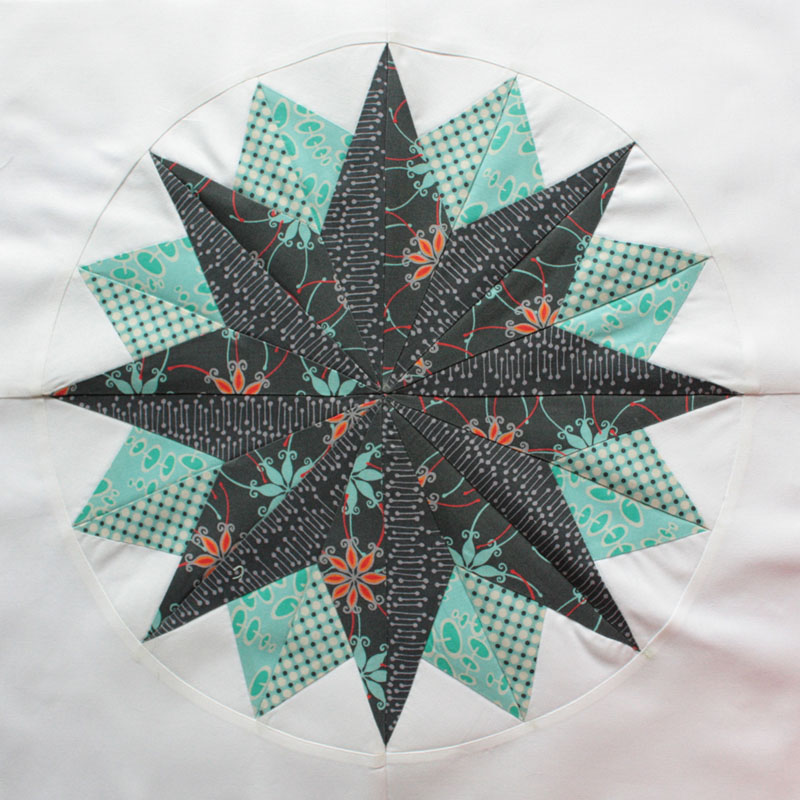
To start piecing the star together you need to make the points.
This includes 8 right points and 8 left points.
These can be completed by the freezer paper method of foundation piecing which I talk about in my pattern or your preferred foundation piecing method.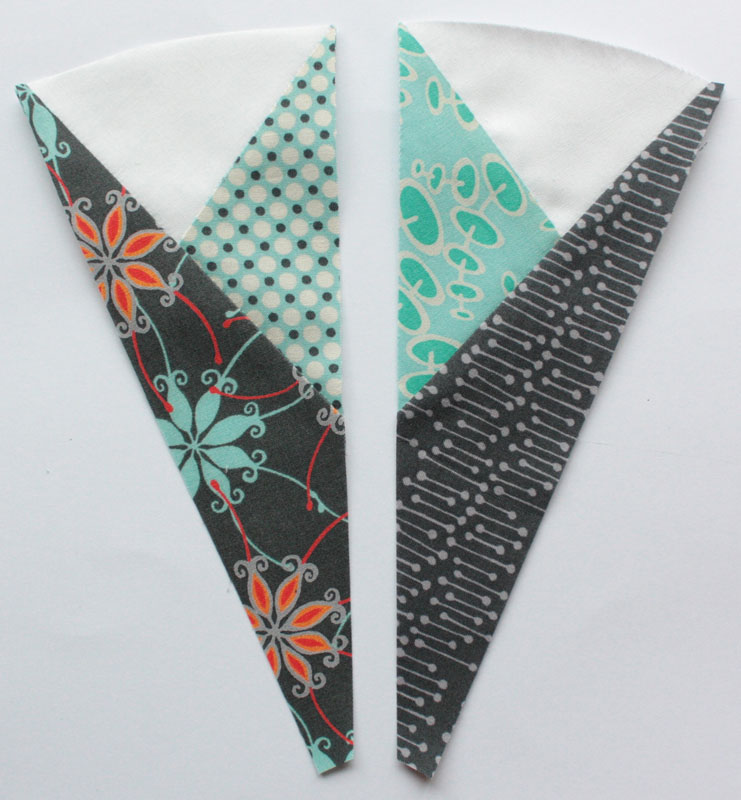
You then need to join these two pieces togther.
I like to pin and the top seam and then at the middle to make sure the seams meet.
Start sewing from the wide end down to the small end.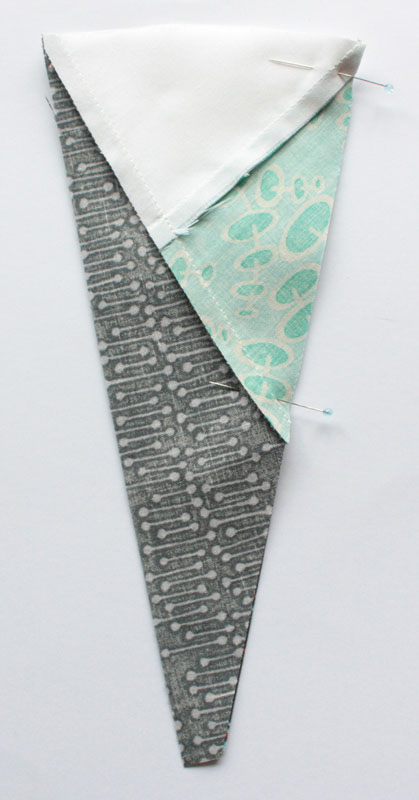
After you have sewn the points together, you need to trim the seam allowance at the base.
I just trim with my scissors making sure I don't clip the stitching.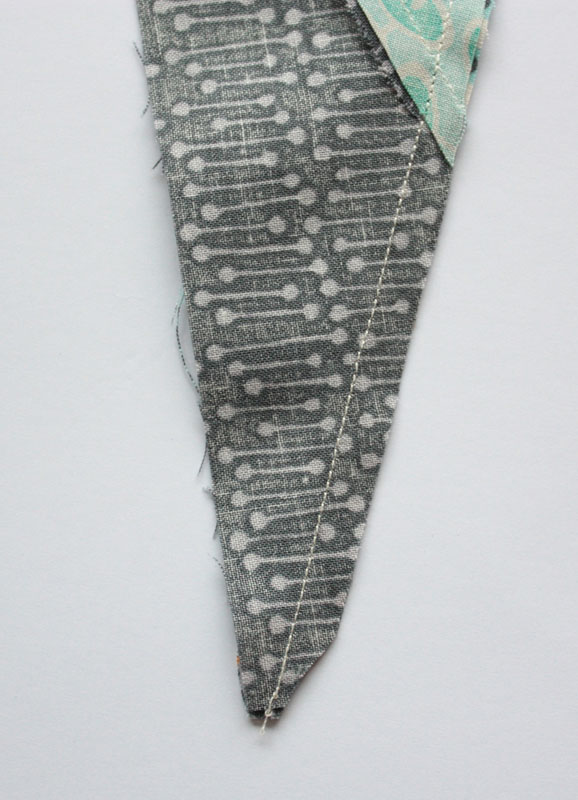
Your completed unit should look like this.
Make sure to iron in one direction and repeat with the other 7 units required for this block..jpg)
You then need to sew two of these untits togtether to make a quarter block.
Match the seams at the top and pin, and do the same at the small end.
The seams should lock togther as you ironed them in opposite directions.
Once again after you have sewn the seam from the wide end to the small end, trim the seam allowance making sure not to clip the seam.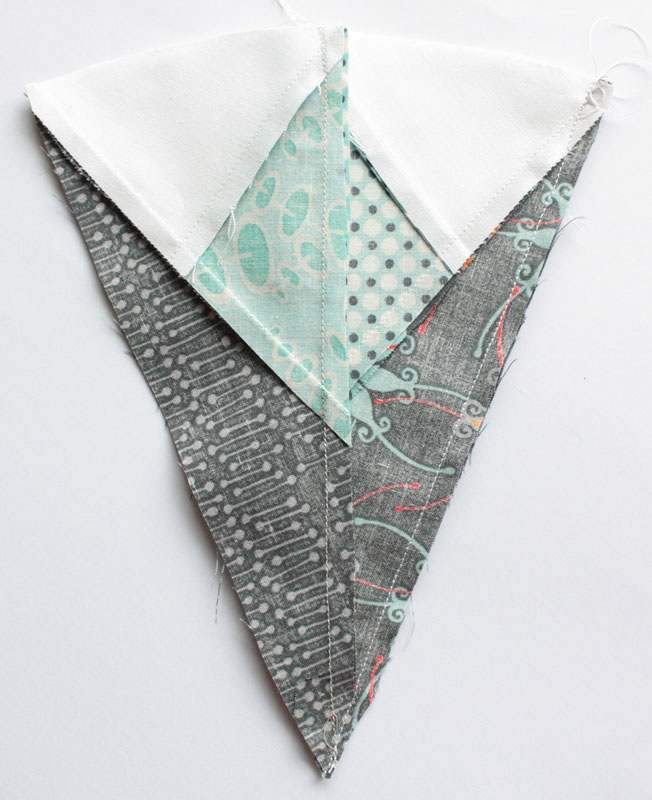
The finished quarter should look like the photo below.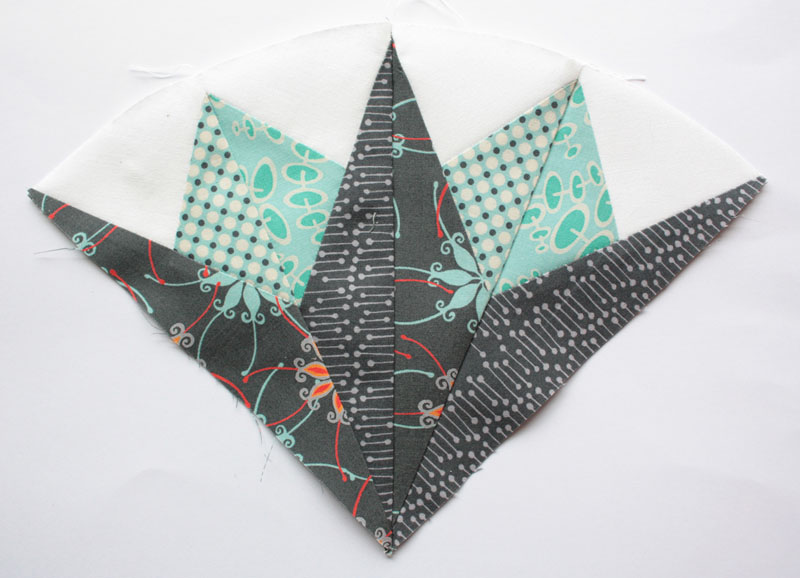
Remember to iron the seams in all the same direction.
See photo below.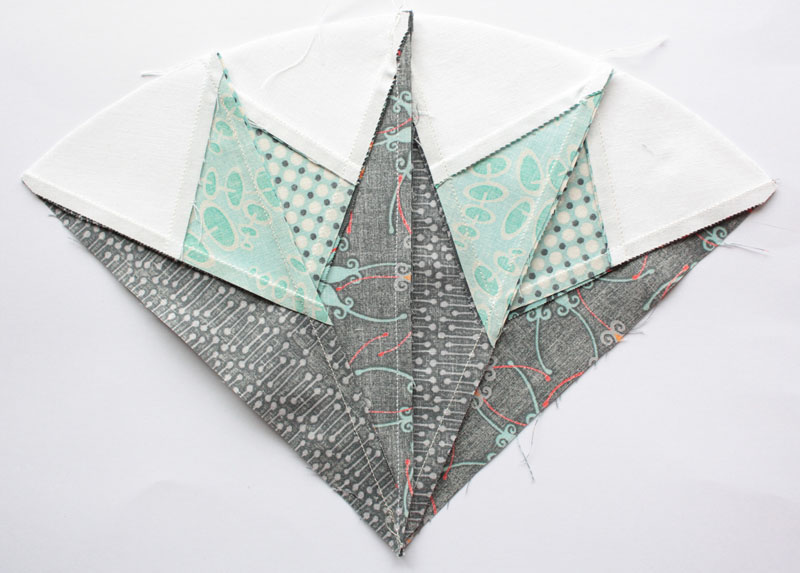
Here is a close up of where all the seams meet at the small end.
This is what yours should look like.
Make 3 more of these quarters to complete the star.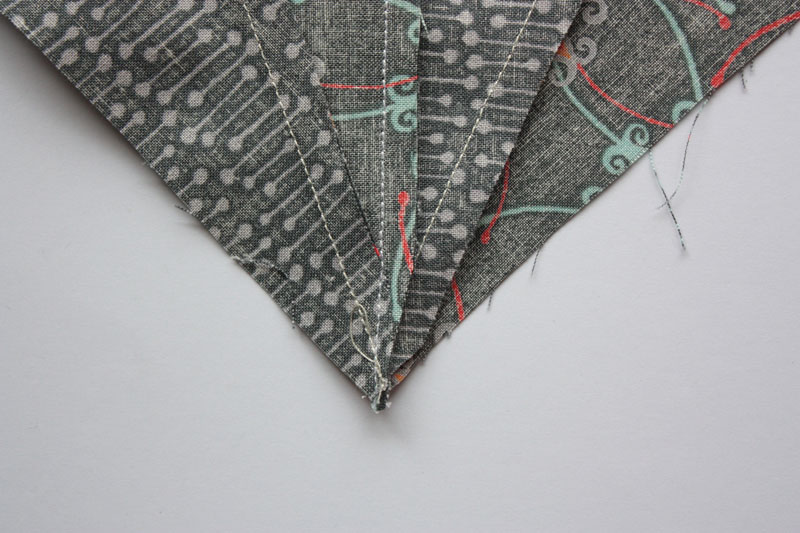
Add the drunkard's path piece to make the block into a square.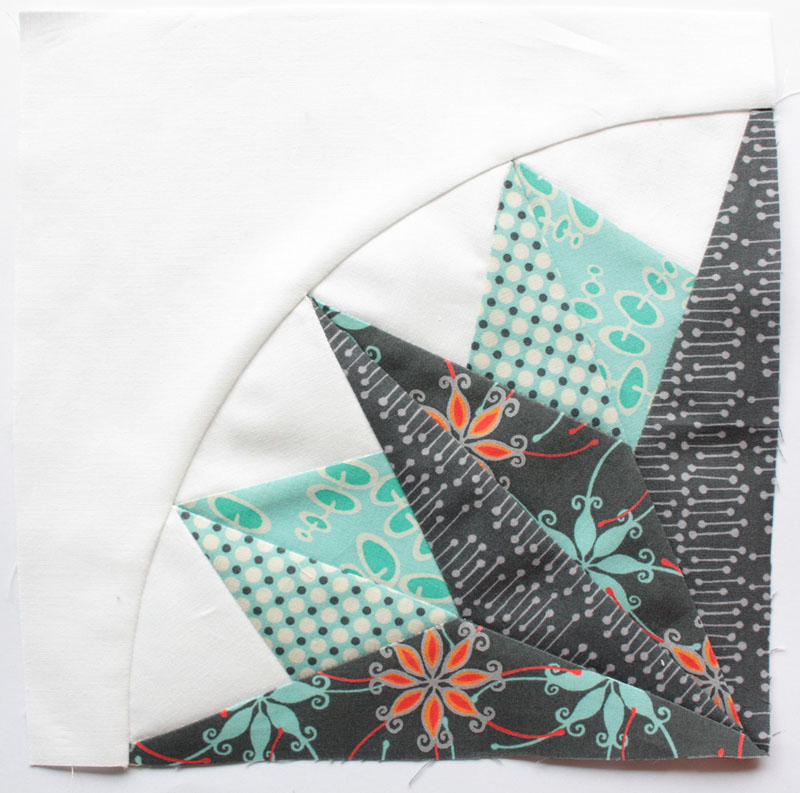
Here's a photo of the reverse side too.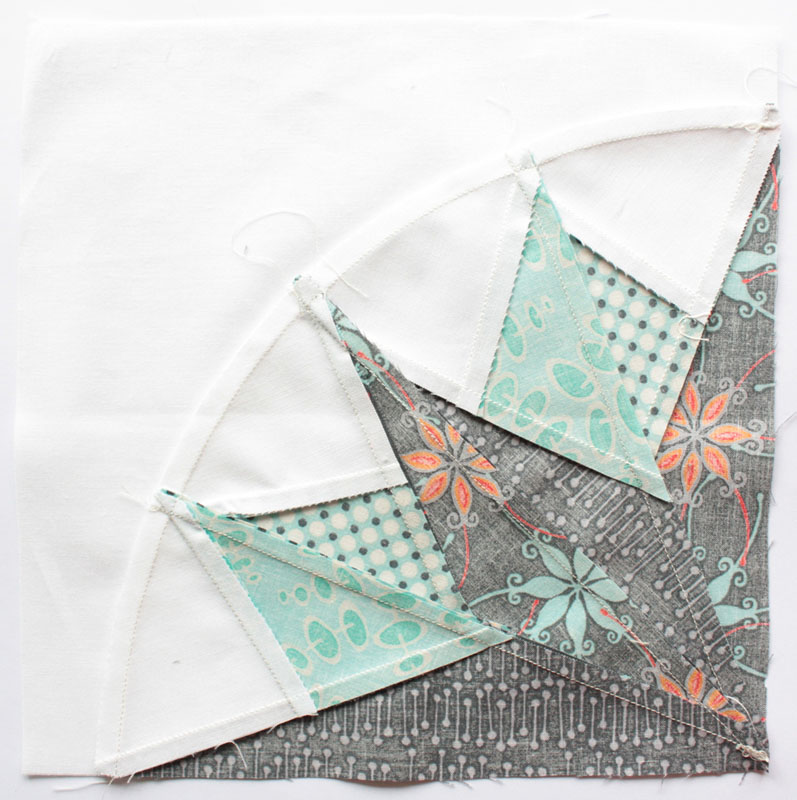
Now take two of these quarters and sew them togther to create a half.
Use pins to match the seams and sew from the outside into the middle of the block.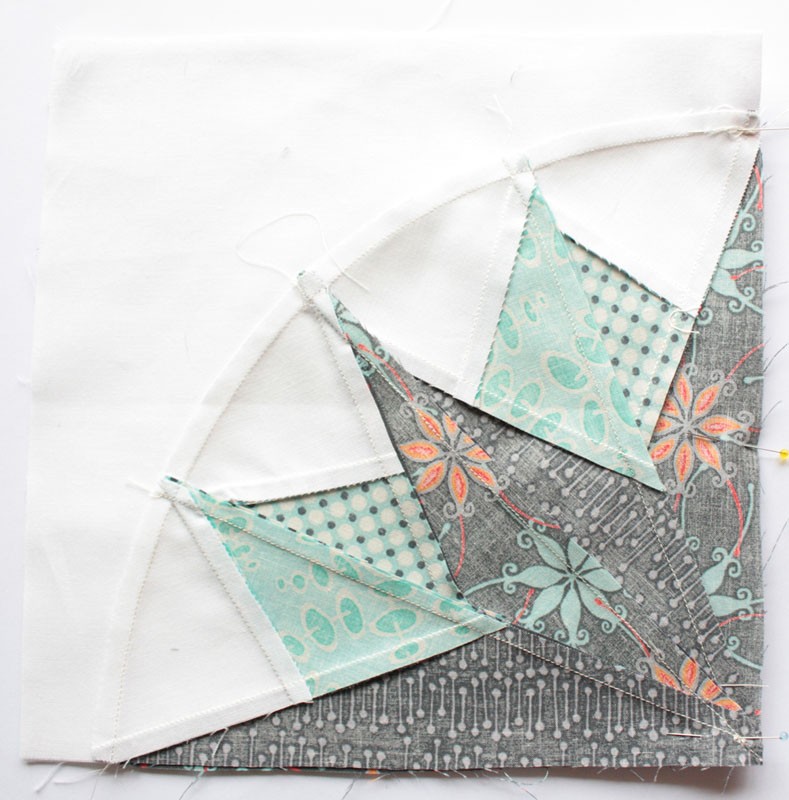
This time iron the seam in the opposite direction to the other seams.
See the photo below.
For some reason this helps when piecing the 4 quarters togther.
Repeat to create another half.
Then you need to sew the two halfs togther.
Use pins to match the seams, paying lots of attention to the centre.
Here's a close up of the pinning.
I like to pin either side of the seam, it stops any movement when you sew.
You can also use fork pins.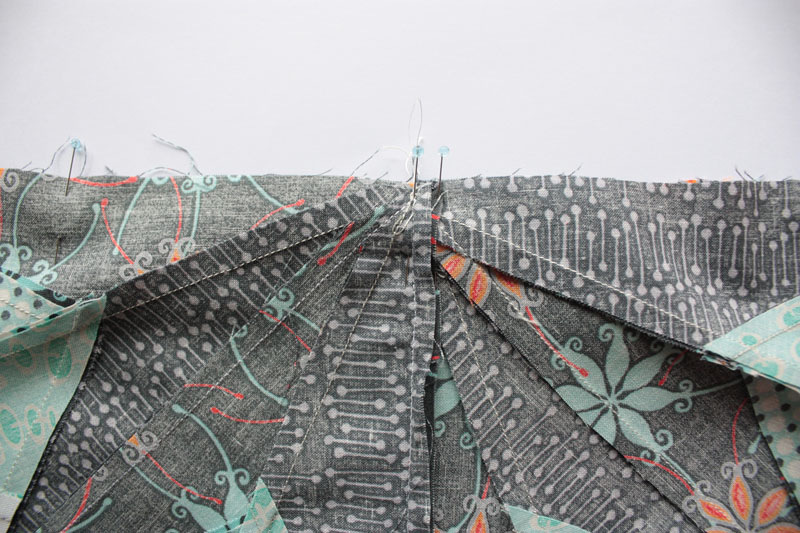
Once sewn, iron to one side and press well.
I also use "Best Press" to help achieve a flat block.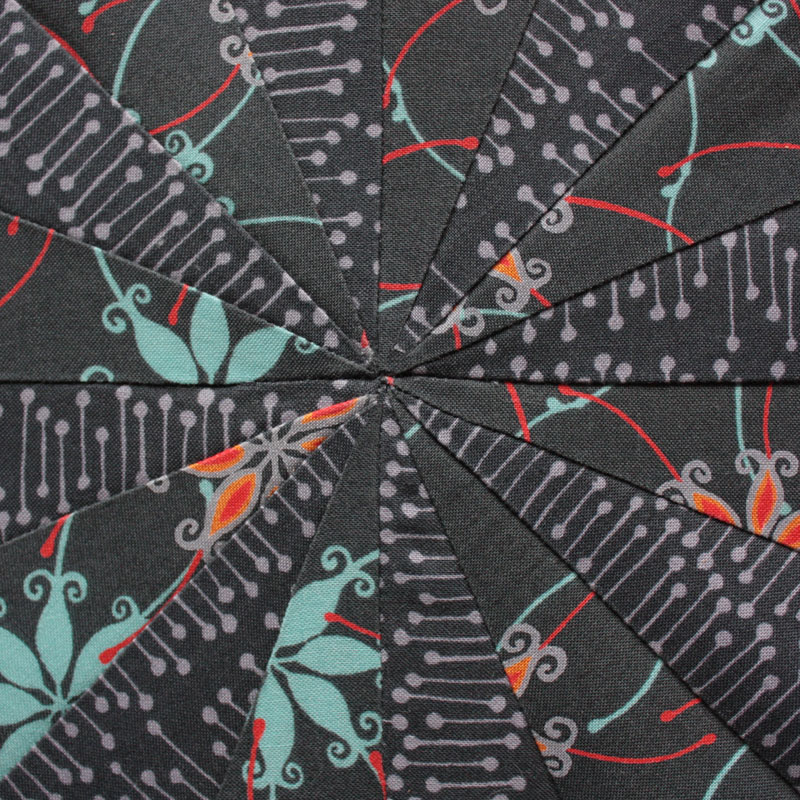
I hope these tips help you to create a block with neatly matched centre points!
Sep 1, 2015 - 5:58pm
Eleonor: I am so glad I followed anhtoer link and found your site again, and now your blog. I admire your work, and as a fellow doll maker, I also admire your generosity of spirit, and immense creativity. the mice are darling. I am having a baby this year, and I think I will try and make a mobile of them.


