
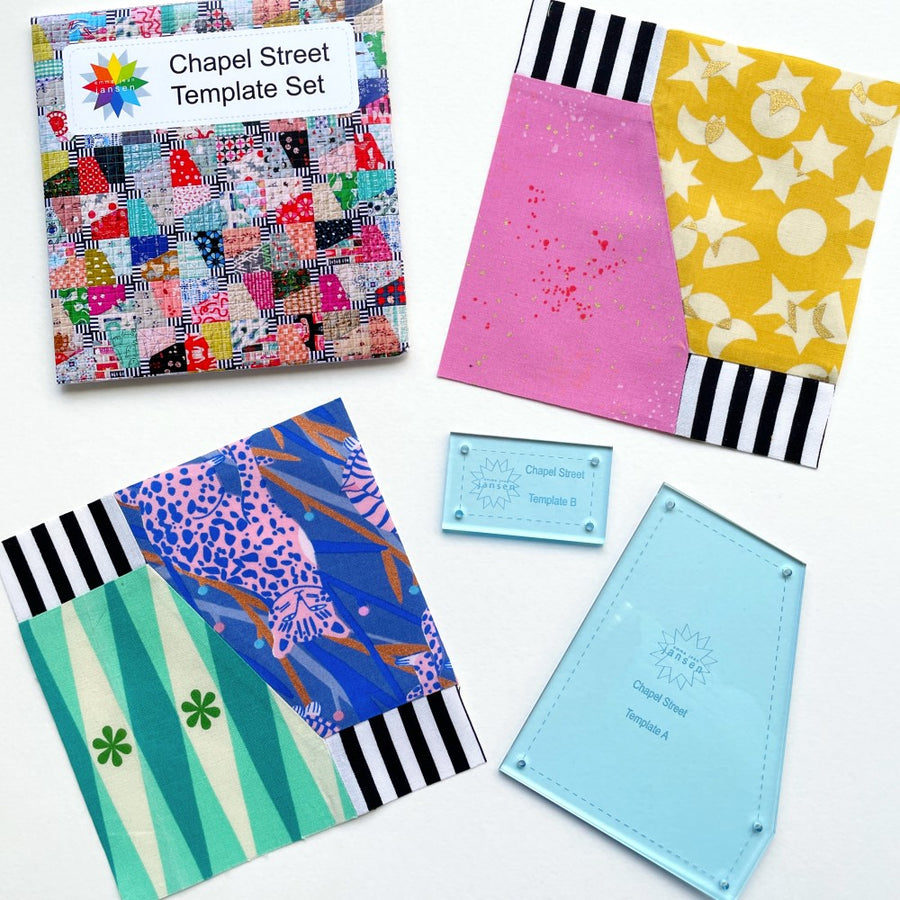
Chapel Street Quilt - Machine Piecing Tips
My Chapel Street quilt was designed as an English Paper Piecing project, however that dosen't mean it can't be pieced by hand or even machine. I've made a little step by step tutorial to walk you thro
My Chapel Street quilt was designed as an English Paper Piecing project, however that dosen't mean it can't be pieced by hand or even machine. I've made a little step by step tutorial to walk you thro
I have written this tutorial to help with the piecing together of this block. There are 16 points all meeting in the centre and with seam allowances it can get tricky. This tutorial will have a few ti
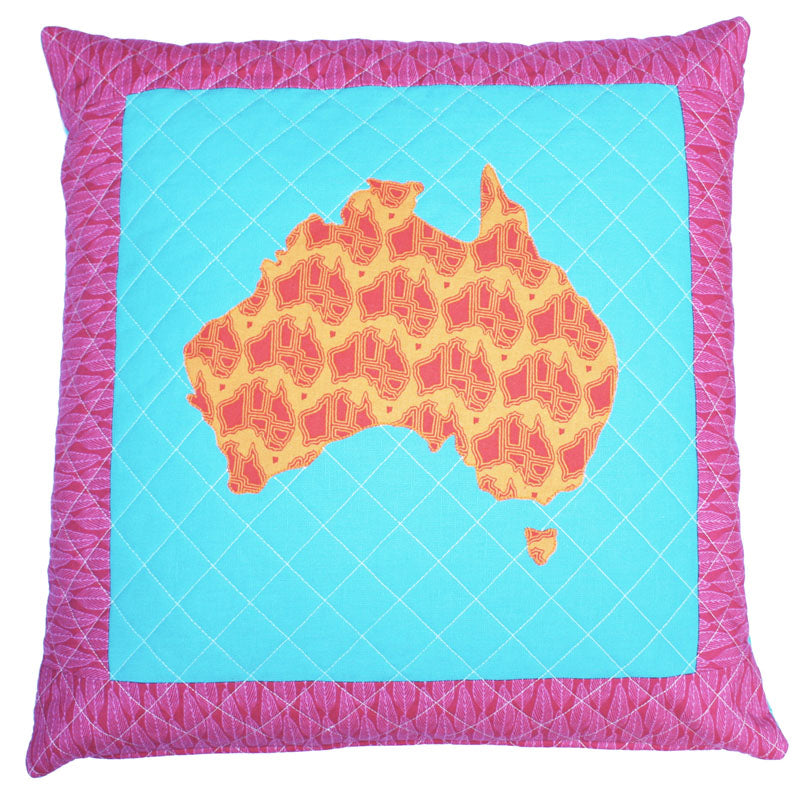
Map Of Australia Cushion Finished size: The cross hatch quilting shrinks the cushion front and back in, to make a perfect fit for a 16” (40cm) cushion insert. REQUIREMENTS: 30cm zipper (approx.) Iron

A few months ago I was asked to create a project using the beautiful range of Liberty Fabrics . I chose to create a pair of cushions using raw edge applique and circles. I hope you enjoy making these

A free pattern to make your own Kangaroo Cushion from Terra Australis

This is a re-post of my simple Rainbow Scrap Quilt Tutorial from my old blog! I recently made a quilt using all my colourful scraps. Whenever I have fabric left over and it's too small to put into the
A couple of days ago I posted a photo on instagram showing how I make quilt labels. I was asked to do a tutorial on my method so here it is! I either write the label by hand or print them on...