Week 2 - Kiss Goodnight Sew Along
Feb 3, 2022 - 8:15pm

1

0
Week 2
Welcome to Week 2 of the Kiss Goodnight Stars Sew Along.
This week is all about cutting your fabrics, making half square triangles and getting organised to sew the blocks.
If you have just joined the SAL, welcome! Be sure to grab the pattern, read up on all the details and choose your fabrics soon so you can catch up and join in the fun!
SHARE ON INSTAGRAM
Don’t forget to post a pic of your cut fabrics to IG and be sure to the use the #kissgoodnightquiltSAL and #kissgoodnightquilt hashtags to make it easier for others to find your photos.
Don't worry if you’re ahead, or you see other people sewing blocks already, this is supposed to be fun. If you feel like sewing, go for it. This sew along is all about enjoyment so there are no rules, stick to the schedule or move ahead, do what's right for you.
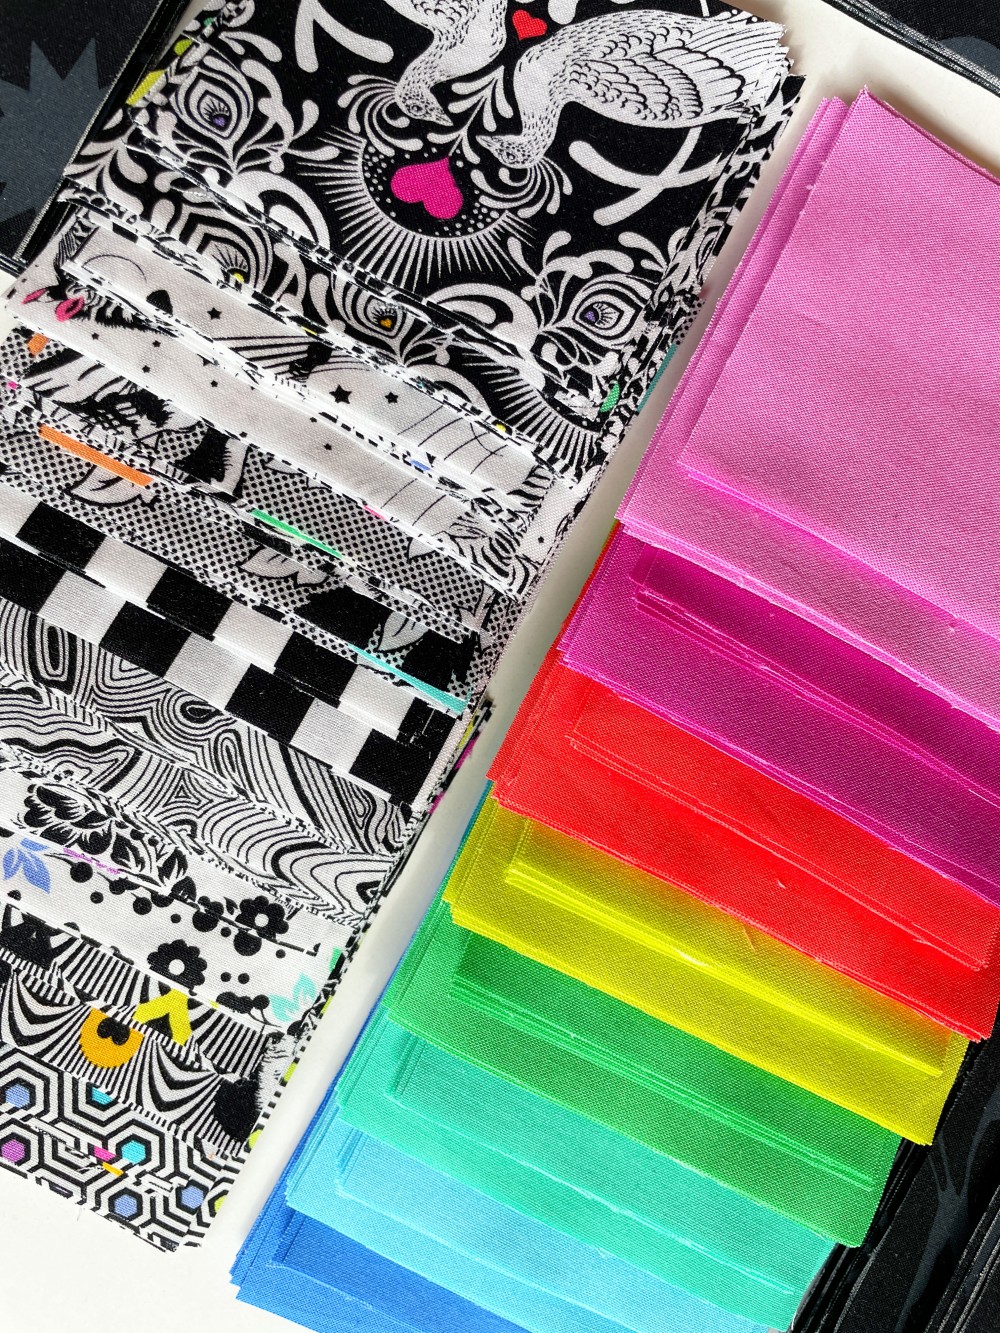
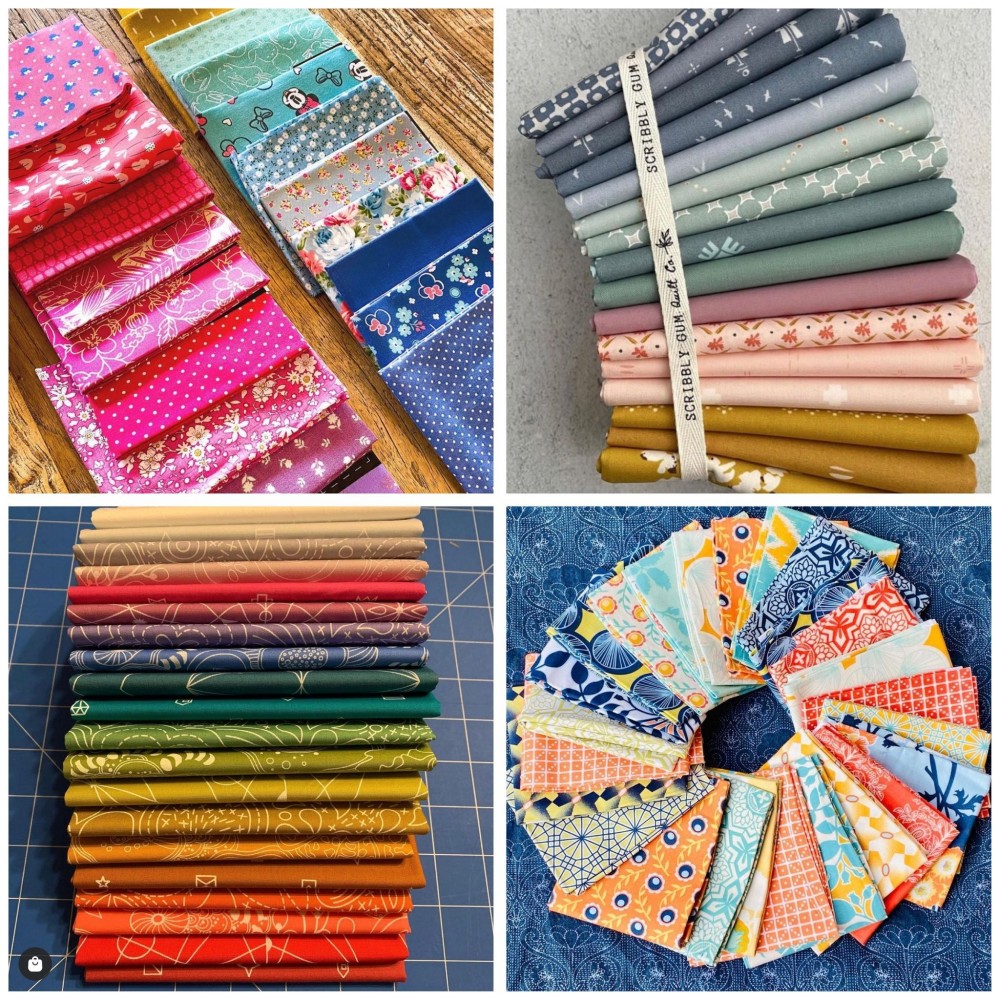
There have been some fabulous fabric combos popping up on Instagram and in the Facebook group and I'm excited to watch these quilts come to life. Check out some inspiring fabric pulls below.
CUTTING TIPS
This quilt is made up of squares and HST's, so you’re basically cutting out heaps of squares! Make sure that blade is sharp and get those fabrics ironed, then brace yourself for lots of cutting. Follow the cutting out instructions for the size quilt you are planning to make in the pattern. To speed up cutting I like to cut 4 layers at a time. I know this can be a bit daunting but I promise if you have a nice sharp blade it's easy. Just remember to concentrate because if you make a mistake, you will make it 4 times!!
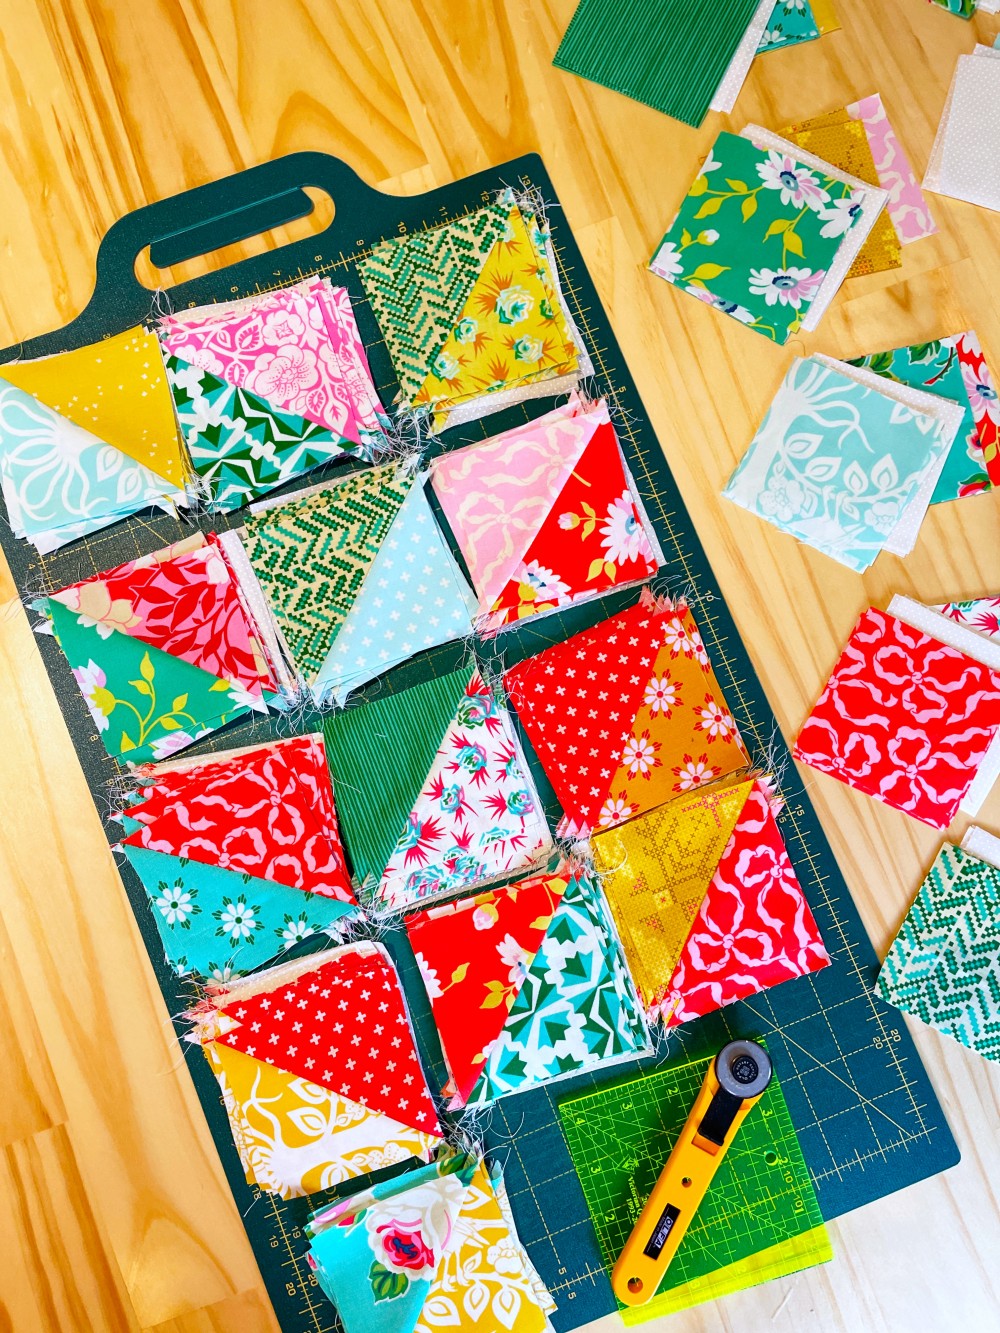
ORGANISATION
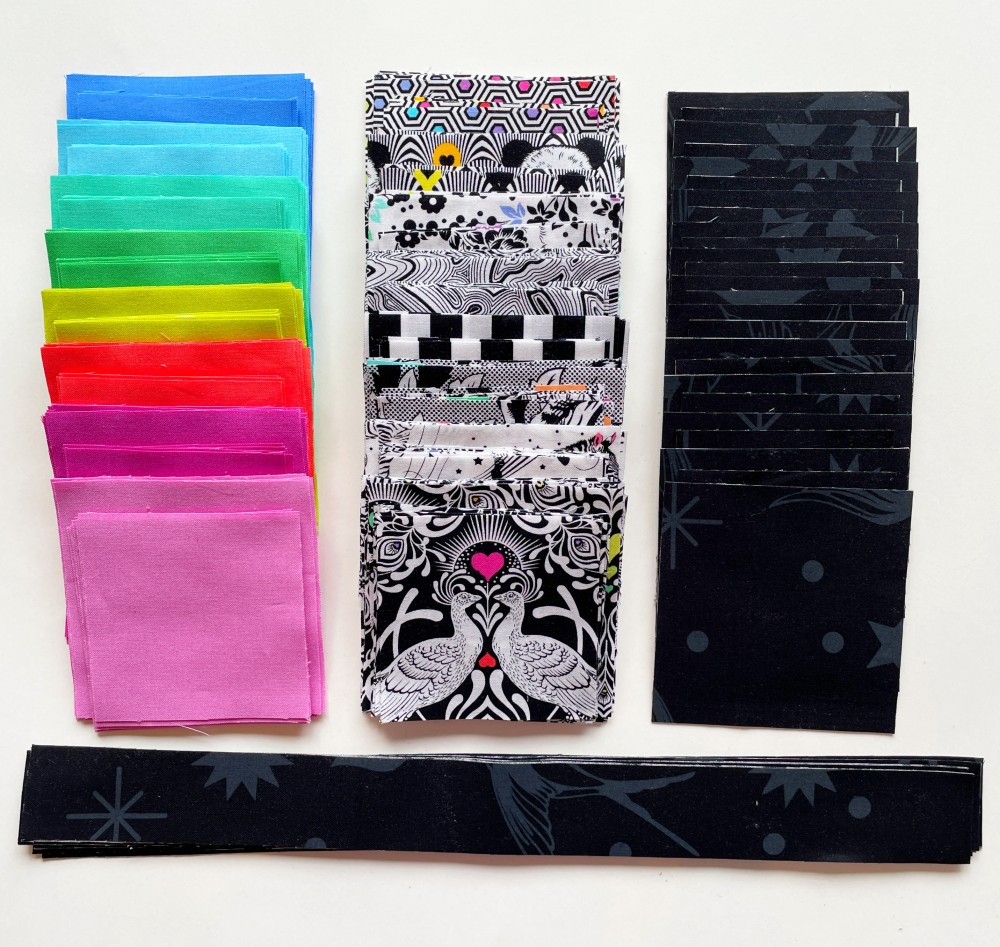
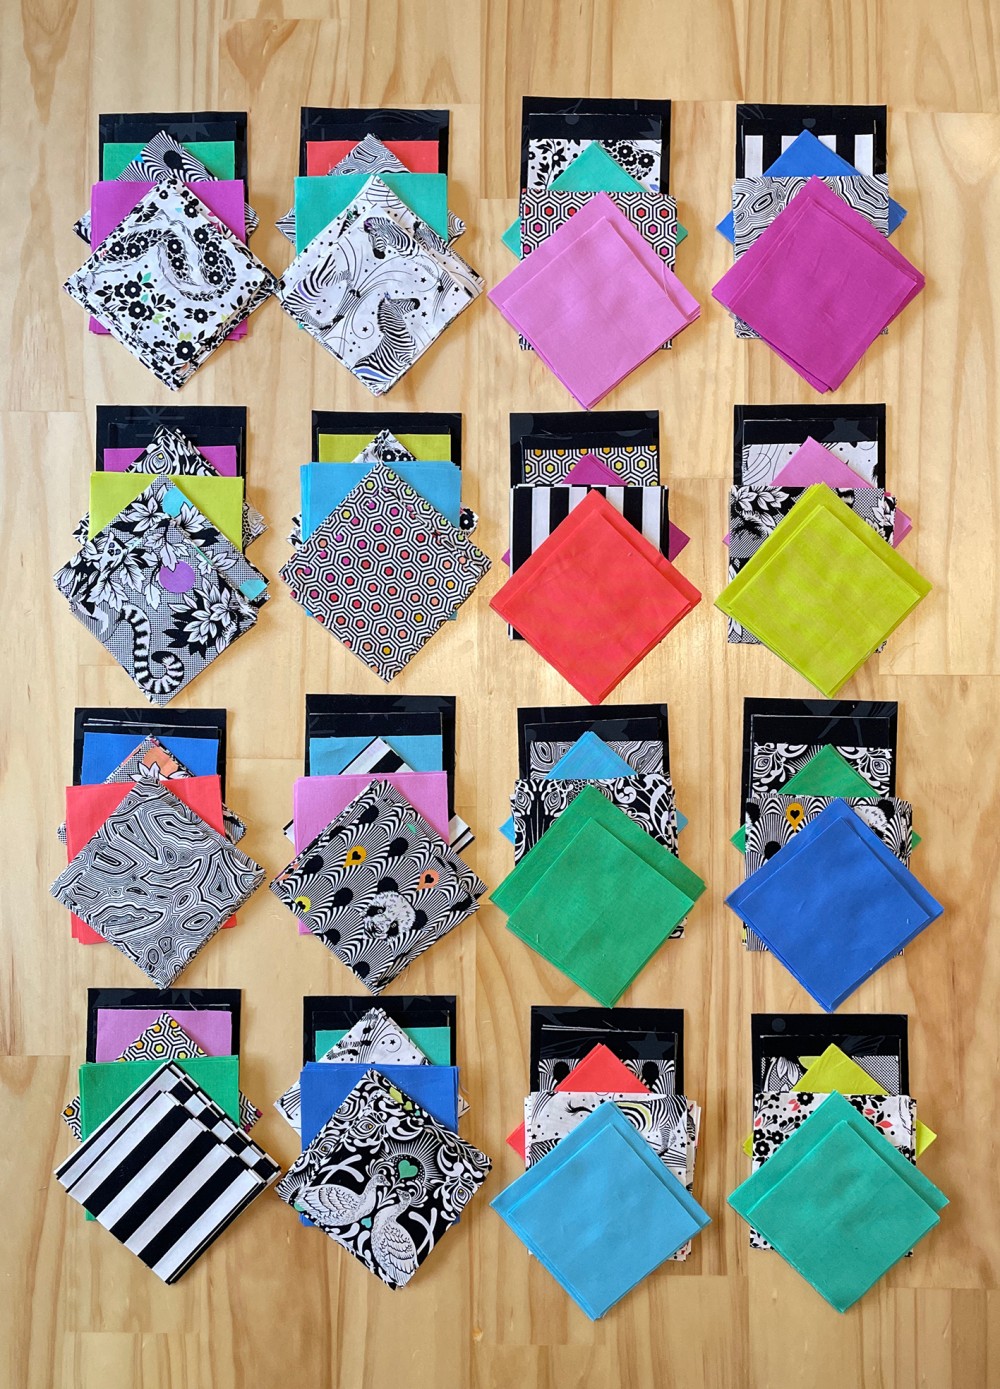
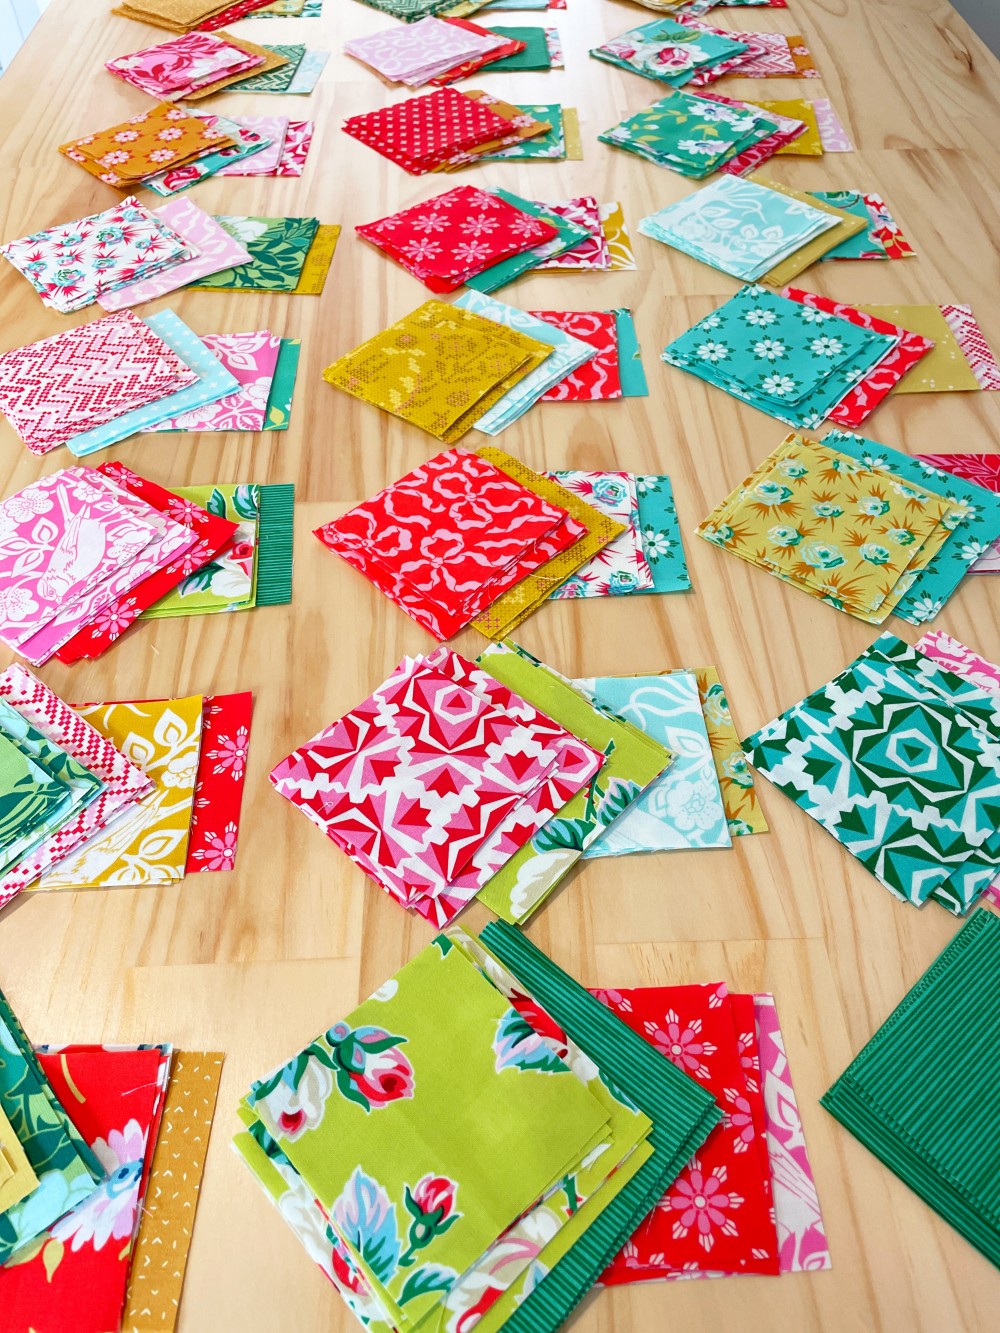
Once the cutting has been completed it's time to get organised. With my first quilt I sorted all the cut squares into blocks and decided on the layout once the blocks were pieced. With my second, I also planned the layout before any piecing was started. This ensured that I had an even balance of colours and prints throughout my quilt. The photo below shows all my fabrics sorted and ready to go.
HALF SQUARE TRIANGLES
Next up we need to make Half Square Triangles or HSTs. If you have your own way of making HSTs, go for it, just make sure you trim your blocks to 3.5".
If you participated in any of my sew alongs you will notice I have used the same step by step photos. I hope you don't mind, but running around after a toddler and organising a sew along can fill my days pretty quickly. This was a little shortcut that gave me heaps more time!! I usually like to make all my HSTs at the beginning of my quilt but with this one I did a block of a time. I found it much easier to keep track of which fabrics go with which block, however do whatever feels right for you.
PREPARATION
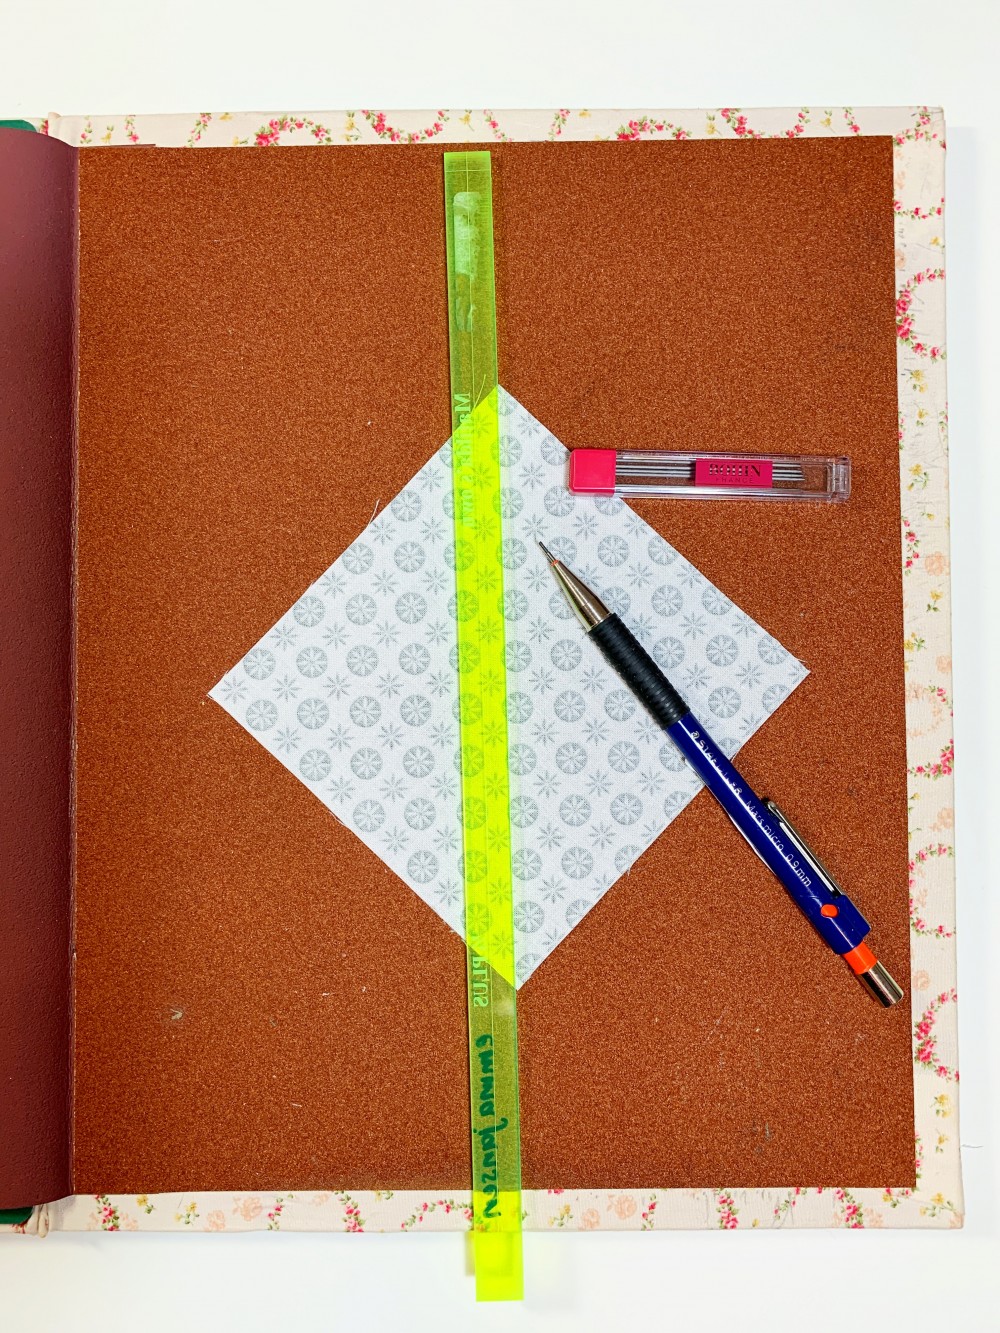
Once you’ve paired up your squares, the next thing you need to do is mark the back of half of your squares. I marked the back of my “C” fabric squares.
One of the best ways to get a straight line on the back of your fabric is to use a sandpaper board underneath. The sandpaper stops the fabric moving, which makes it so much easier to draw the line. How cool is that! I have a fancy sandpaper board but you can just use a sheet of sandpaper from your local hardware store.
I like to use a mechanical pencil with a chaco lead to mark my fabrics. The chaco lead marks the fabric easily and is erasable later on.
Take one of the fabric squares and mark a diagonal line on the wrong side of the fabric. Repeat for all your pairs!
SEWING TIME
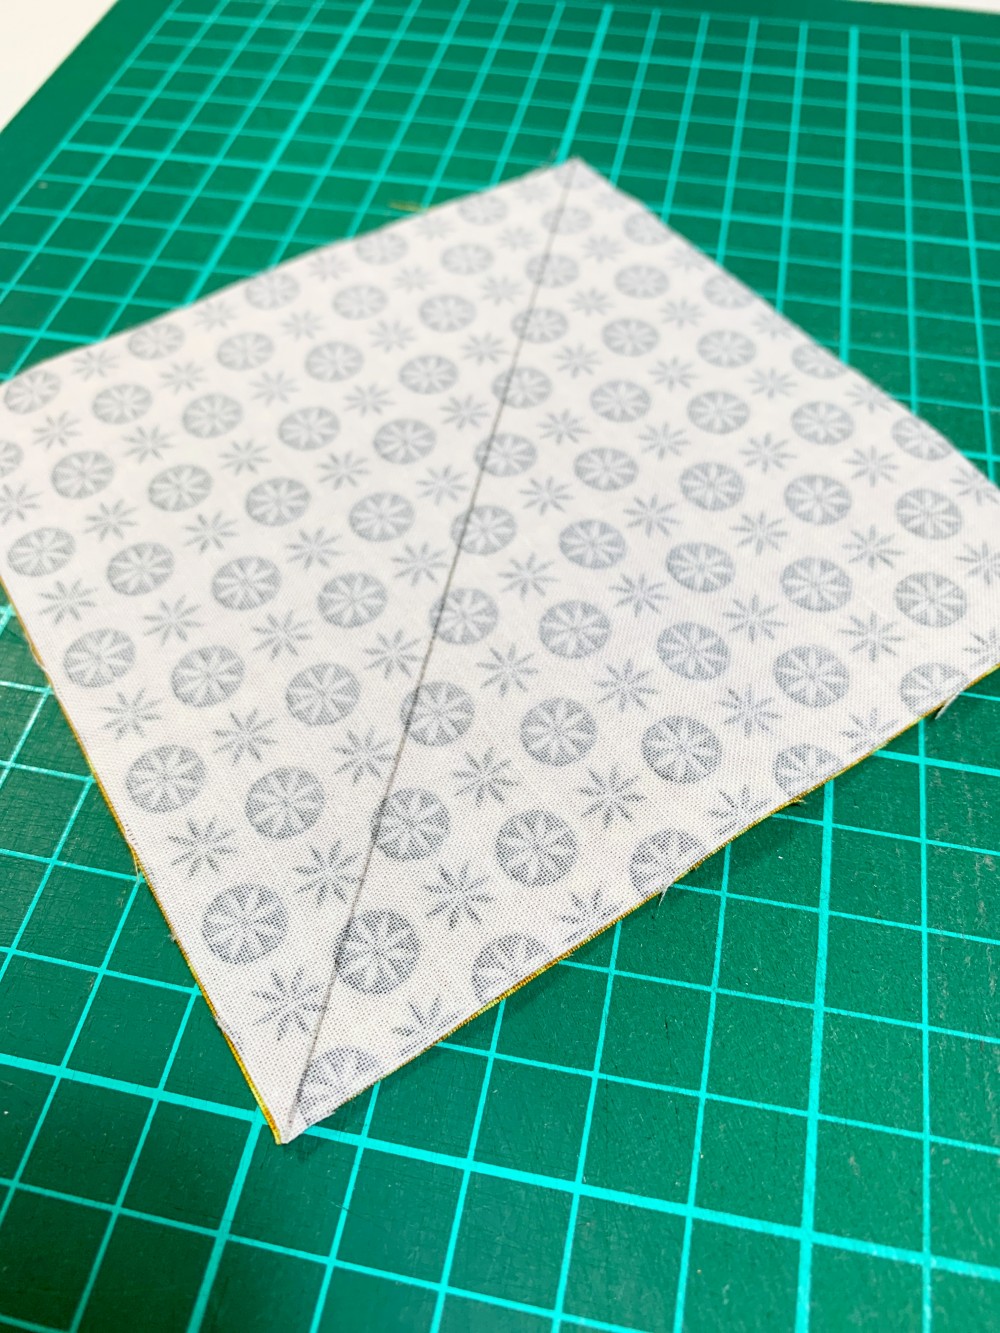
Take one pair of squares with the marked square on top.
Sew either side of the marked line with a ¼” seam.
Repeat for all the pairs.

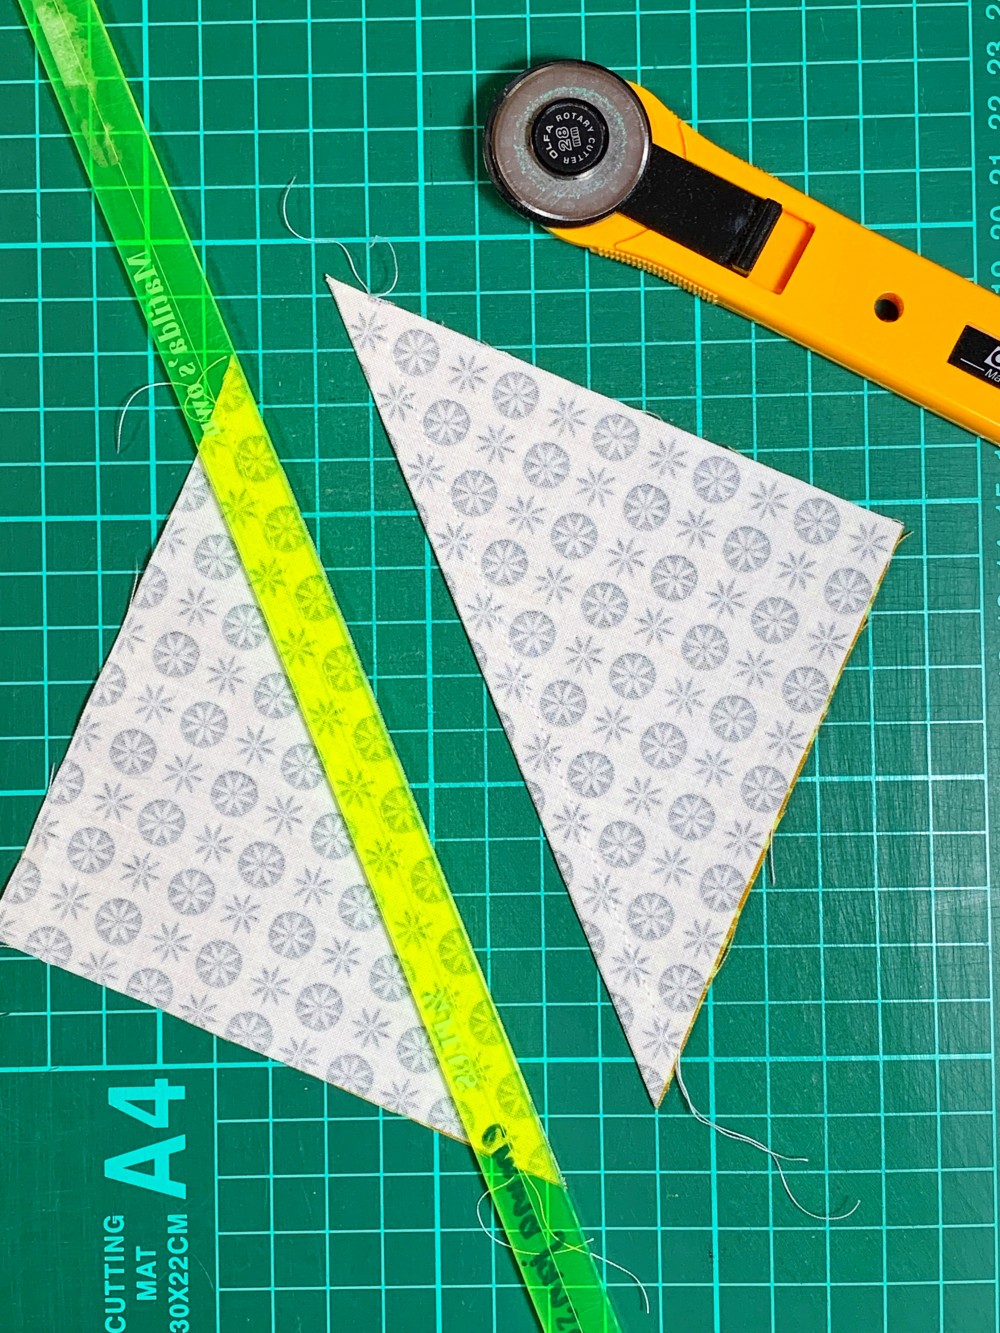
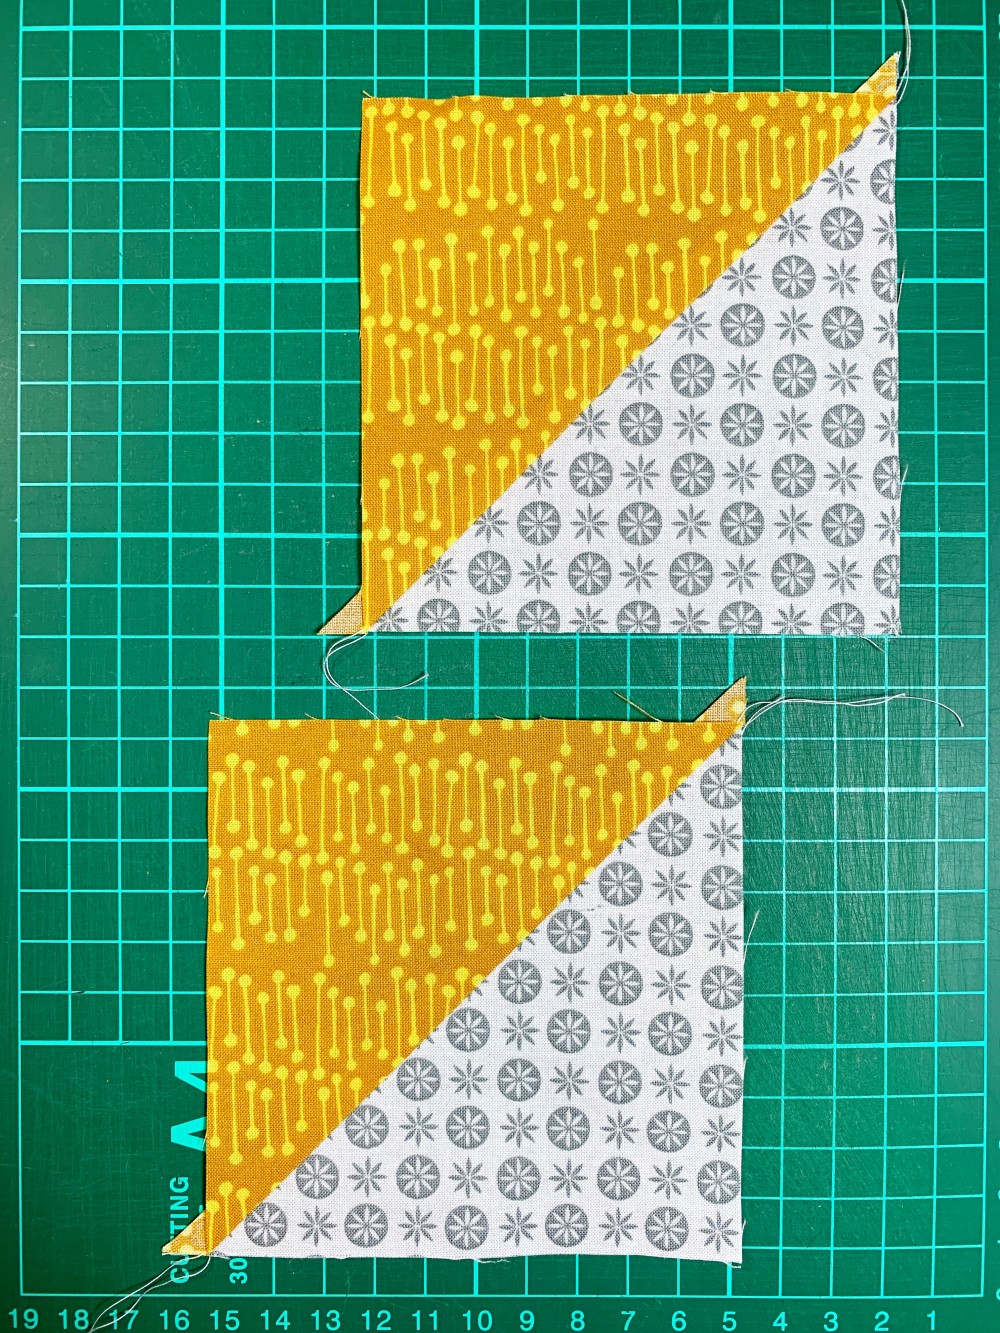
CUTTING TIME
Now take your rotary cutter, ruler and mat.
Cut down the centre of all the blocks on the drawn line from before.
Press the blocks. I like to press to the dark fabric, AKA the dark side!
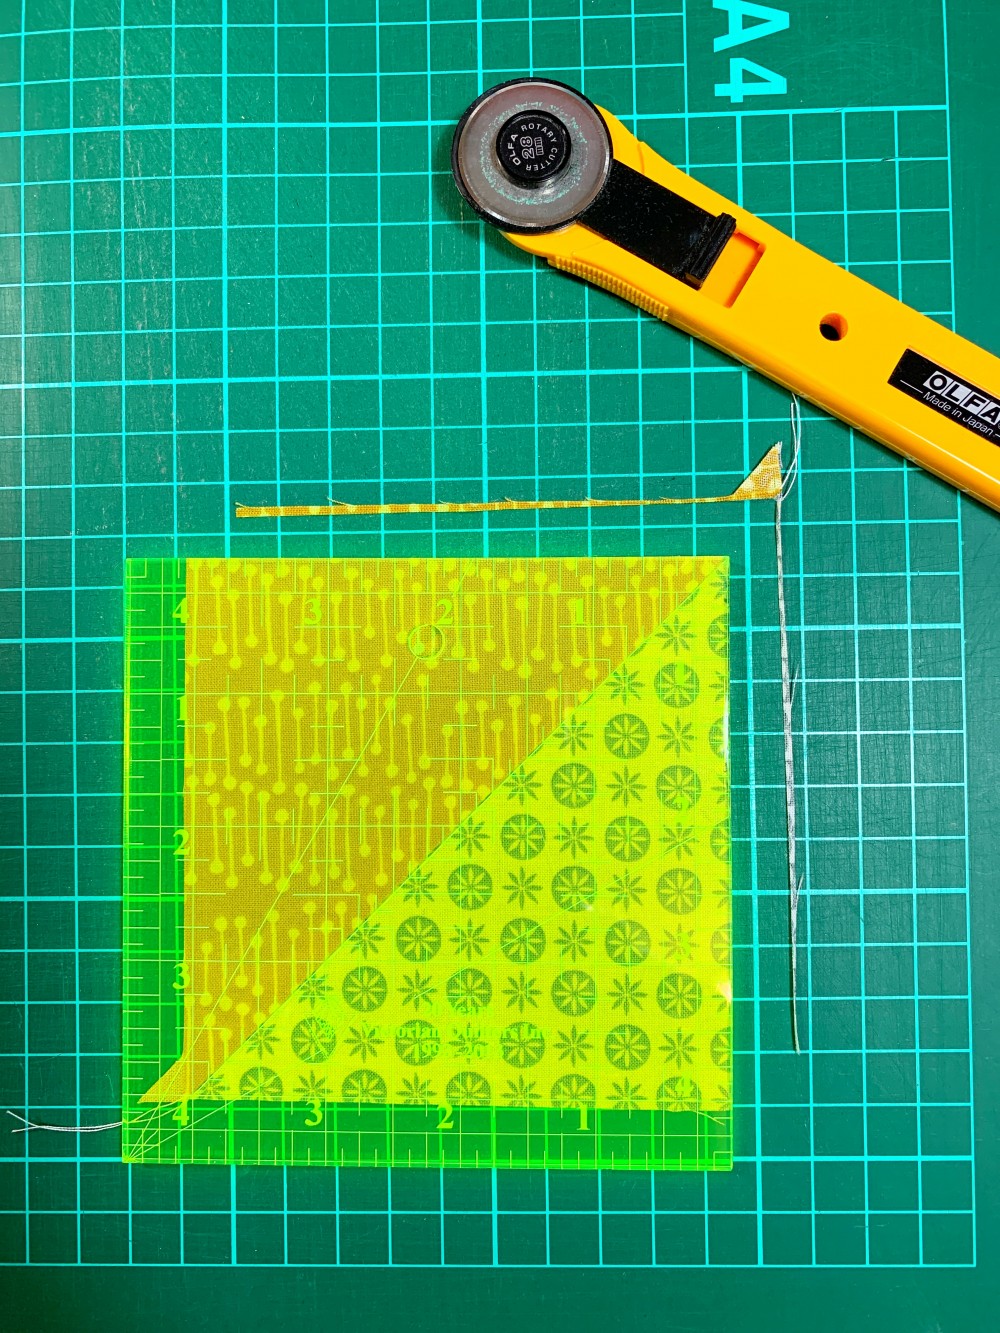
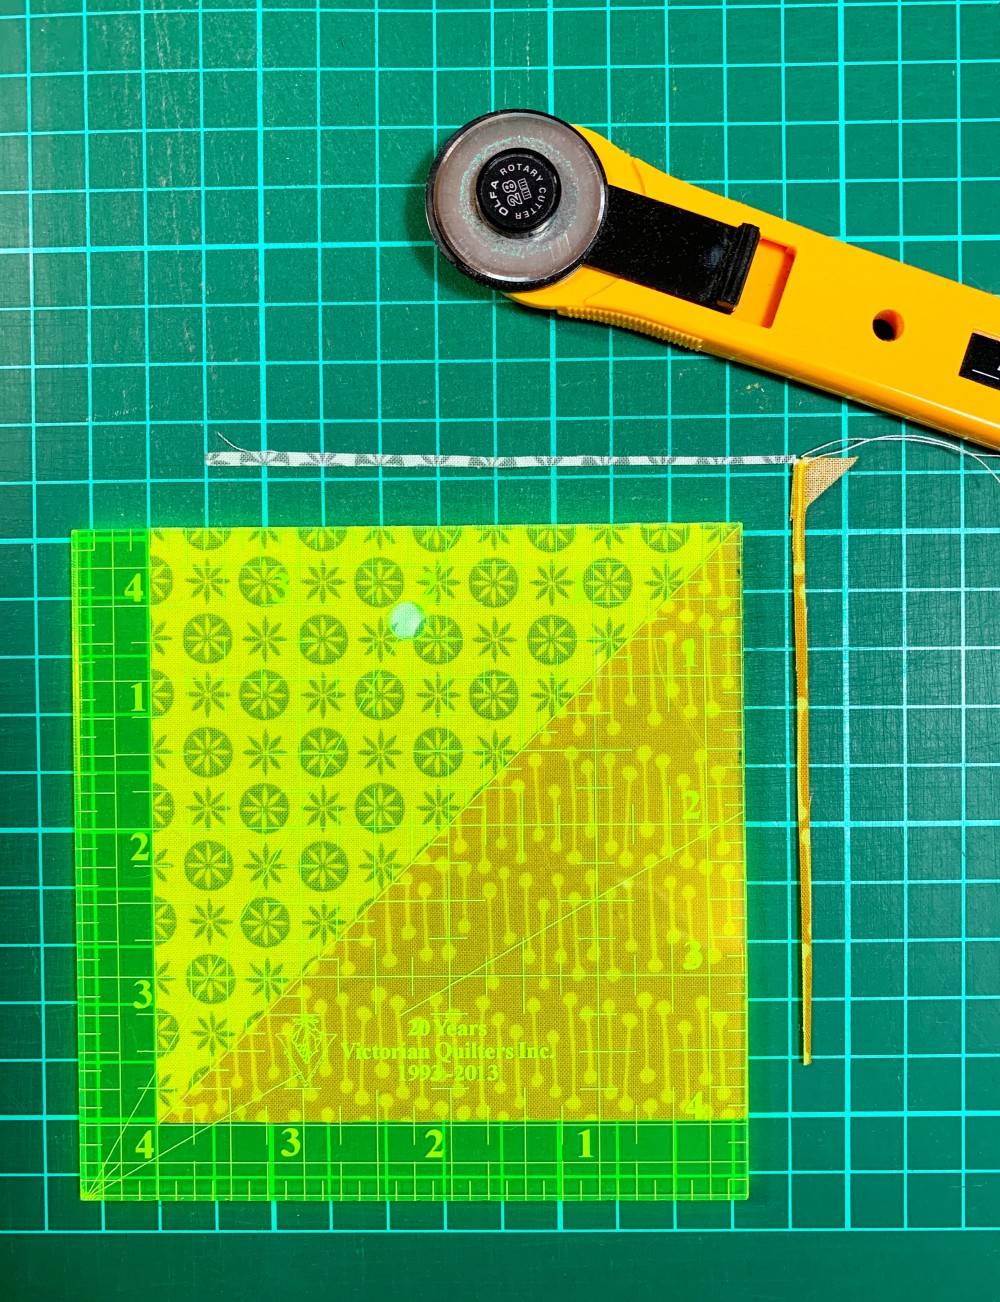
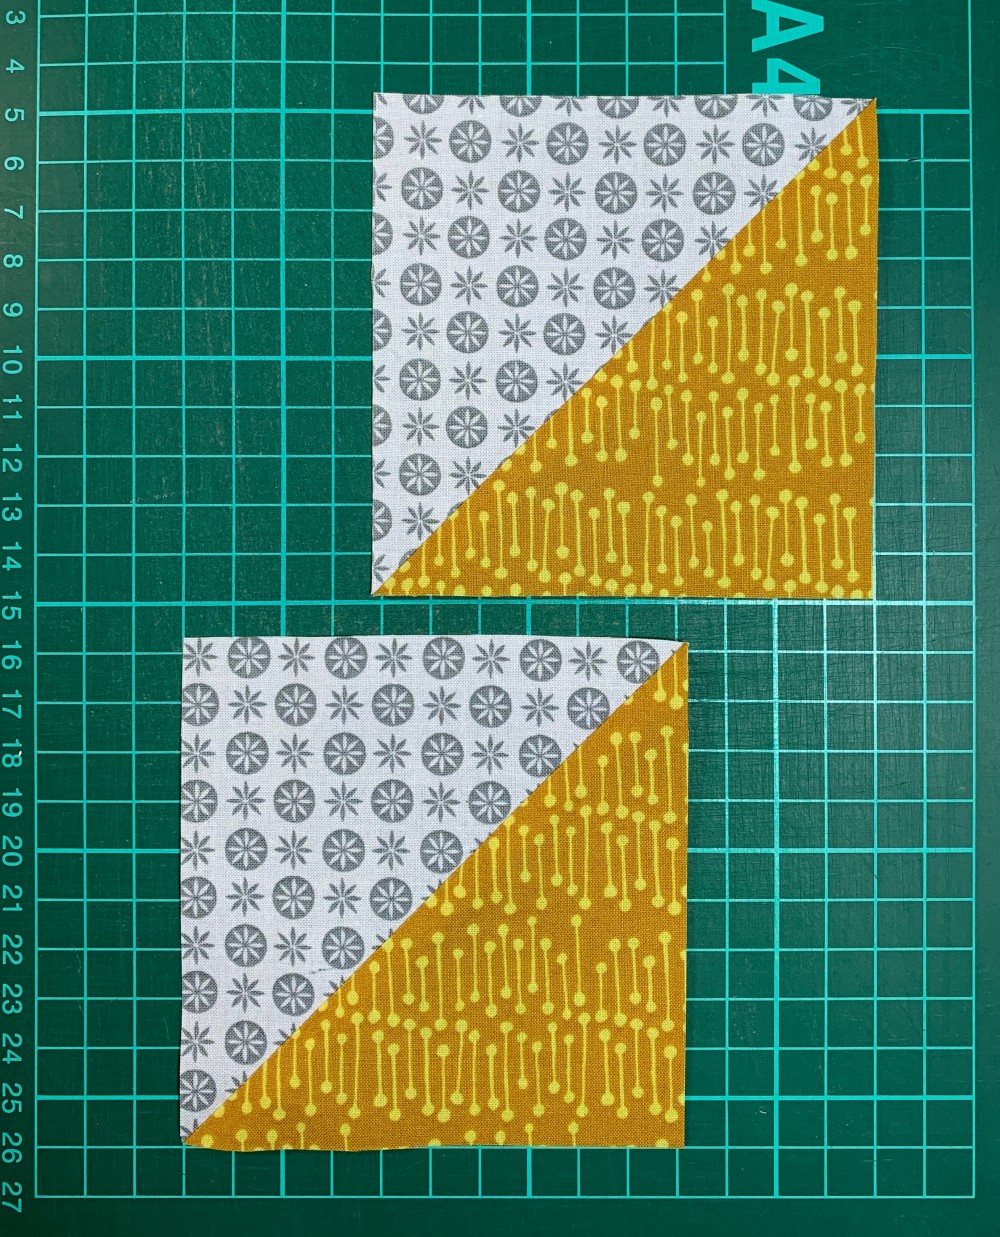
TRIMMING TIME
The blocks you have just made will be a little big, they also might be a little wonky. I suppose it will depend on how much quarantine wine you’ve been drinking! Don't worry, that's where the trimming comes in.
Using a square ruler (or a bloc loc ruler if you have one), line up the 45 degree line on your ruler with the seam through the middle of the block. Trim the block down to 3.5" square.
Check out the pics below for a visual on how to trim your HSTs.
• Please note these blocks were trimmed to 4" for another quilt, just remember yours need to by 3.5" trimmed.
LABEL YOUR BLOCKS
An extra tip for keeping organised to is to label your blocks if you decide on a layout before piecing. My technique was not very fancy, just a scrap of paper with the row and position noted and pinned to the top left coner of the block.
EG: 1A, 3D
If you don't have space to keep your blocks laid out you might want to look in other options for storing them. Stacked up paper plates work really well, just put all the pieces for each block on a seperate plate and then stack them. It's a great space saver and an excellent way to store your blocks before sewing.

PRIZES
Each week I will pick a winner from the posts using the hashtag #kissgoodnightquiltSAL to win a bundle of my patterns.
That's three PDF's patterns, your choice!
Next week we will be sewing blocks, yay! I've actually started sewing a scrappy version of this quilt and can't wait to show you more.
If you have any questions, you can always email me!
Once again thank you so much for joining me on this sew along. I hope you are enjoying the process and meeting some other sewers from around the world.
Emma x